Unraveling the World of Rattlesnakes!
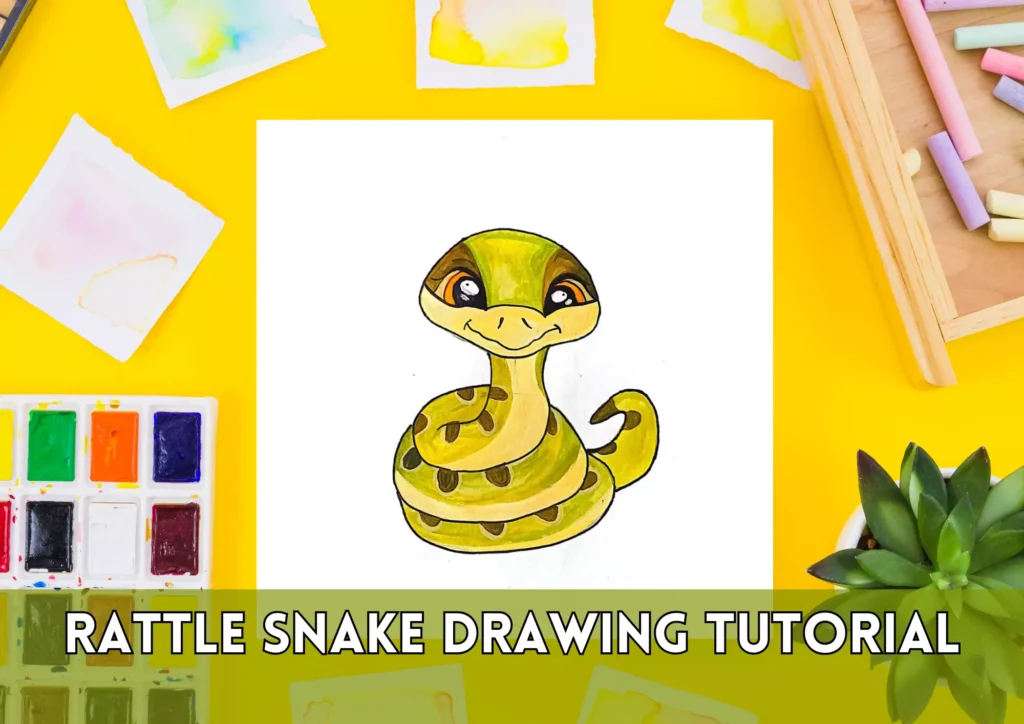
Embark on a creative journey with Mimi Panda as we explore the captivating world of rattlesnakes—a subject brimming with unique characteristics that make it an enthralling muse for artistic expression.
Table of Contents
Decoding Rattlesnake Identity
Rattlesnakes, distinguished by their venomous nature and the iconic rattling appendage at the tip of their tails, provide distinctive elements that will breathe life into your artistic portrayal.
Embracing the Venomous Beauty
Infuse your artwork with the hues of nature, capturing the mesmerizing color palette of rattlesnakes, dominated by earthy browns and dark tones. This not only adds visual allure but also conveys the awe-inspiring yet fearsome essence of these remarkable creatures.
Crafting with Image References
Crafting a lifelike rattlesnake begins with a curated collection of visual references, serving as your compass throughout the artistic process. Let’s delve into the significance of these references in elevating your creative endeavor.
Curating Rattlesnake References
Scour for high-quality images spotlighting the intricate patterns, tail structure, and color nuances specific to rattlesnakes. Organize these references meticulously, categorizing details such as head features, body motifs, and the distinctive rattle. This comprehensive visual guide will anchor your artistic vision.
Essence in Details
The allure of rattlesnakes lies in the meticulous details—the intricate patterns adorning their bodies and the unique structure of their rattles. Immerse yourself in these details, drawing inspiration from references to ensure an accurate representation that breathes life into your creation.
How To Draw a Rattlesnake: Step-by-Step Rattlesnake Artistry
Embark on a step-by-step tutorial designed to demystify the process of translating rattlesnake allure onto your canvas, ensuring an authentic and visually striking outcome.
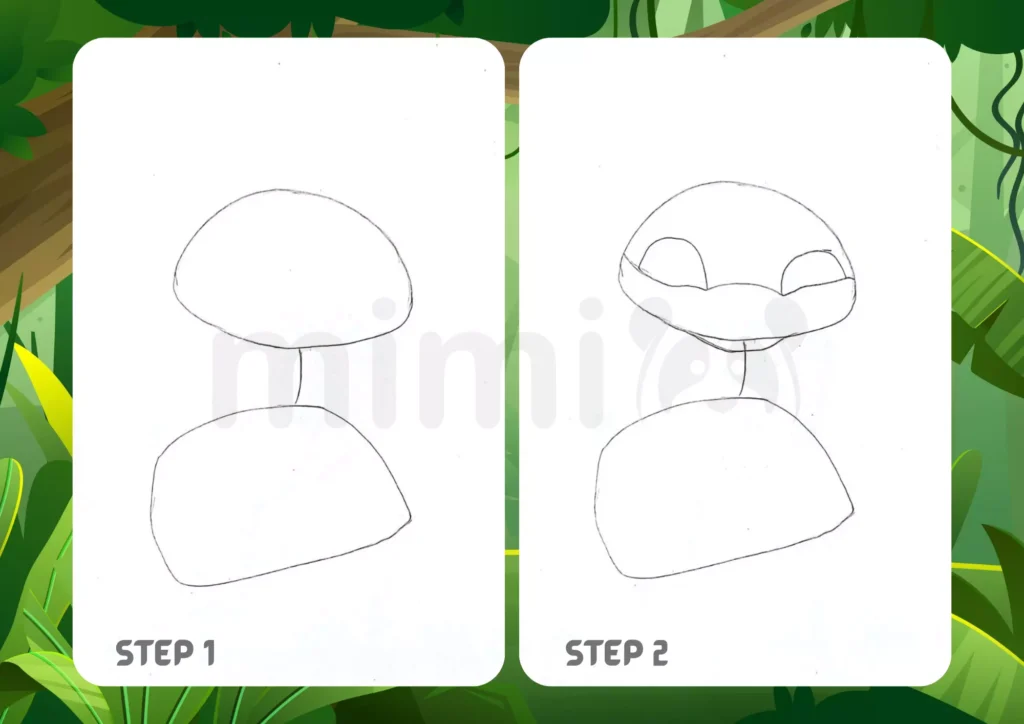
Step 1: Sketch a rattlesnake
Take a pencil and make a sketch of the future rattlesnake.
Step 2: Place the eyes and mouth
Place the rattlesnake’s eyes and mouth on the paper.
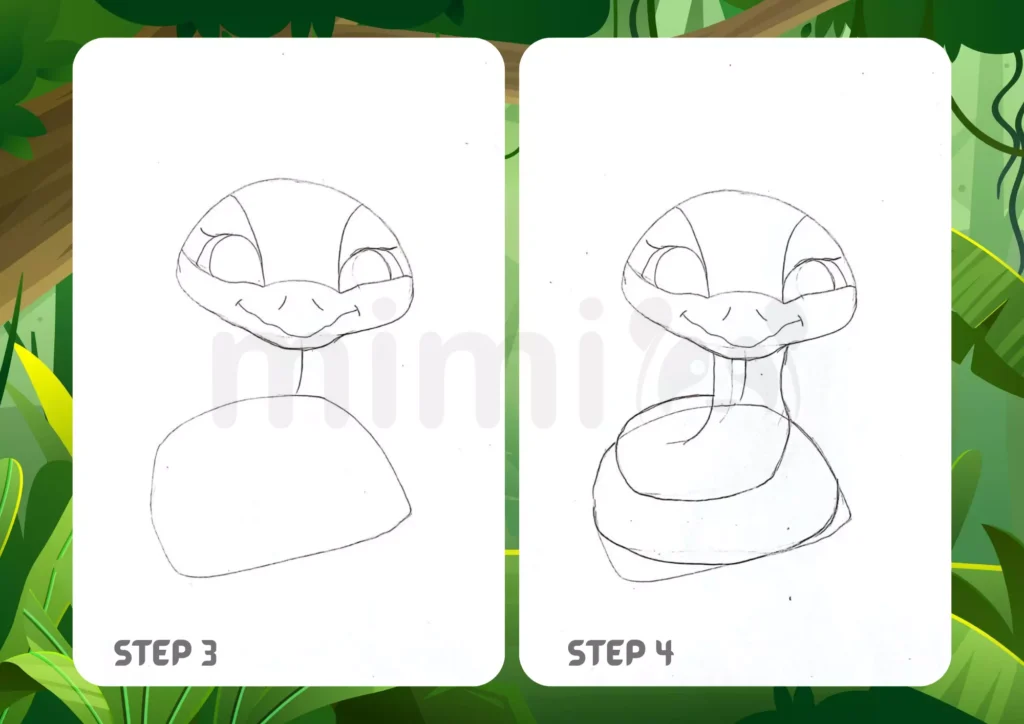
Step 3: Add a nose and a smile
Add details to the eyes, draw a nose and a smile for the rattlesnake.
Step 4: Draw snake rings
Now draw the snake rings as if the body were a spiral.
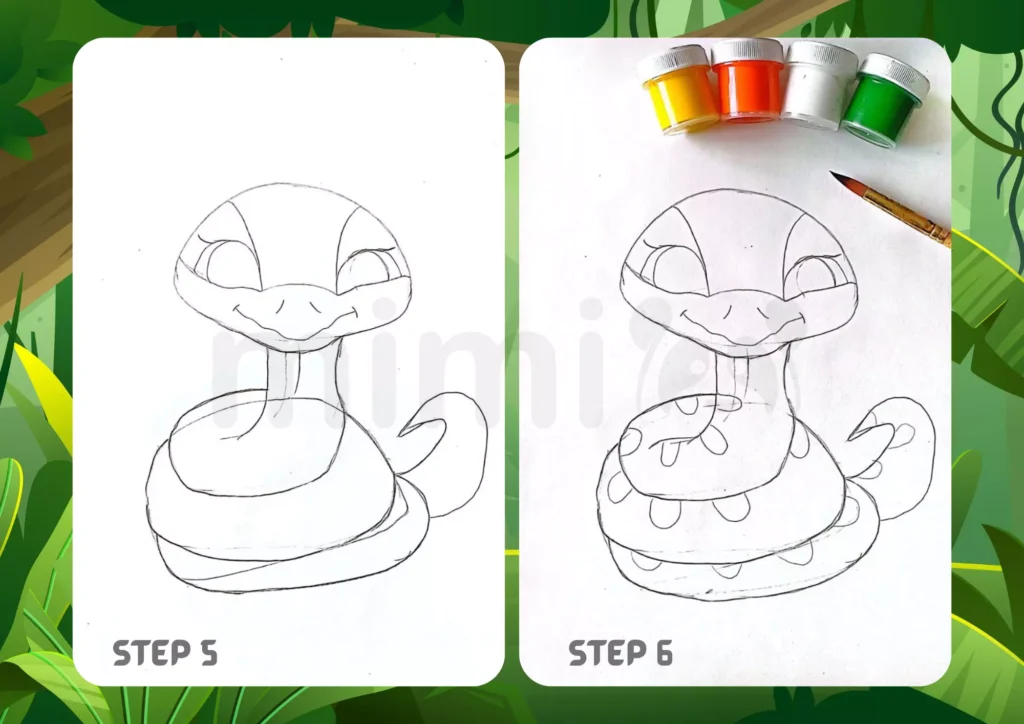
Step 5: Draw the tail
Next, draw the bottom ring and the tail that sticks out behind the rattlesnake.
Step 6: Add a pattern
The last step before coloring is to add the pattern to the future rattlesnake.
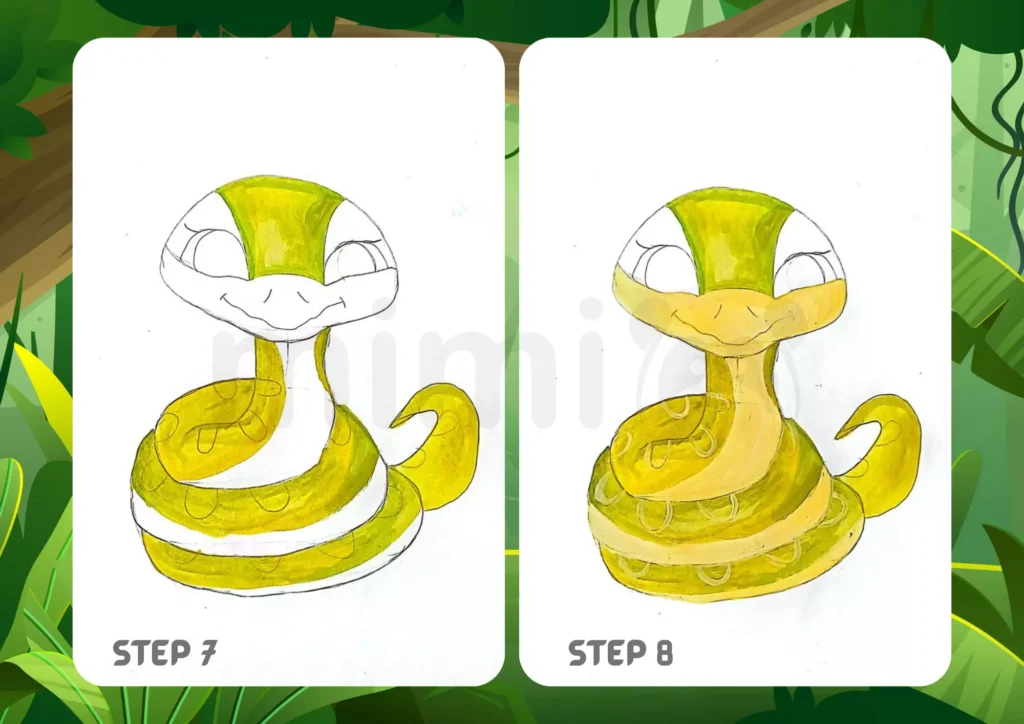
Step 7: Paint with green color
Now let’s move on to coloring. Take green paint, a brush and water and start painting the snake’s body only the upper part where there is a pattern. And also in the middle of the head – from the top and through the nose to the bottom.
Step 8: Color in yellow
Now use the yellow color and draw the mouth area. And also the bottom of the snake’s rings.
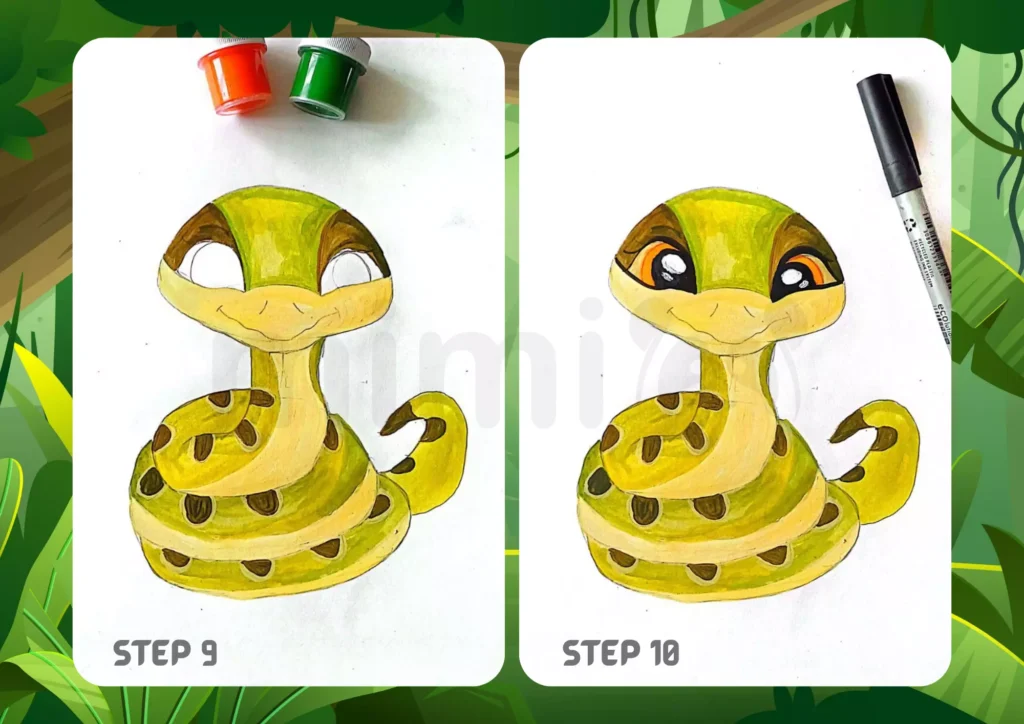
Step 9: Color it brown
Now take the brown color, or you can mix red and green, and paint the areas around the eyes, as well as the pattern on the rattlesnake’s body.
Step 10: Color the eyes of a rattlesnake
Next, color the eyes using red or orange. Also, take a black marker and draw the pupil of the eye, and add a white highlight. Then use a black marker to draw the eyelashes.
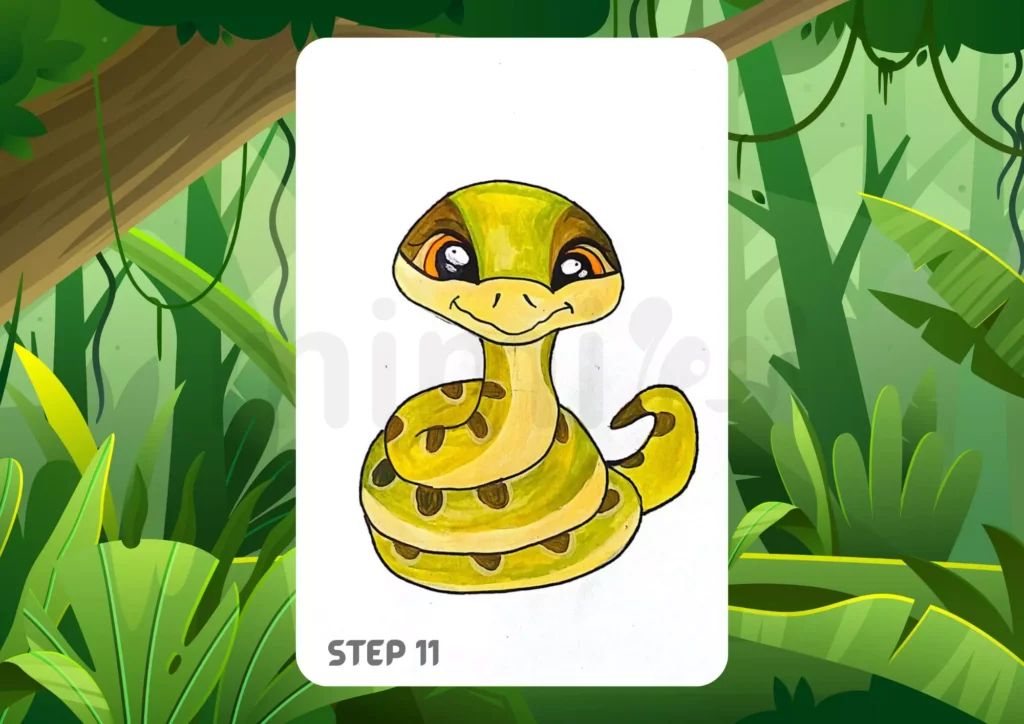
Step 11: Trace the outline with a black marker
The last step is to trace the outline and draw the mouth and nose.
Wrapping Up the Rattlesnake Artistry
Drawing a rattlesnake transcends a mere visual exercise; it’s an opportunity to harmonize creativity with detail. By understanding the nuances of this animal, leveraging image references, and following our step-by-step guide, you’ll unveil a strikingly authentic representation. Embrace the challenge, revel in the creative process, and watch your rattlesnake come alive on the canvas.
