Embarking on the artistic endeavor to draw a leopard invites you into the intricate world of wildlife illustration, presenting the chance to capture the sleek and spotted essence of one of nature’s most elusive predators. Leopards, with their elegant silhouettes and distinctive coat patterns, provide a captivating challenge for artists aiming to translate their grace onto paper. This guide will offer a step-by-step methodology for creating a leopard drawing, seamlessly integrating key terms to enrich your drawing journey and ensure your artwork reflects the majestic beauty of the leopard.
Table of Contents
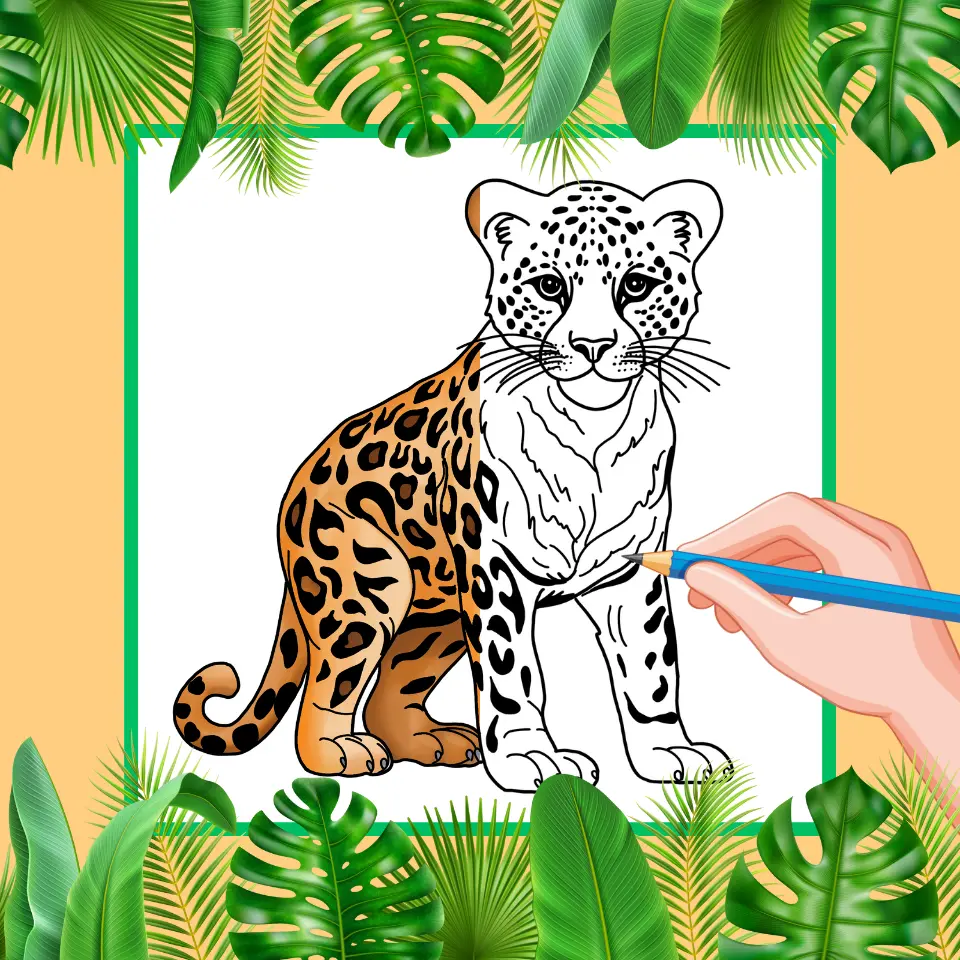
Understanding the Leopard
Before initiating your drawing, acquainting yourself with the leopard’s key characteristics is beneficial. Renowned for their lithe bodies, powerful limbs, and rosette-covered fur, leopards embody the perfect blend of strength and beauty. Observing images or studying videos can lend crucial insights into their posture, muscular build, and the unique pattern of their fur.
Step-by-Step Guide to Drawing a Leopard
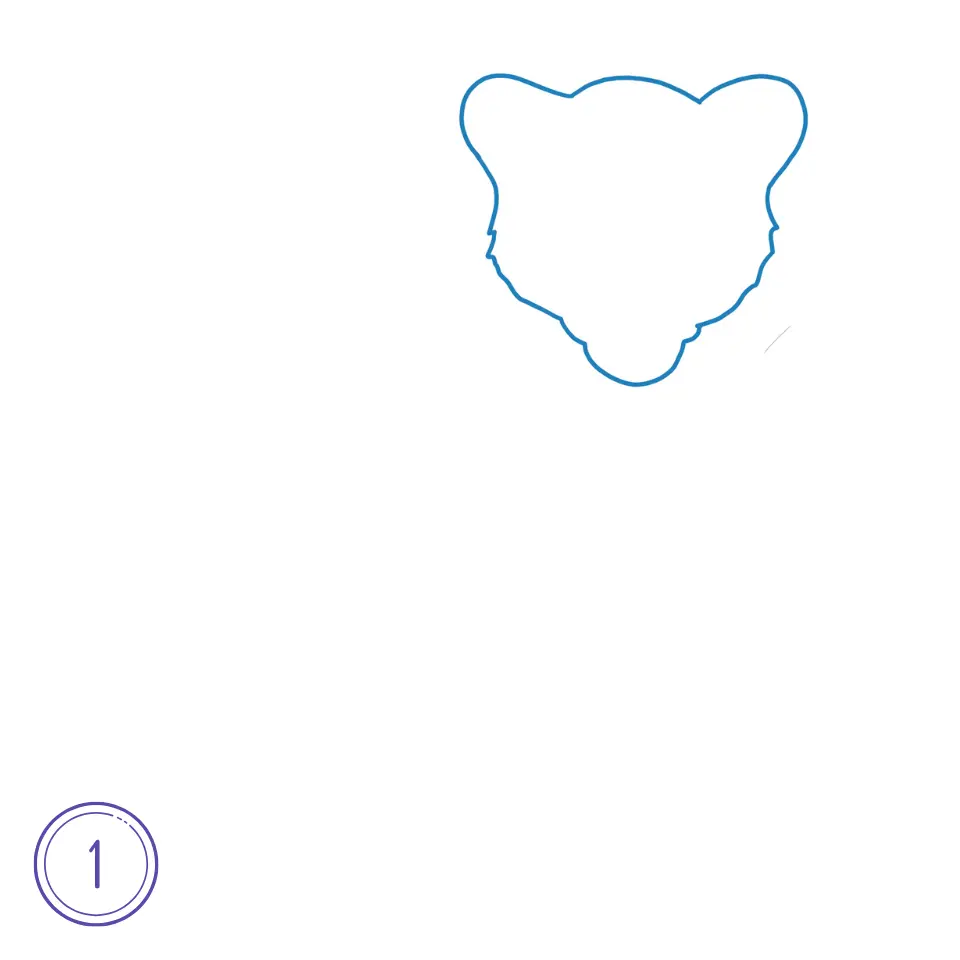
Step 1-2: Sketch the Basic Outline
Start with Simple Shapes: Draw a large oval for the body and a smaller circle for the head to form the basic outline. This initial step helps in capturing the leopard’s robust yet graceful frame.
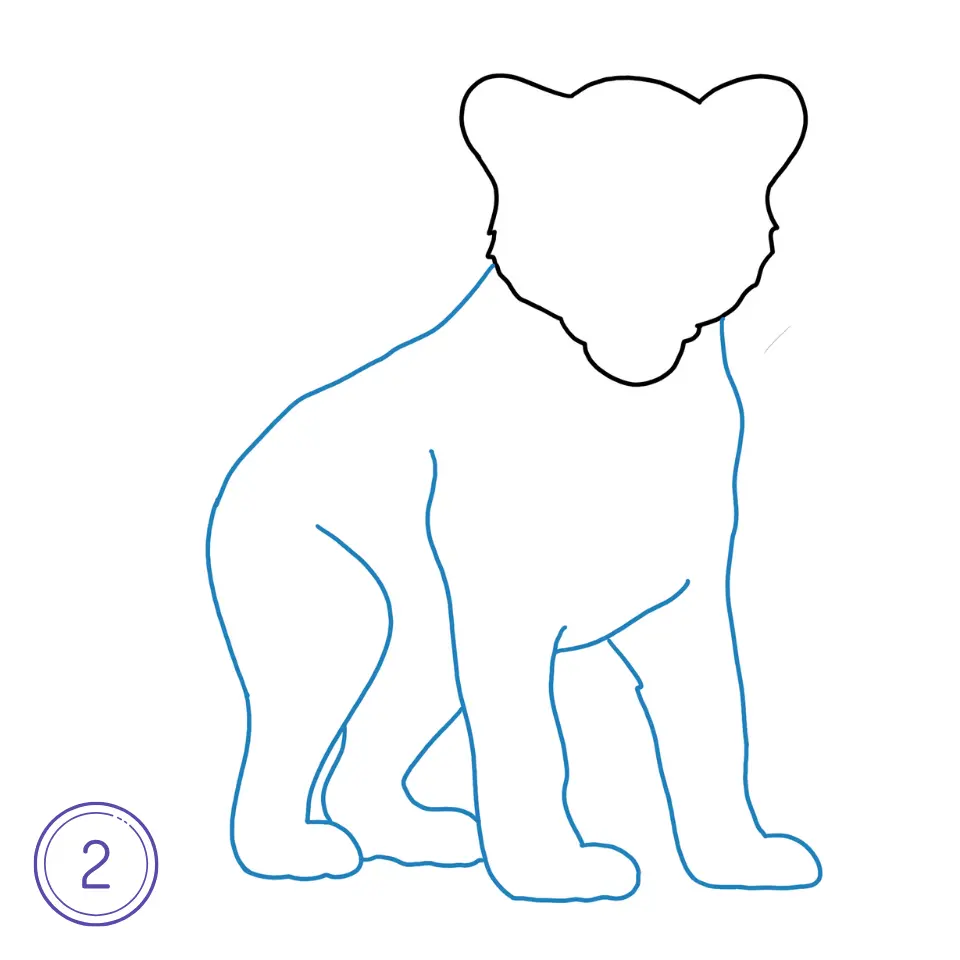
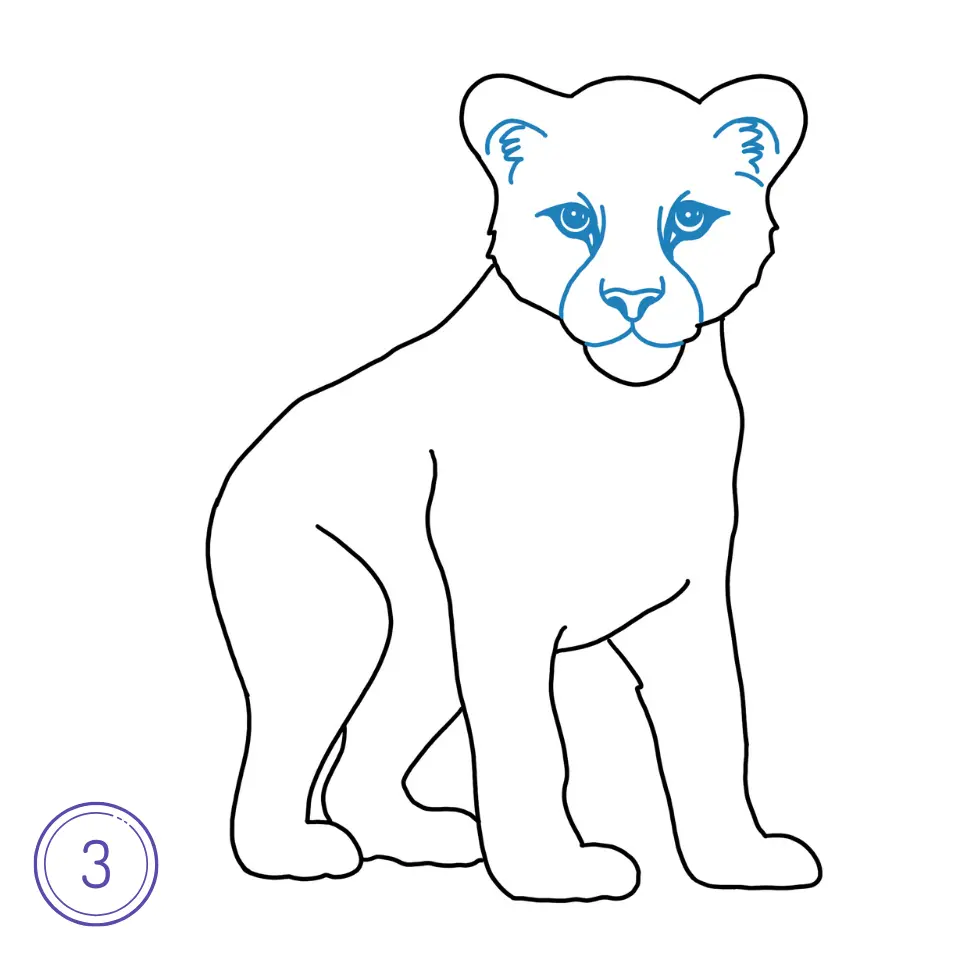
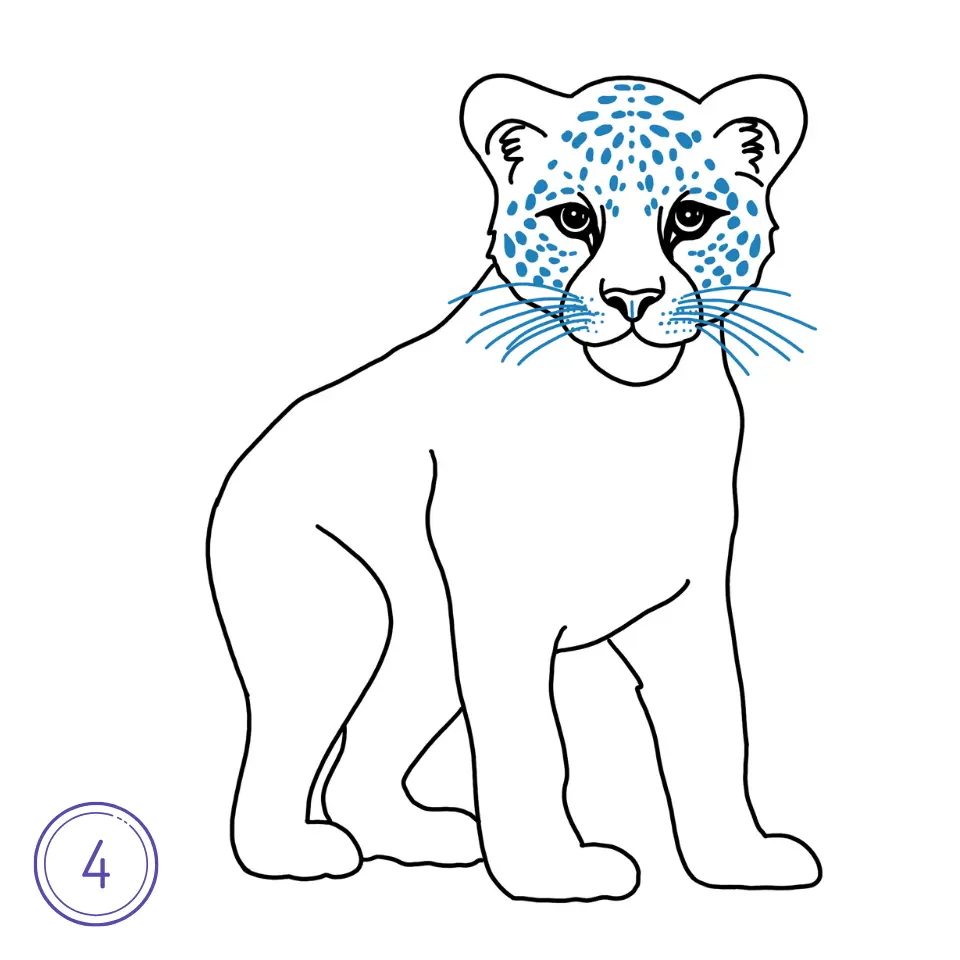
Step 3-4: Add the Head Details
Shape the Face and Eyes: Begin to sketch the leopard’s face by focusing on the eyes, nose, and mouth. Leopards have penetrating eyes and a distinct facial structure. Add almond-shaped eyes, a small nose, and a curved mouth to bring the face to life.
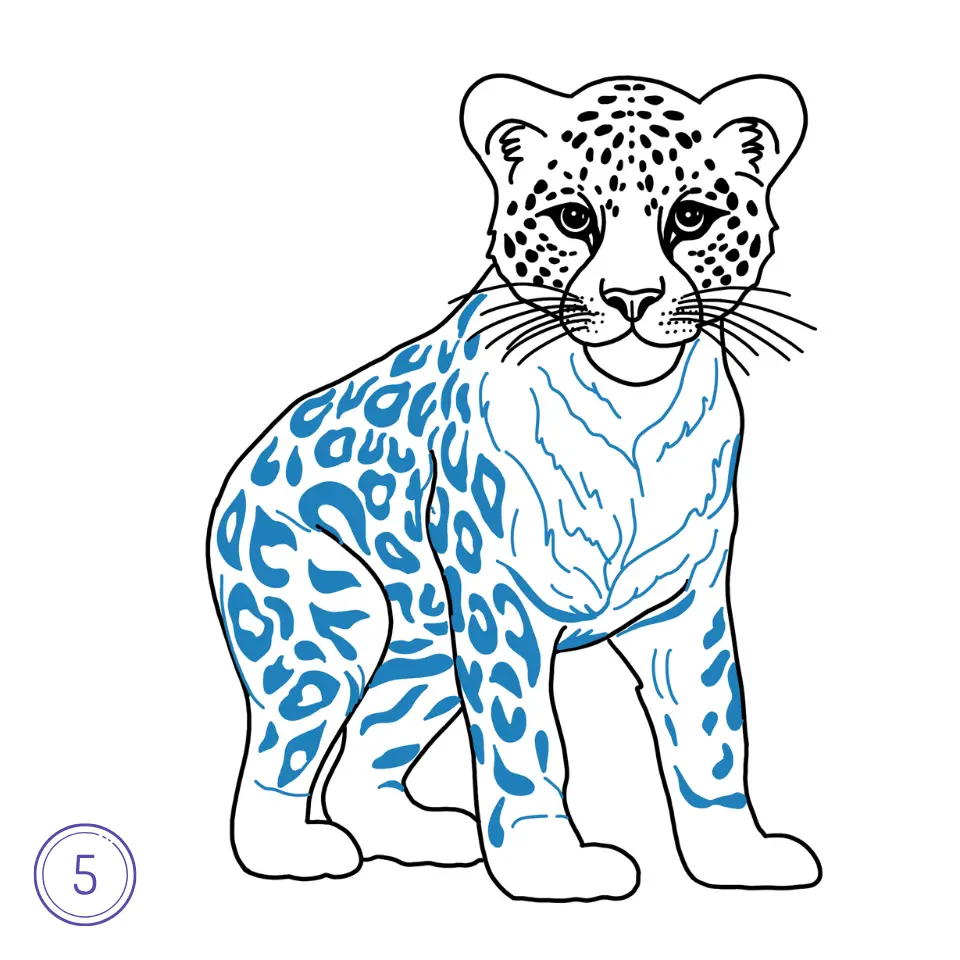
Step 5-6: Detail the Body and Limbs
Illustrate the Limbs: Given their strength, leopards have muscular legs. Add four limbs to the body, using oval shapes for the thighs and slender shapes for the lower legs and paws, ensuring they’re proportionate to support its weight.
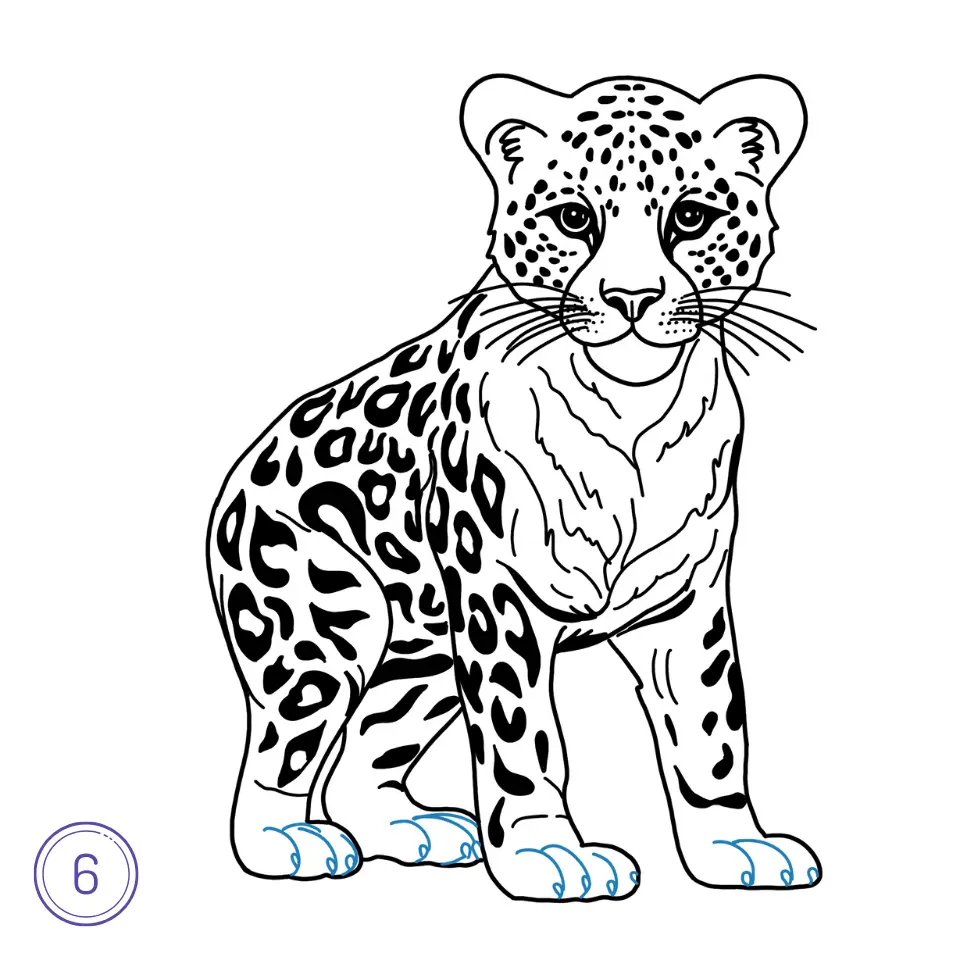
Step 7: Refine the Drawing
Add Texture and Spots: Over your initial sketch, refine the leopard’s outline, incorporating the curves of its body. Begin adding the leopard’s iconic rosettes, ensuring they vary in size and spacing to mimic a natural pattern. Don’t forget the tail, long and slender, adding balance to its form.
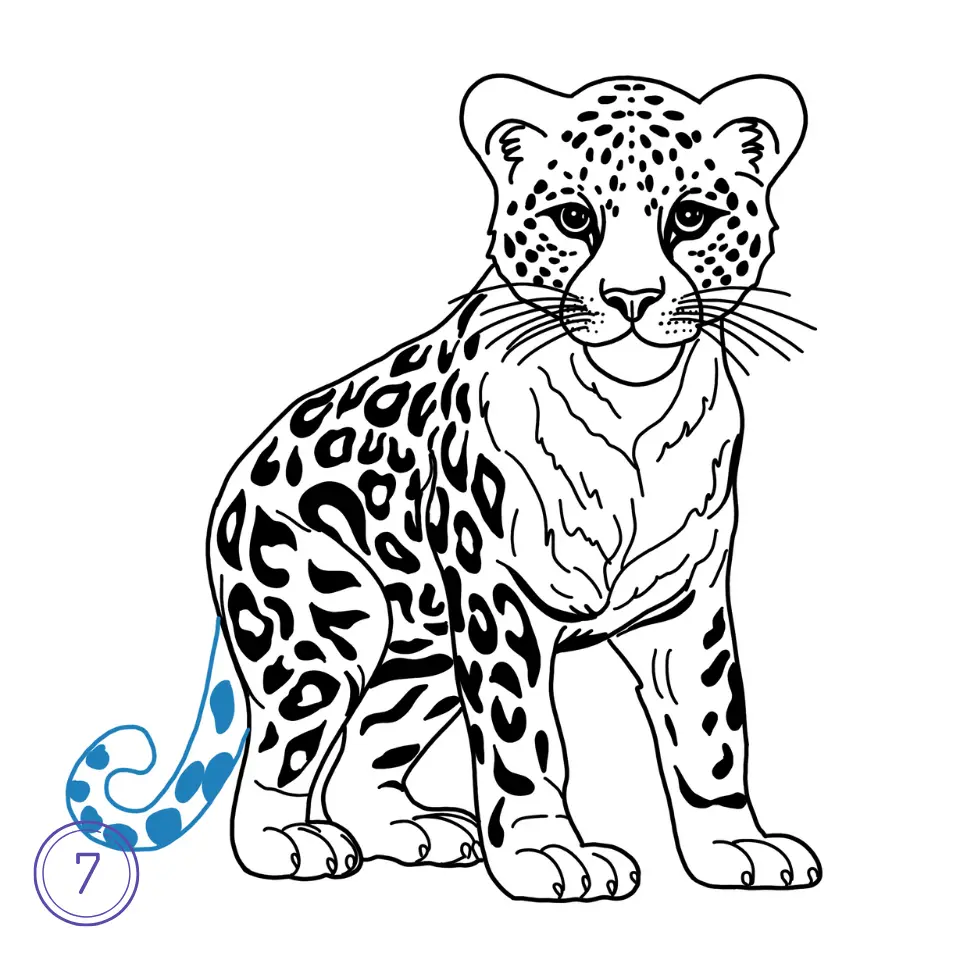
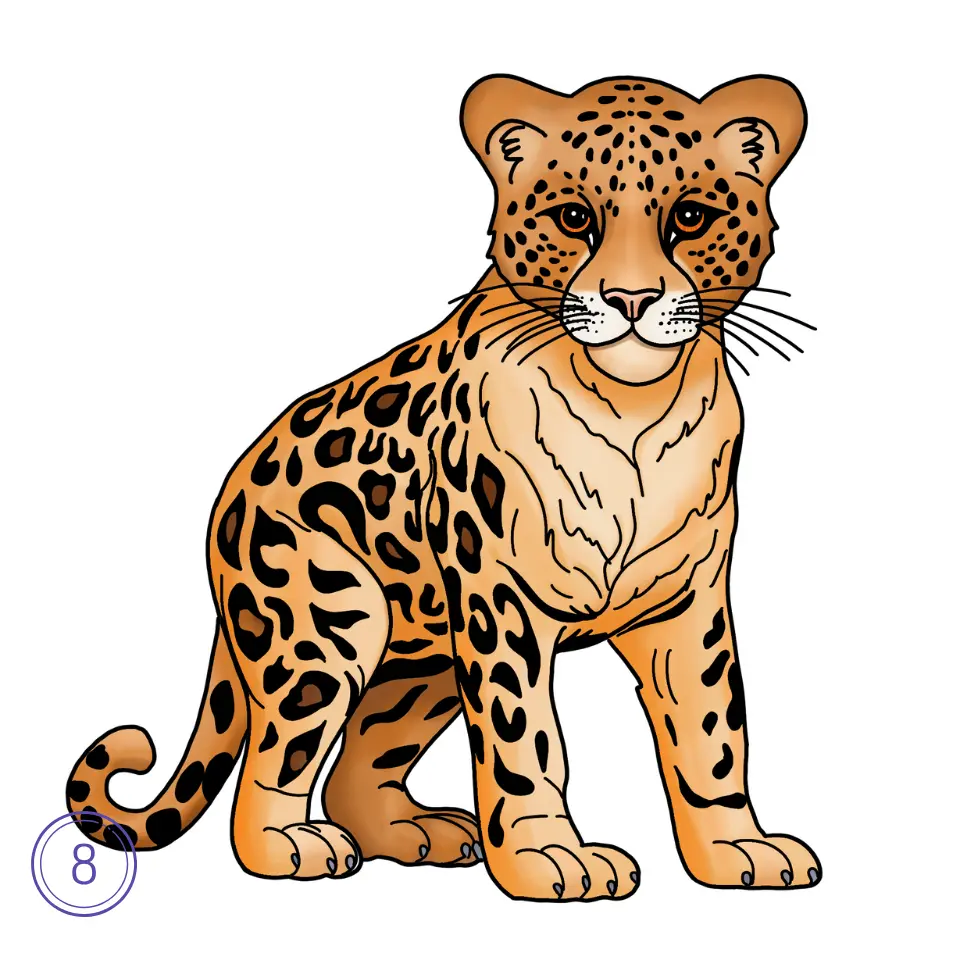
Step 8: Final Touches
Shading and Coloring: Apply shading to imbue your leopard drawing with depth and dimension, particularly under the belly, around the limbs, and beneath the tail. While leopards are predominantly golden-yellow with dark spots, feel free to experiment with shading techniques to highlight the texture of its fur and the distinctiveness of its markings.
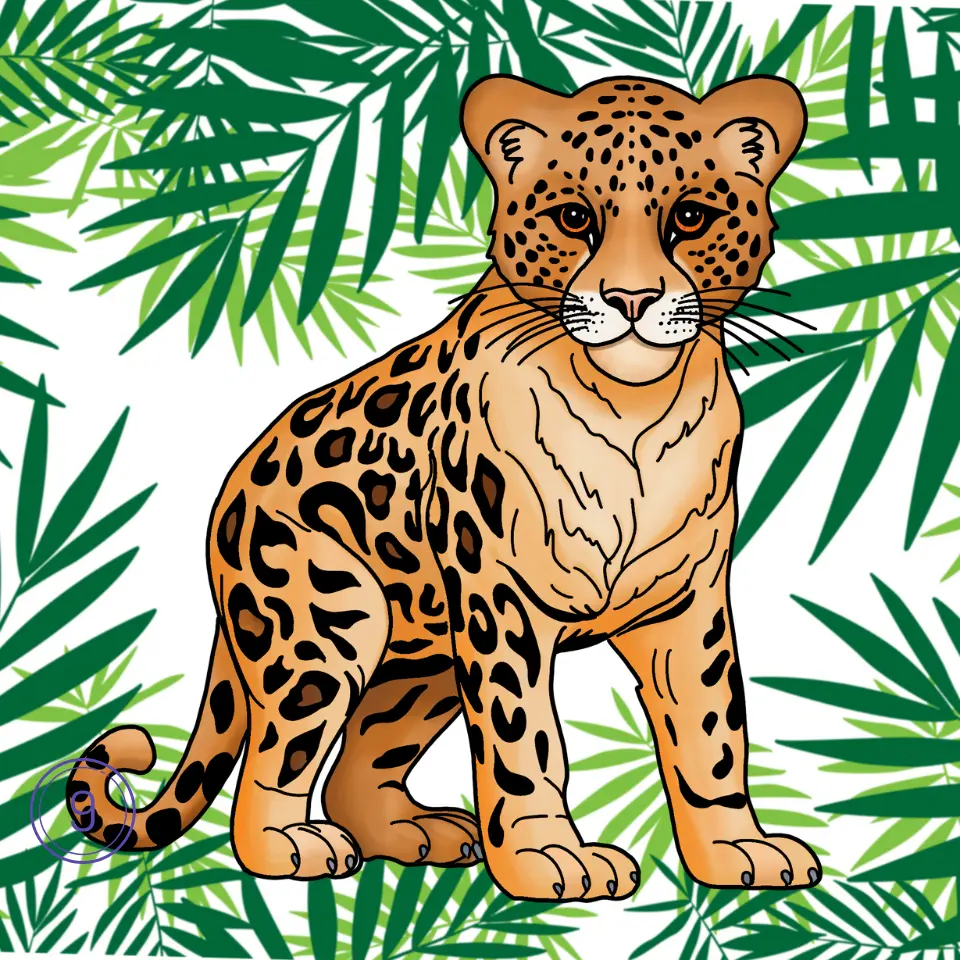
Step 9: Add background
Add a background to situate your leopard in its natural habitat, like a dense jungle or a rocky savanna. Include elements such as trees with hanging vines, bushes, or distant mountains to create depth and context. Keep the background balanced and not overly detailed, so the leopard remains the centerpiece of your drawing.
Tips for a Successful Leopard Drawing
- Use References: Employing a reference image is invaluable for accurately capturing the leopard’s proportions, spots, and overall essence.
- Practice Varied Poses: Engage in drawing leopards in different poses to grasp their flexibility and movement fully, from resting to leaping.
- Experiment with Mediums: Explore various drawing mediums, from graphite pencils to digital tablets, to find the best method to express the leopard’s dynamic form and textured coat.
Conclusion about How to Draw a Leopard
Drawing a leopard offers a profound opportunity to delve into the subtleties of animal anatomy and the artistry of replicating fur patterns and body structures. By adhering to these steps and keeping the provided tips in mind, you can create striking leopard drawings that convey your skill and admiration for this magnificent animal. Whether you’re pursuing this project for personal satisfaction, educational purposes, or portfolio development, remember that practice, detailed observation, and creativity are crucial to mastering how to draw a leopard.
