Table of Contents
Embracing the Warmth of Autumn with Pumpkin Drawing
As the leaves turn fiery shades of red and orange, and a gentle chill fills the air, autumn unveils its rich tapestry of warm colors. Nature seems to understand our need for coziness, generously adorning the world with its fiery hues. One such embodiment of autumn’s warmth is the humble pumpkin. With its vibrant shades, it has the power to warm hearts and capture the essence of this beautiful season. Not only is it an iconic symbol of autumn, but it’s also an indispensable part of the Halloween spirit.
Two Ways to Draw a Pumpkin: Halloween Fun or Realistic Beauty
At Mimi Panda, we understand that artistry comes in many forms. Our pumpkin drawing tutorial offers two distinct options to cater to all artists, from beginners to seasoned professionals. The first option is a fun and easy pumpkin drawing, perfect for beginners or children. Especially if you’re in the mood for some Halloween-themed creativity. The second option presents a more realistic and detailed approach. Ideal for experienced artists or adults looking to capture the true beauty of this autumn icon.
Step-by-Step Instructions for Pumpkin Drawing
At Mimi Panda, we’re dedicated to making the art of pumpkin drawing accessible to all. Our step-by-step instructions will guide you through the creative process. They are ensuring that you can create a beautiful pumkin drawing, regardless of your experience level. Whether you’re aiming for a cute and festive pumpkin or a realistic masterpiece, our tutorial provides clear and detailed guidance every step of the way.
Pumpkin Drawing for Halloween Fun
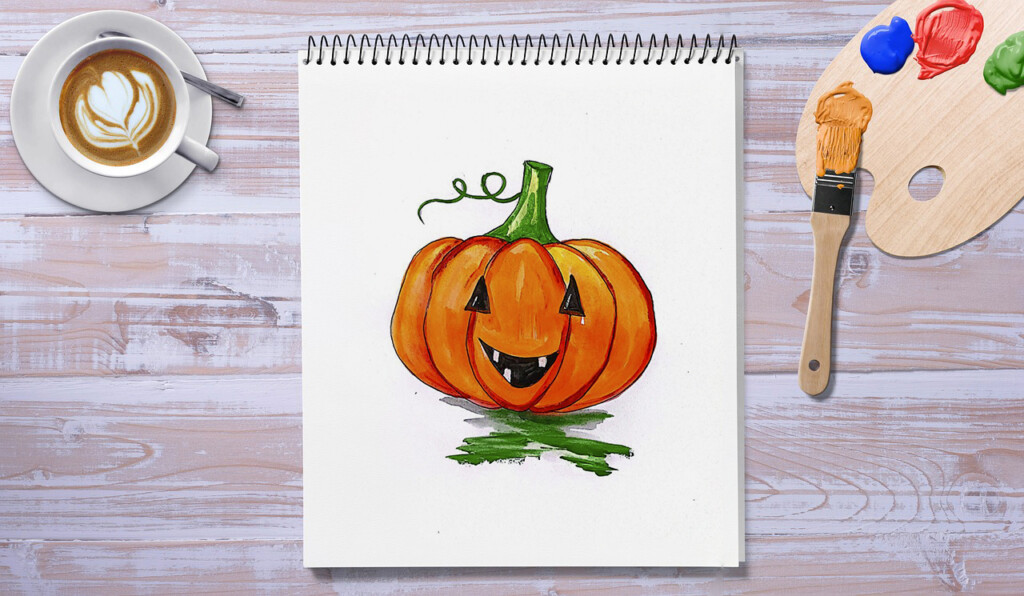
For those seeking a playful and whimsical take on halloween drawing, our first option is a delightful choice. This cute pumpkin drawing, adorned with playful features, is perfect for getting into the Halloween spirit. How to draw a pumpkin easy? Follow our step-by-step instructions, and you’ll soon have a charming pumpkin that radiates the joy and creativity of this beloved holiday. This option is also an excellent way to introduce children to the art of drawing while igniting their imagination.
Materials you’ll need:
- Sheet of paper
- Pencil
- Eraser
- Paints
- Brushes
Step-by-Step Instructions:
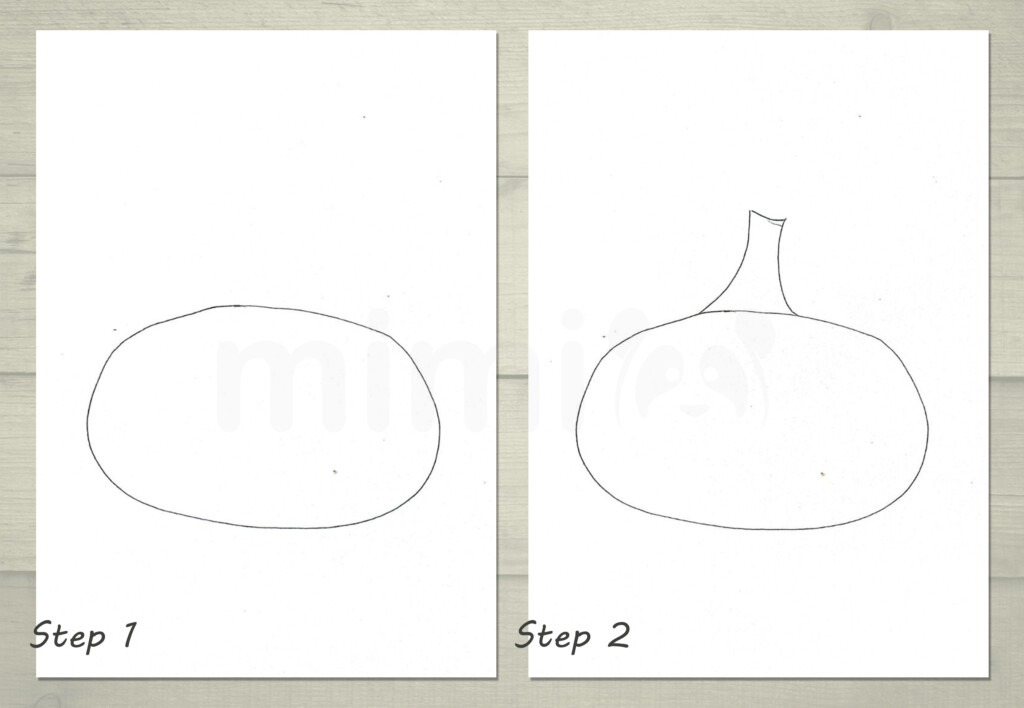
1. How to draw pumpkin? Start by drawing an oval in the center of your paper. This oval will determine the size of your cute pumpkin.
2. Add a tail to your pumpkin by drawing a curved shape.
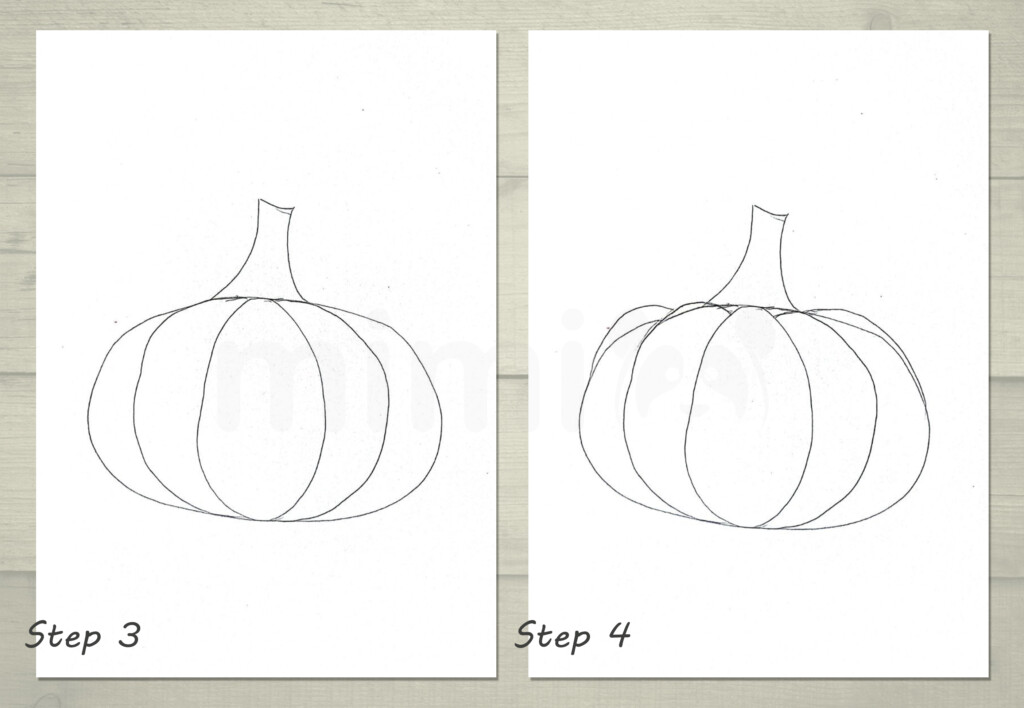
3. Divide the oval into 5 parts using curved lines. These lines will create sections on your pumpkin.
4. Draw the sections of the pumpkin, making them look more three-dimensional.
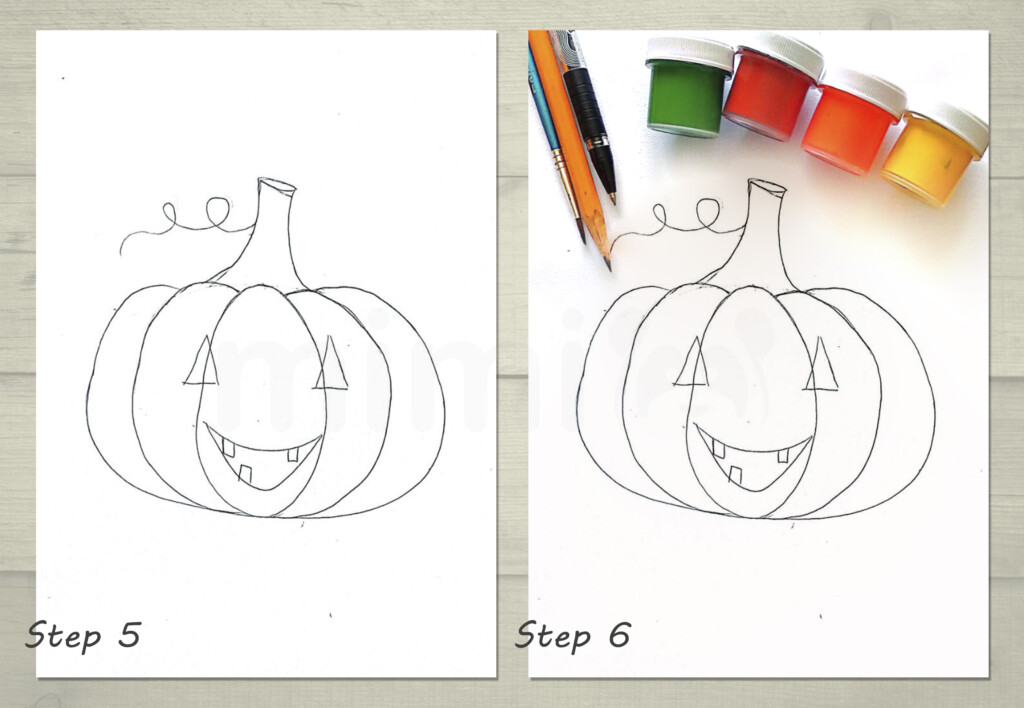
5. Create the pumpkin’s eyes by drawing two triangles and a mouth. Erase any unnecessary lines with your eraser.
6. It’s time to add color!
7. Start with the lightest part of the pumpkin. Apply yellow paint as shown in the sample.
8. Now, take orange paint and color the entire pumpkin.
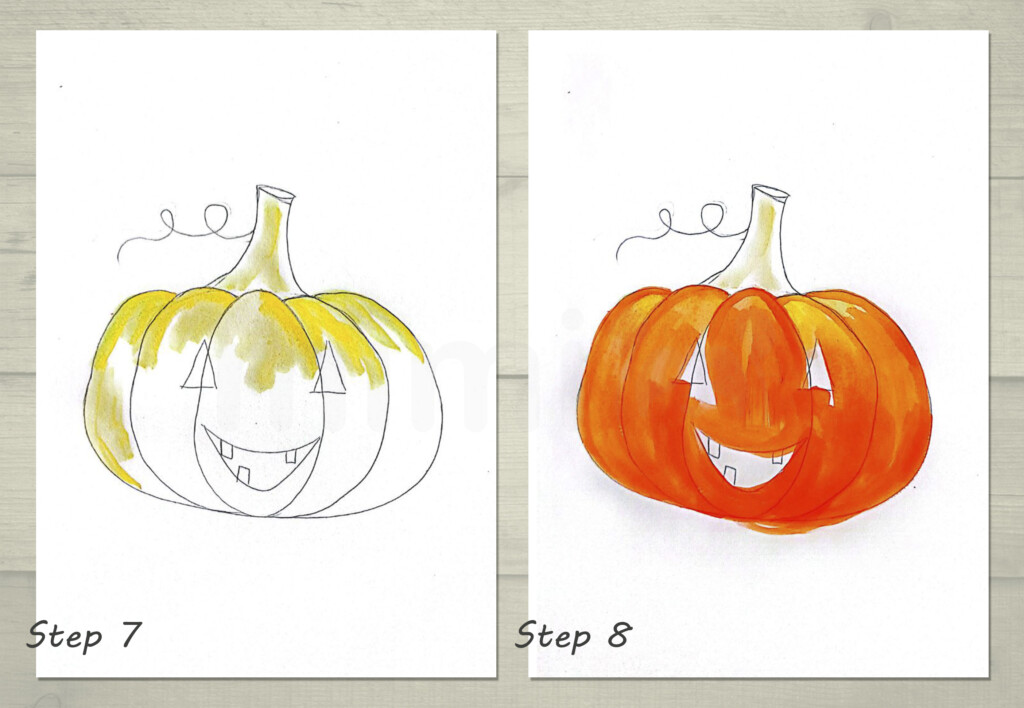
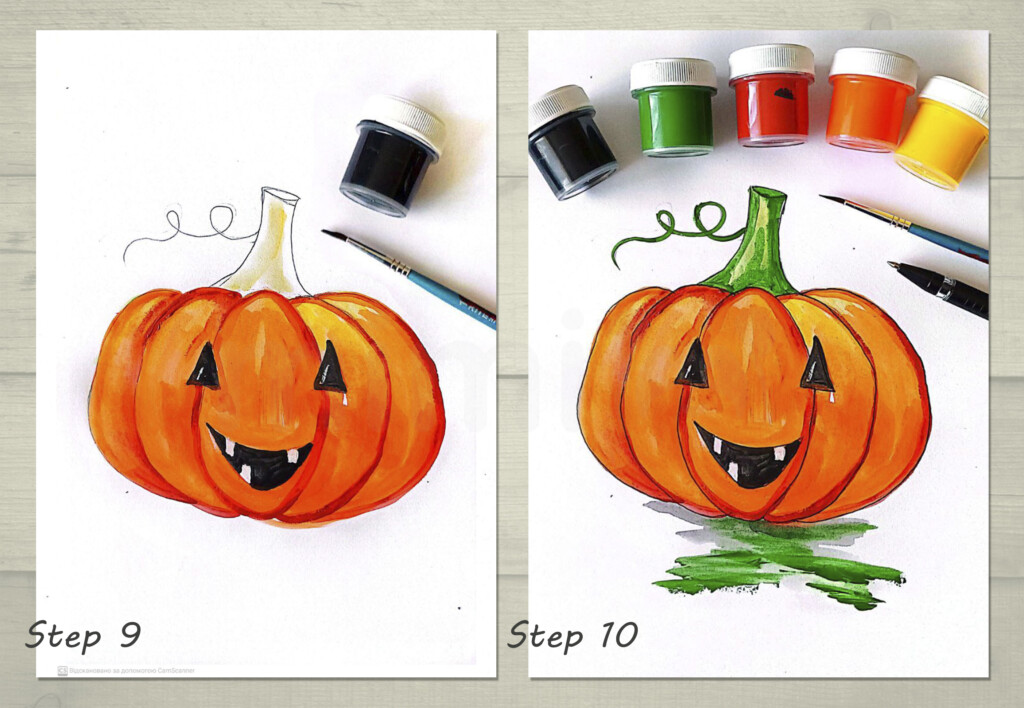
9. Fill in the eyes and mouth of the pumpkin with black paint.
10. Paint the tail of the pumpkin green and add other colors as desired. Finally, outline the contours with a black pen.
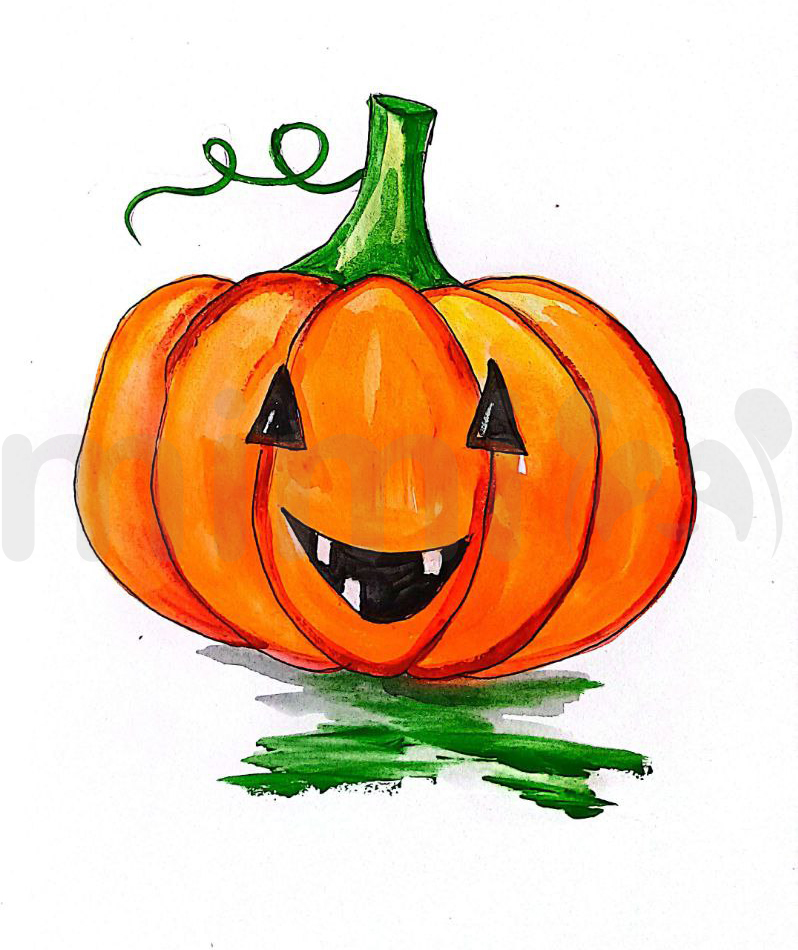
Step back and admire your finished drawing! Your cute pumpkin is ready for Halloween.
A Realistic Pumpkin Drawing for Experienced Artists
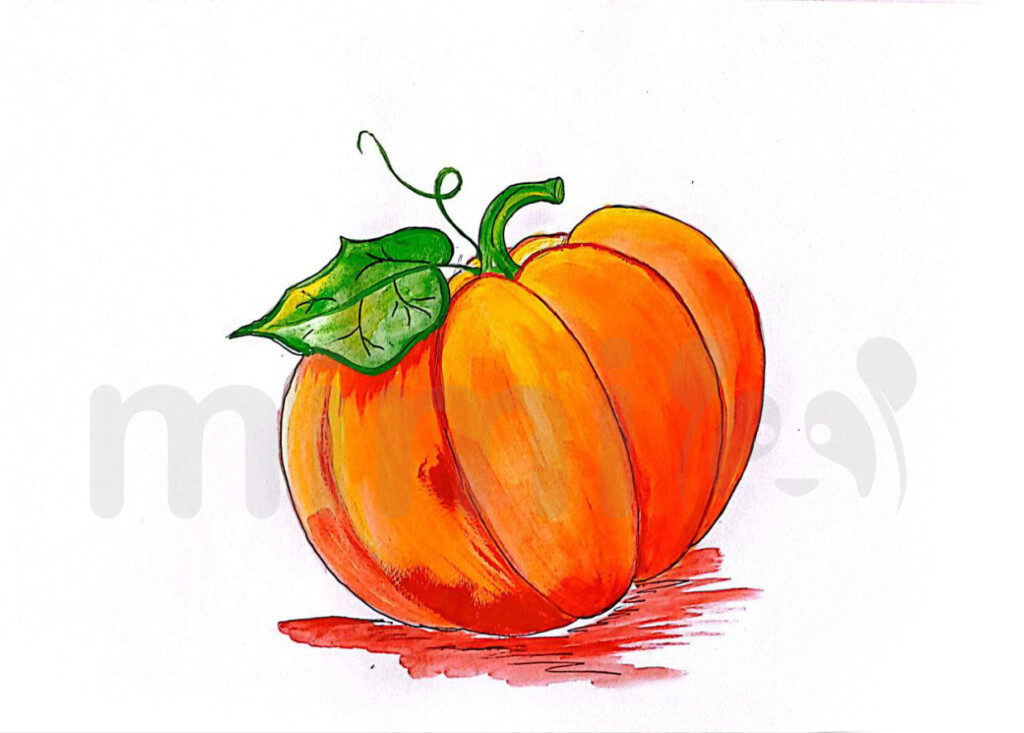
How to draw a pumpkin? If you’re an experienced artist or an adult looking to create a more lifelike representation, our second option offers a realistic approach. This pumpkin sketch tutorial delves into the finer details of drawing. Allowing you to capture the texture, shape, and shading of a pumpkin with precision. You’ll explore the intricacies of this beautiful autumn vegetable. Resulting in a stunning artwork that showcases the true essence of the season.
Materials you’ll need:
- Sheet of paper
- Pencils for sketching
- Paints
- Paintbrushes for coloring
Step-by-Step Instructions:
1. How to draw pumpkin? Start by outlining the location of the pumpkin. Draw a diagonal line approximately in the center of the upper part of the sheet. Divide this line in half, marking the spot for the pumpkin’s stem. Draw a sketch of the future leaf nearby, shaped like a rhombus.
2. On this line, draw an oval that will be the core of your pumpkin, where the stem is attached. But instead of a full circle, draw a large semicircle for the pumpkin itself.
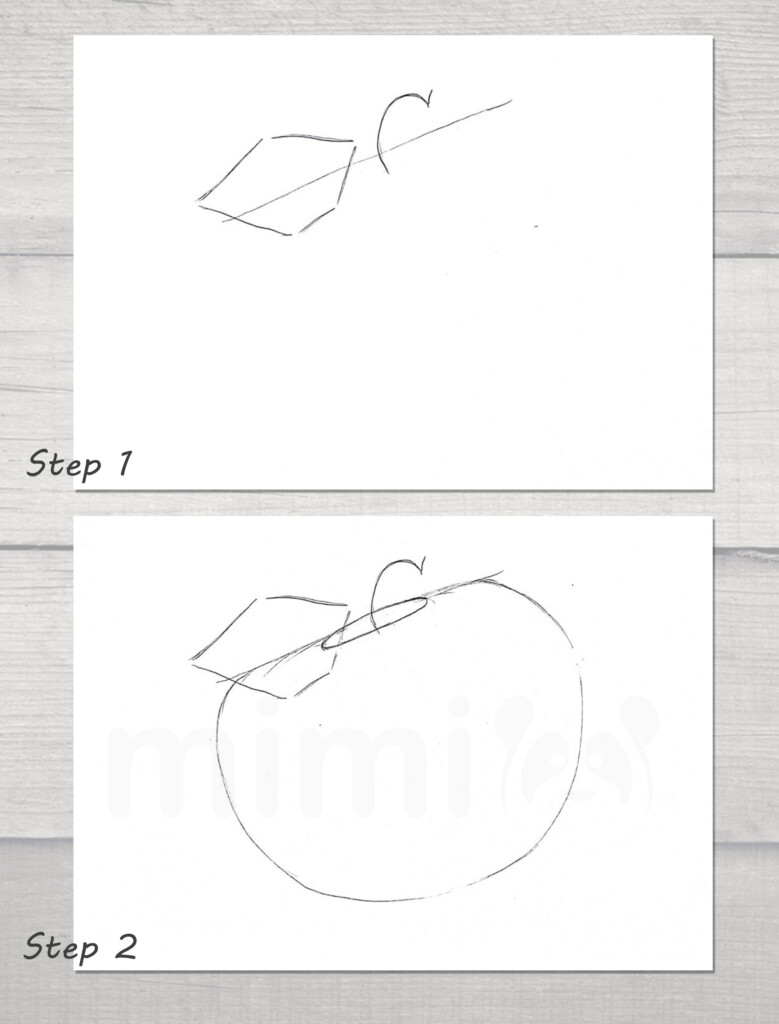
3. Divide the large semicircle into 5 segments. These segments will become the curves of your pumpkin.
4. Draw the leaf more precisely and give it specific lines and details.
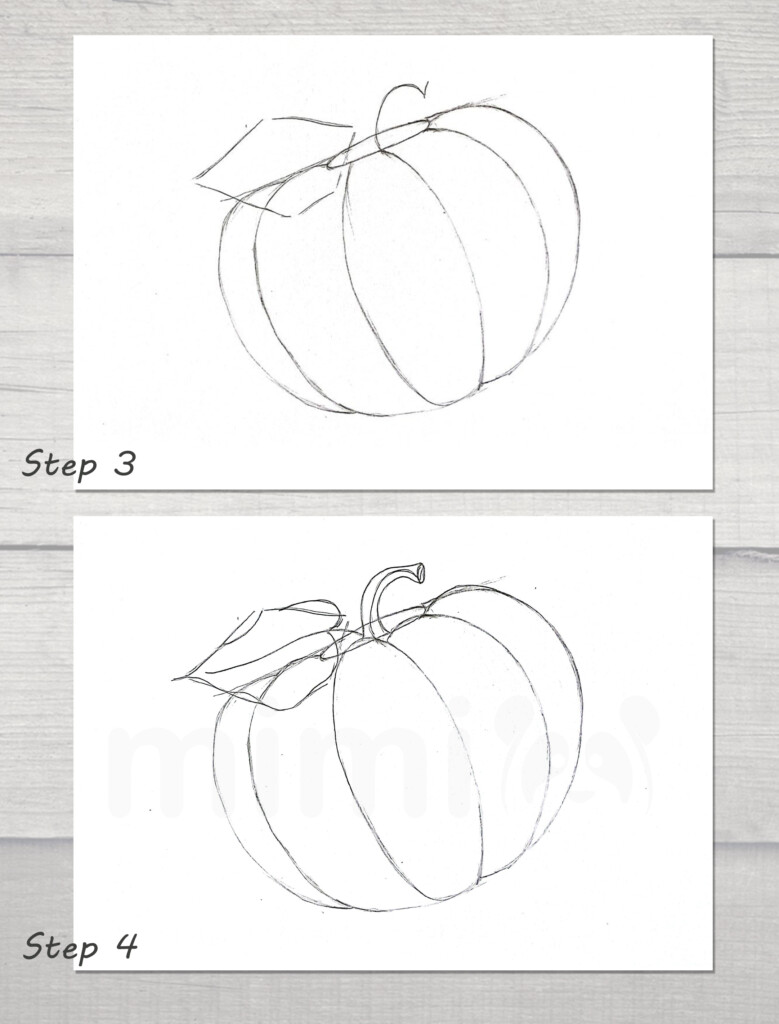
5. Erase any auxiliary lines, draw the contours of the pumpkin, and add more details.
6. Now, let’s move on to coloring.
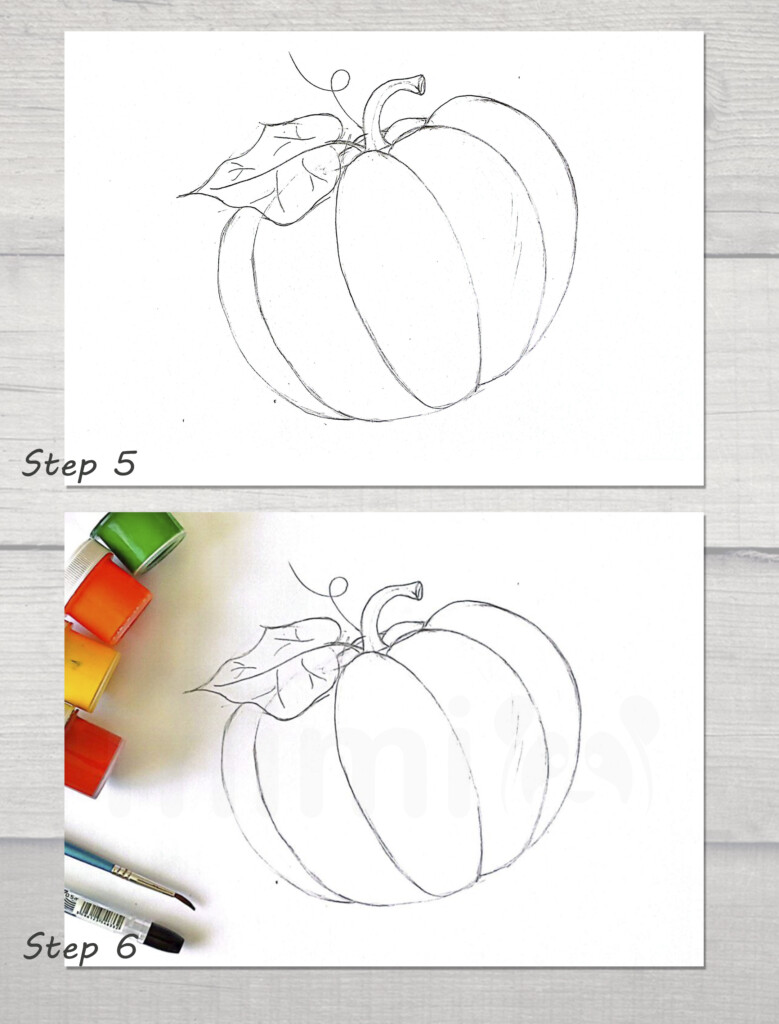
7. Begin by coloring all the light parts of the pumpkin with yellow.
8. Add orange to the entire pumpkin to give it its characteristic color.
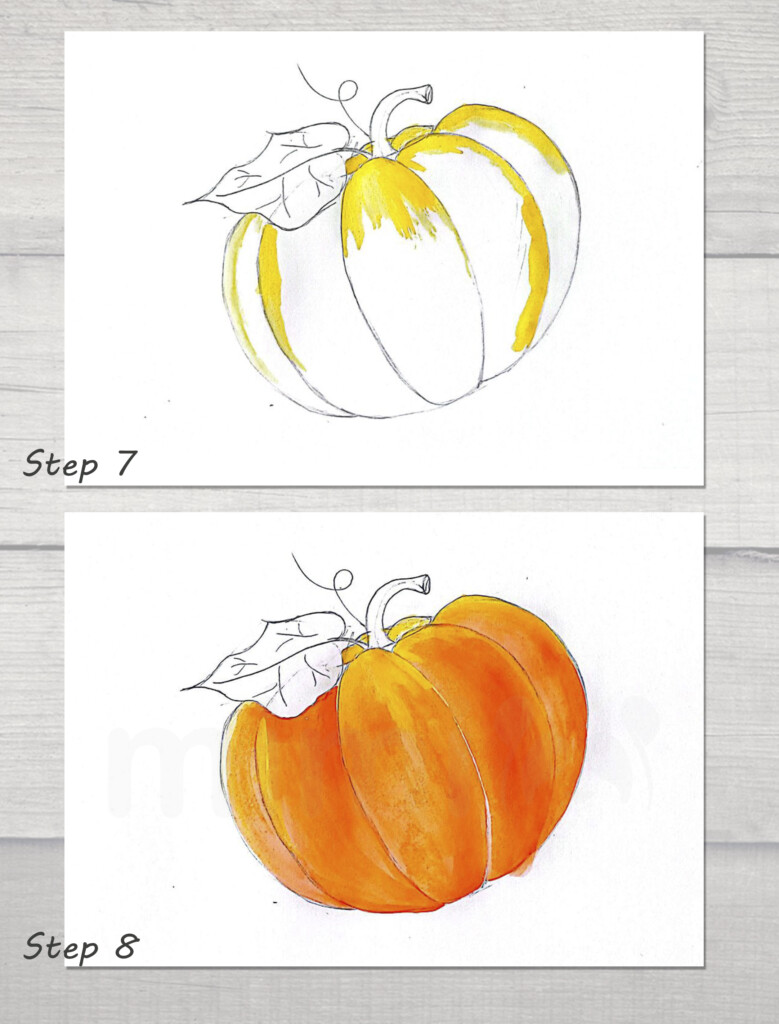
9. Add depth and dimension by incorporating darker colors and shadows. Don’t forget to color the stem and leaf.
10. Add the finishing touches and complete the details on the leaf.
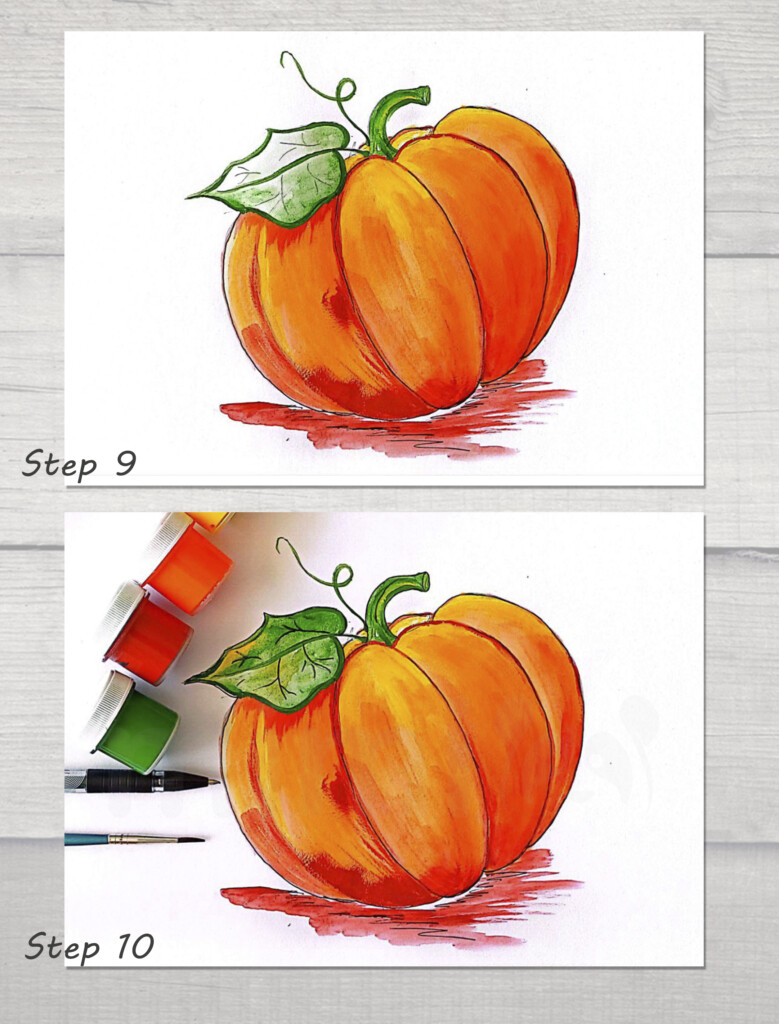
Step back and admire your realistic pumkin drawing. You’ve done a fantastic job, and thanks to our instructions, you’ve created your masterpiece.
Unleash Your Creativity with Mimi Panda
So, why wait? Grab your drawing materials and dive into the world of pumpkin drawing easy with Mimi Panda‘s step-by-step tutorial. Whether you’re looking for Halloween-themed fun or a realistic representation of this autumn icon, we’ve got you covered. Embrace the warmth and beauty of autumn as you create your very own pumpkin masterpiece. It’s time to unleash your creativity and celebrate the season with art!
