
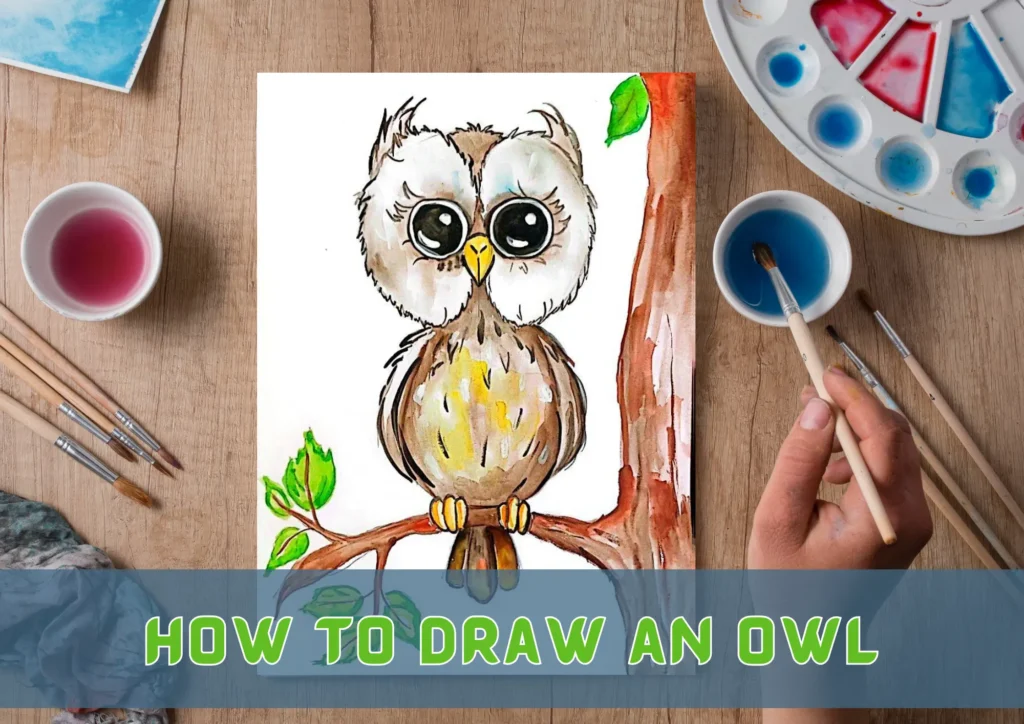
Owls, with their enchanting gaze and captivating charm, are a delightful subject for aspiring artists. If you’re eager to learn how to draw an owl, you’re in for a hoot! Follow this step-by-step guide to create your own adorable owl drawing.
Table of Contents
Getting Started with Owl Drawing
Prepare your artistic tools – a pencil, eraser, and paper. Now, let’s embark on a creative journey to bring the wisdom and whimsy of owls to life on your canvas!
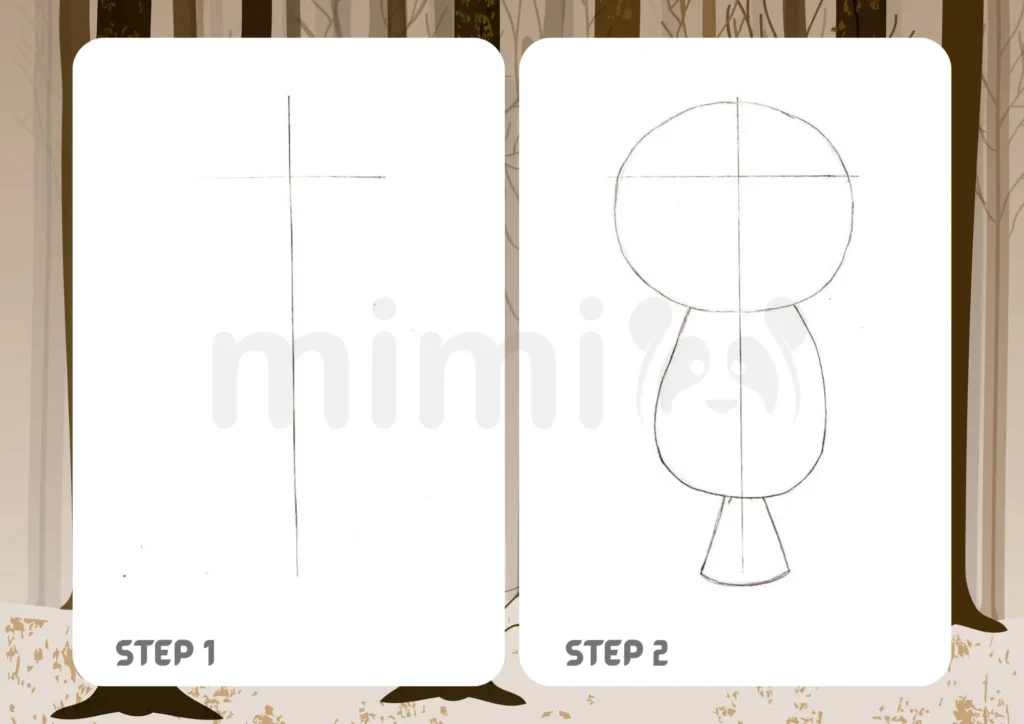
Step 1: Determine the position of the owl
Use a pencil and ruler to draw two straight lines. The horizontal line represents the width of the owl’s head, and the vertical line represents the height of the owl.
Step 2: Draw a sketch of the owl
Now draw the outline of the head and body of the future owl. Also, don’t forget to draw the tail.
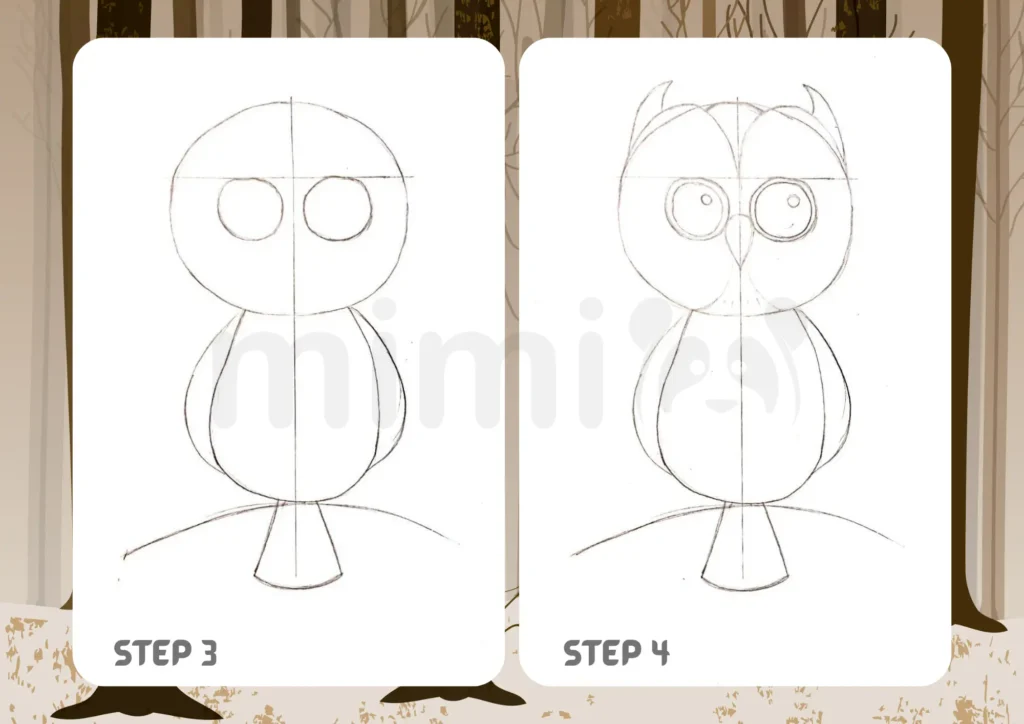
Step 3: Draw the eyes and wings
At the base of the tail, draw a curved line that will serve as a branch on which the owl will sit. Also draw wings and large circles in the eye area.
Step 4: Detail the head
Now we draw the ears of the owl, and draw the eyes in more detail. Also add a nose in the form of an inverted droplet.
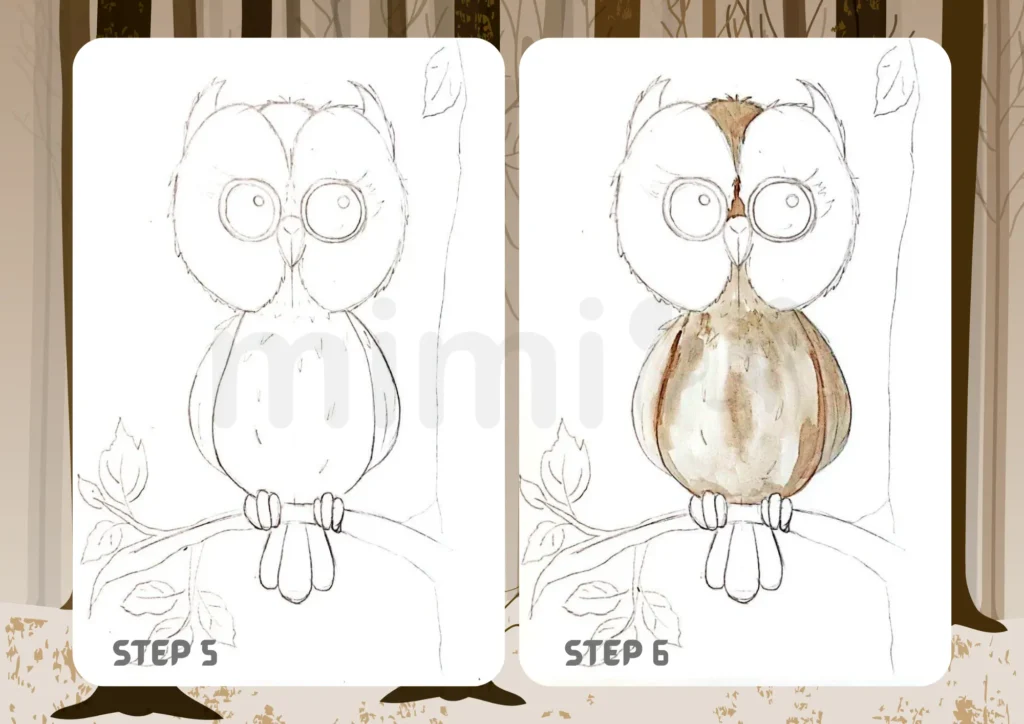
Step 5: Draw the feathers
In this step, draw feathers all over the owl’s body, as well as draw paws and detail the tail. Also draw the outline of the tree and add leaves to the branch.
Step 6: Start coloring
We used paints, but you can trust your imagination and choose any coloring tool and any color. Start coloring with the lightest primary color.
Step 7: Coloring an owl’s nose
While the paint on the owl’s body is drying, we can paint the nose in yellow. Use the same color to paint the paws.
Step 8: Coloring the owl’s head
Use a subtle color to paint over the area around the eyes, and use a black felt-tip pen to color the pupils of the eyes and outline the entire head.
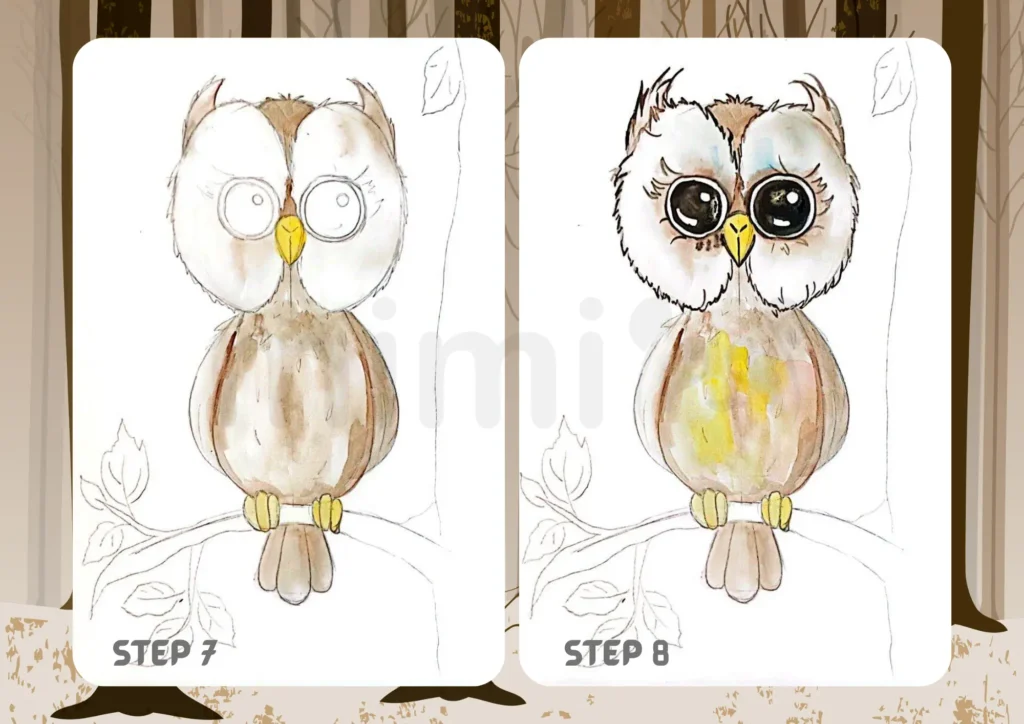
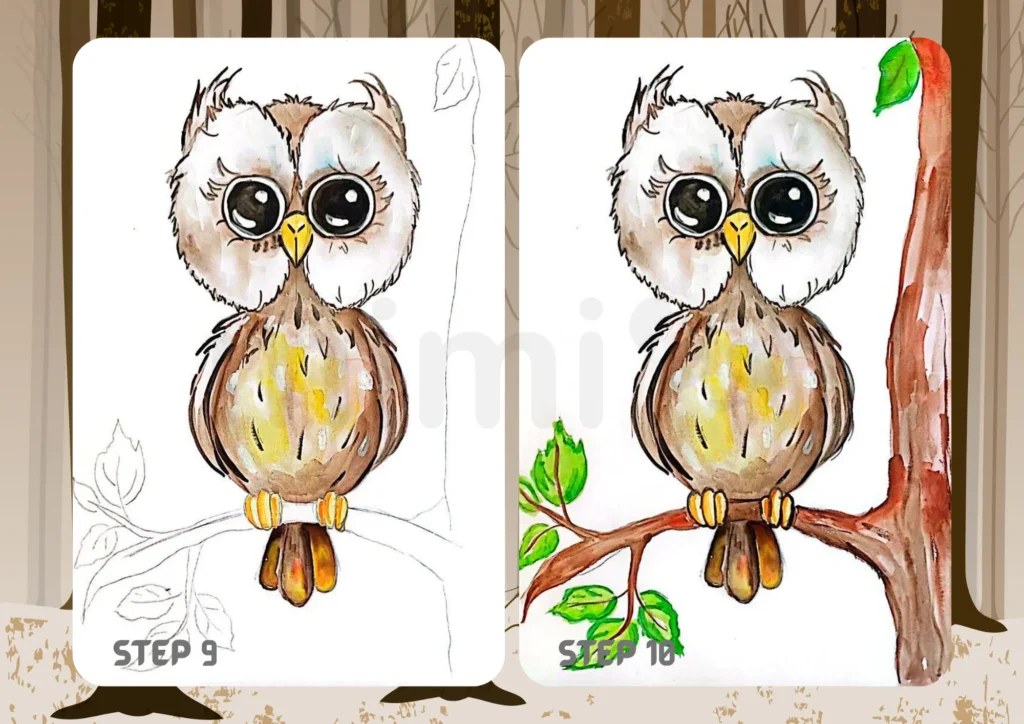
Step 9: Color the body of the owl
Color the body of the owl in detail, adding darker shades closer to the contour of the owl, and lighter shades more towards the center. You can also add a yellow tint to the owl’s belly.
Step 10: Coloring the tree
To complete the owl drawing, color the tree starting with light colors and ending with dark ones. Also color the leaves on the branch. Now your drawing is ready 🙂
Final Touch – Inking and Coloring
If you’re satisfied with your pencil sketch, consider outlining it with ink for a more polished look. Feel free to experiment with colors to bring your owl to life. Owls can be colorful, or you can keep it simple with earthy tones.
Additional Tips for Owl Drawing
Enhance your owl drawing experience by exploring additional tips. Begin with quality sketching pencils, erasers, and fine liners. Experiment with different poses and expressions to create a variety of owl characters. Adding vibrant colors can make your owl drawings truly enchanting.
Perfecting Owl Features for Realism
For a more realistic owl portrayal, pay attention to specific features. Focus on the intricacies of the feathers, creating layers and textures. Experiment with shading to give depth to the eyes and facial features. By refining these details, your owl will exude authenticity.
Crafting Scenic Backgrounds for Your Owl
Elevate your owl drawing by incorporating backgrounds. Whether it’s a moonlit night, a tree branch, or a whimsical forest, context adds depth and narrative. Experiment with settings that complement your owl’s character, creating a more immersive visual experience.
Conclusion – A Parliament of Owl Drawings Awaits!
Congratulations on completing your owl drawing! Whether you’re a novice or an experienced artist, savor the joy of creating these whimsical creatures. Keep practicing, and let your imagination soar with each charming owl you draw. Happy creating!