Eagles, with their majestic presence and soaring beauty, captivate artists seeking to capture the essence of these magnificent birds. If you’re eager to learn how to draw an eagle, follow this step-by-step guide and let your creativity take flight!
Table of Contents
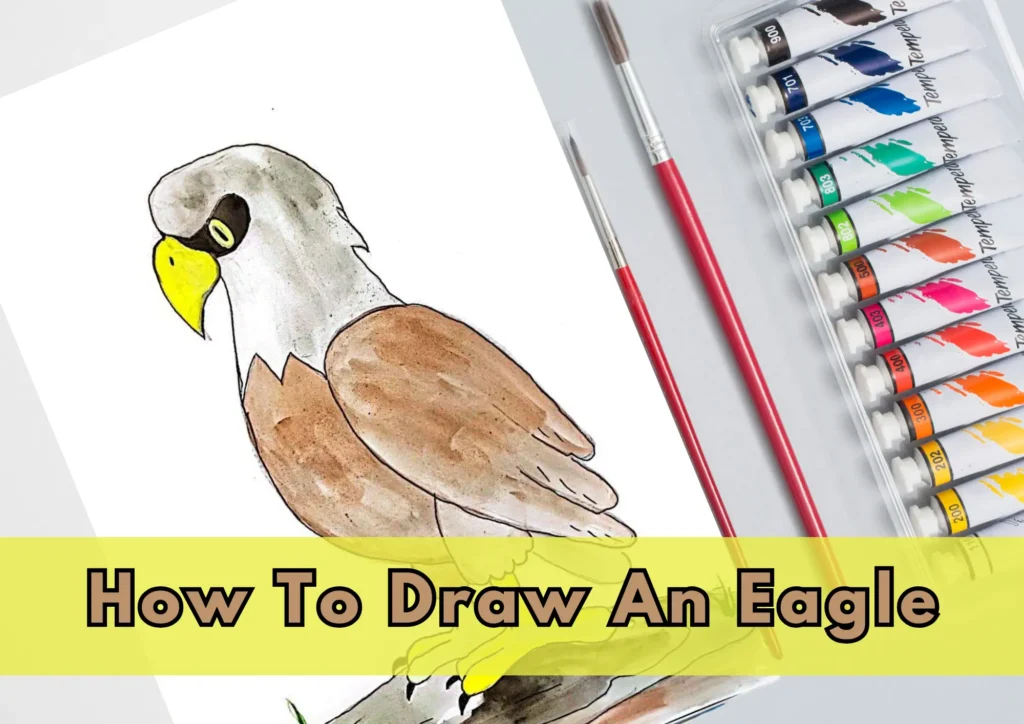
Getting Started with Eagle Drawing
Prepare your artistic arsenal by grabbing a pencil, eraser, and paper. Now, let’s embark on a journey to bring the regality of an eagle to life on your canvas!
Step 1: Drawing a head
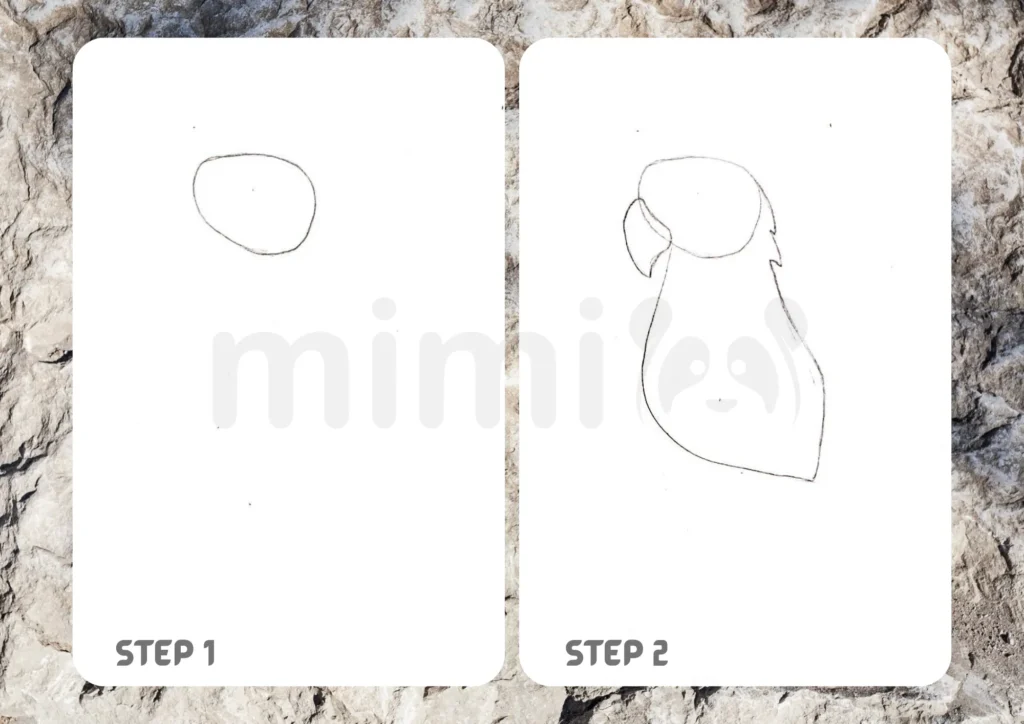
First, prepare the necessary materials – a sheet of paper, a pencil, an eraser, and coloring materials. Now draw a head at the top of the paper.
Step 2: Draw the neck and beak
It’s time to draw the beak to the left of the head. And draw a neck with a wider lower part.
Step 3: Draw the eye
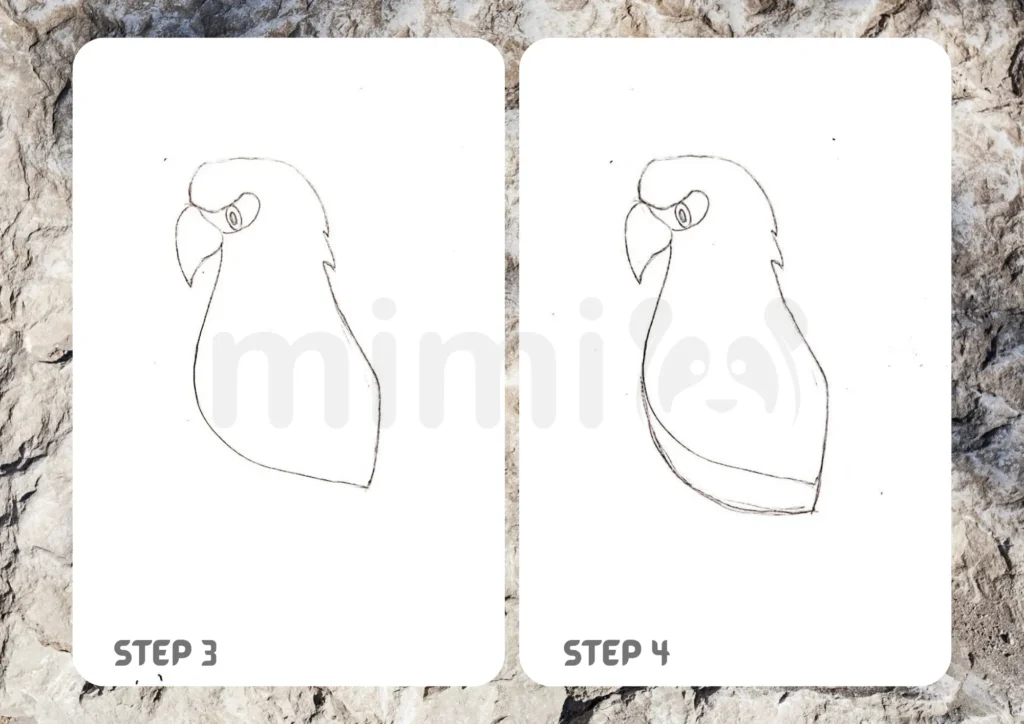
Create a serious look on the eagle’s face by drawing an eye that looks like it’s watching its prey.
Step 4: Lengthen the body
Make the body look longer by drawing a round belly.
Step 5: Draw a wing
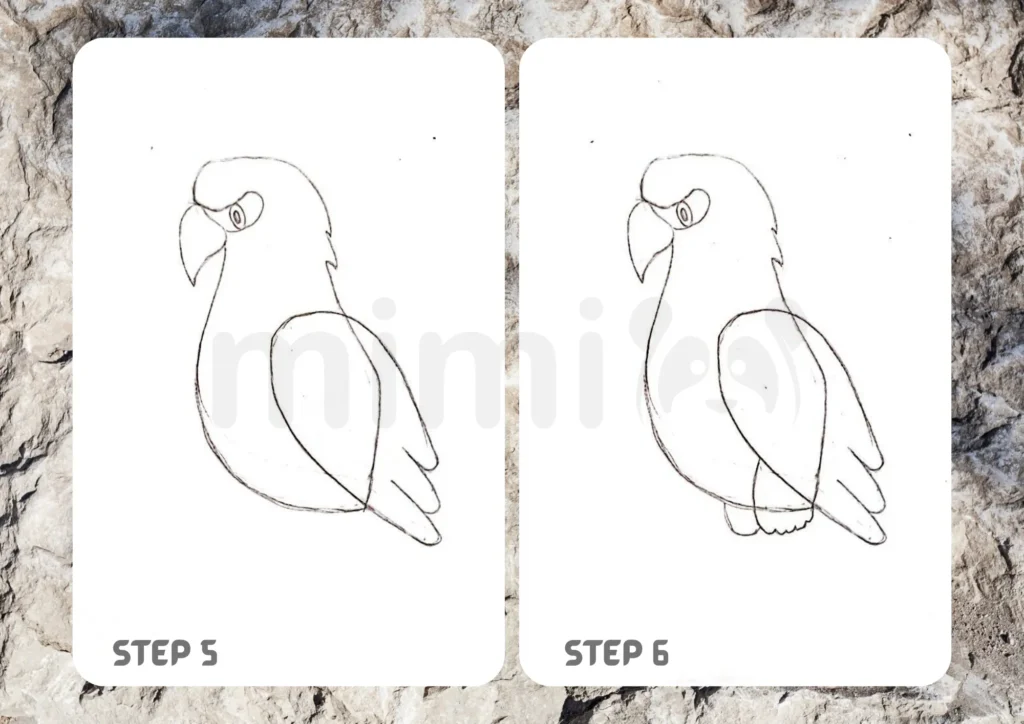
Draw a wing with a pronounced feather. We draw one wing, because the eagle seems to be standing sideways and obscuring the other wing.
Step 6: Draw the eagle’s legs
Draw the upper part of the eagle’s legs, also called the tibia.
Step 7: Draw the lower part of the legs
First, draw a zigzag line to visually separate the neck from the body. Next, draw strong paws with sharp claws. Remember that the eagle is a large bird of prey, so all parts of the body are quite strong. Also draw a part of the rock on which the eagle is standing.
Step 8: Drawing the details
You can add anything here. From single blades of grass to the cloudy sky, or even a small rodent that the eagle is hunting. Also, at this stage, don’t forget to erase unnecessary lines.
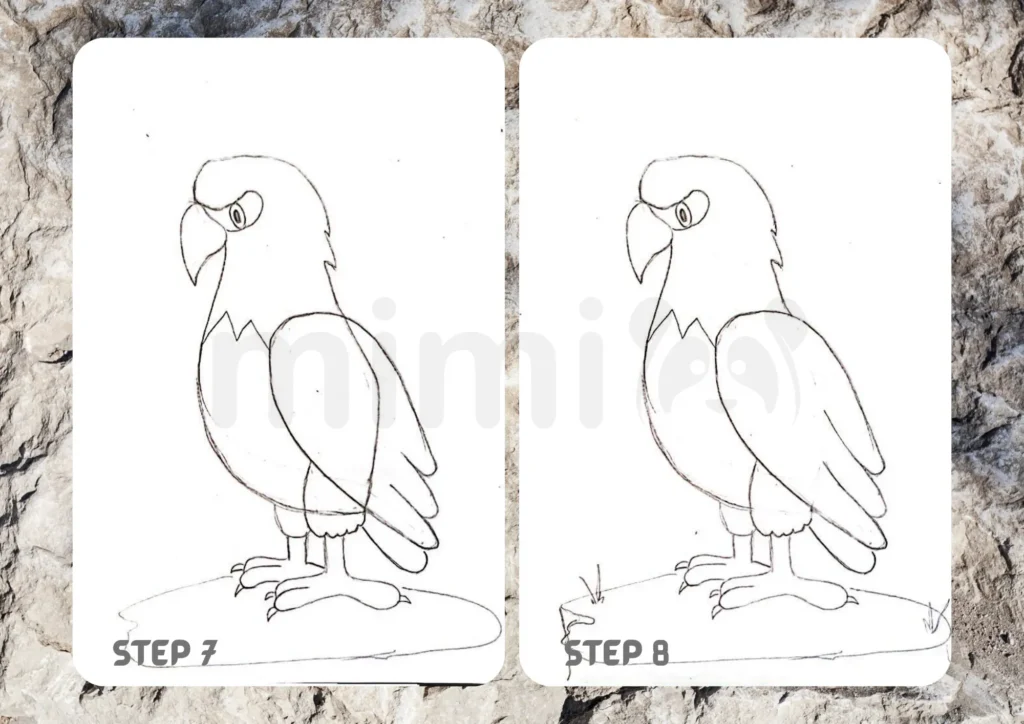
Step 9: Color the eagle’s head
Take the gray paint and color the eagle’s head and lower feathers.
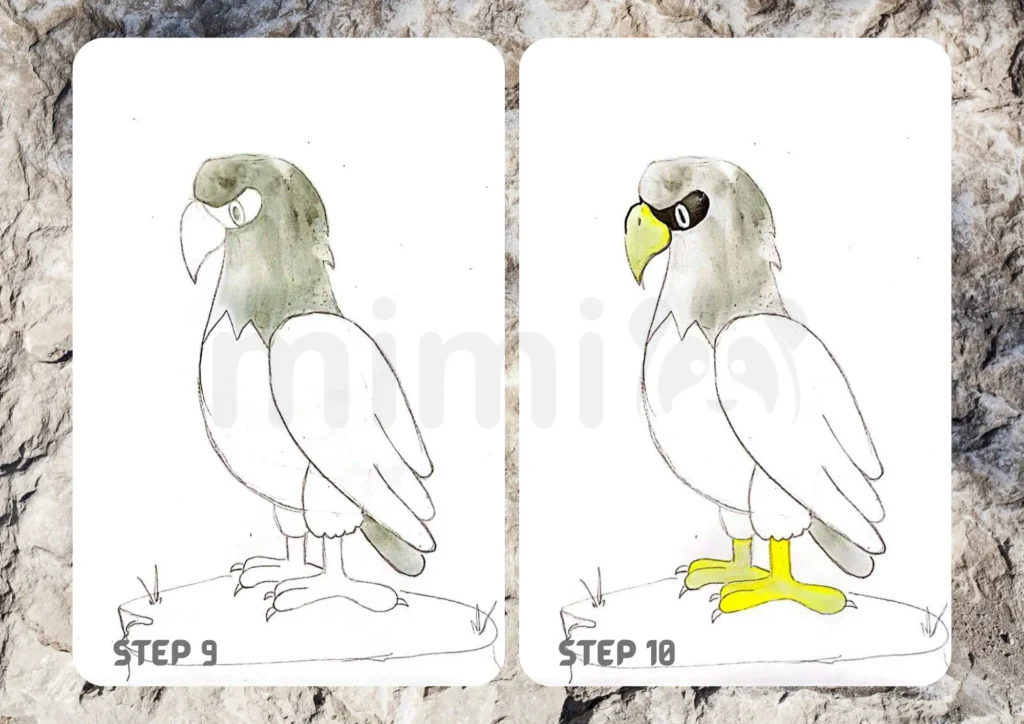
Step 10: Color the beak and legs
Now use yellow to color the beak and paws, leaving out the claws. Also use a black marker to color the eye.
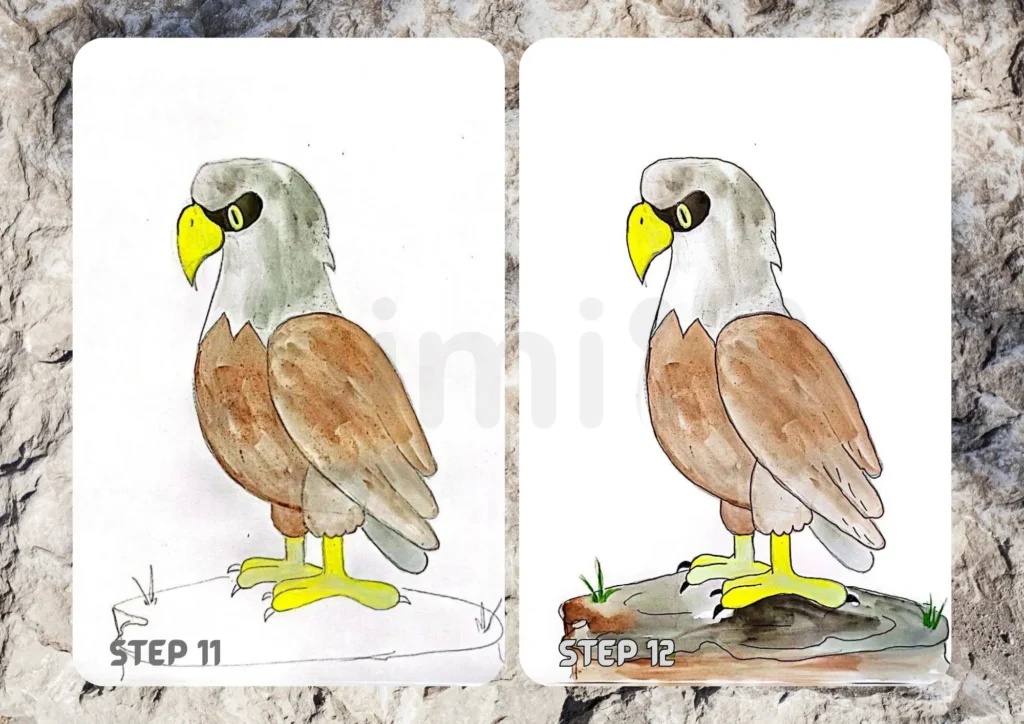
Step 11: Color the body and wing
Use brown to color the remaining areas of the eagle.
Step 12: Color the rock and grass
As a final step, color the rock on which the eagle is perched with gray and brown. Also color the grass. Your eagle drawing is ready 🙂
Final Touch – Inking and Coloring (Optional)
Once satisfied with your pencil sketch, consider outlining it with ink for a polished look. Experiment with coloring to add vibrancy. Eagles can vary in color, but browns and whites are common. Allow your creativity to soar!
Additional Tools for Eagle Drawing
Elevate your eagle drawing experience by exploring various tools. Begin with sketching pencils for outlining and shading. Use erasers for precision and correction, ensuring your eagle’s details are immaculate. Fine liners come in handy for intricate feather detailing and refined lines.
Tips for Realistic Eagle Features
For a lifelike eagle portrayal, focus on capturing specific features. Pay attention to the sharpness of the beak, the intensity of the eyes, and the intricate details of the feathers. By honing in on these characteristics, your eagle drawing will radiate realism.
Enhance Your Eagle Drawing with Backgrounds
Take your eagle drawing to new heights by incorporating a background. Whether it’s a mountainous landscape or a wide-open sky, context adds depth and narrative to your artwork. Experiment with settings that complement the regality of your majestic eagle.
Conclusion – Soar High with Your Eagle Art!
Congratulations on completing your eagle drawing! Whether you’re a novice or seasoned artist, relish the joy of bringing these majestic birds to life. Keep practicing and infuse your unique style into each drawing. Happy creating!
