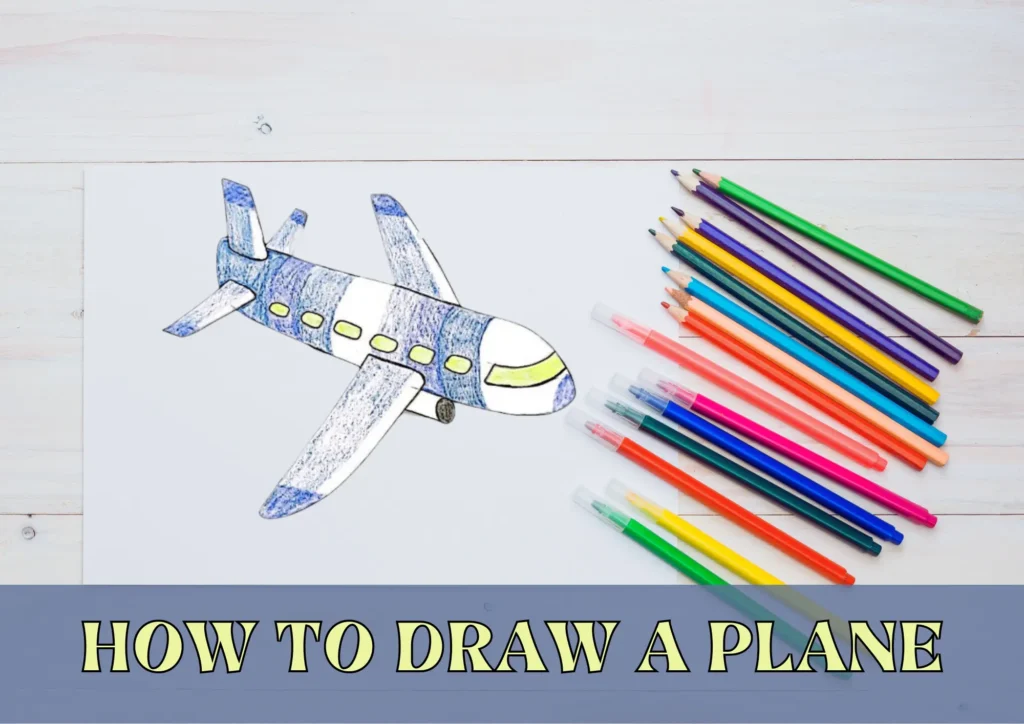
How to Draw the Airplane: A Step-by-Step Guide for Kids

Table of Contents
What You’ll Need?
Before you embark on your artistic journey, gather the following materials:
- Paper: A clean sheet of paper is your canvas.
- Pencils: Use pencils of varying lead thickness for different lines.
- Eraser: Correct any mistakes without a trace.
- Markers or Colored Pencils: Add a pop of color to your masterpiece.
Easy Stepwise Instructions on How to Draw the Airplane
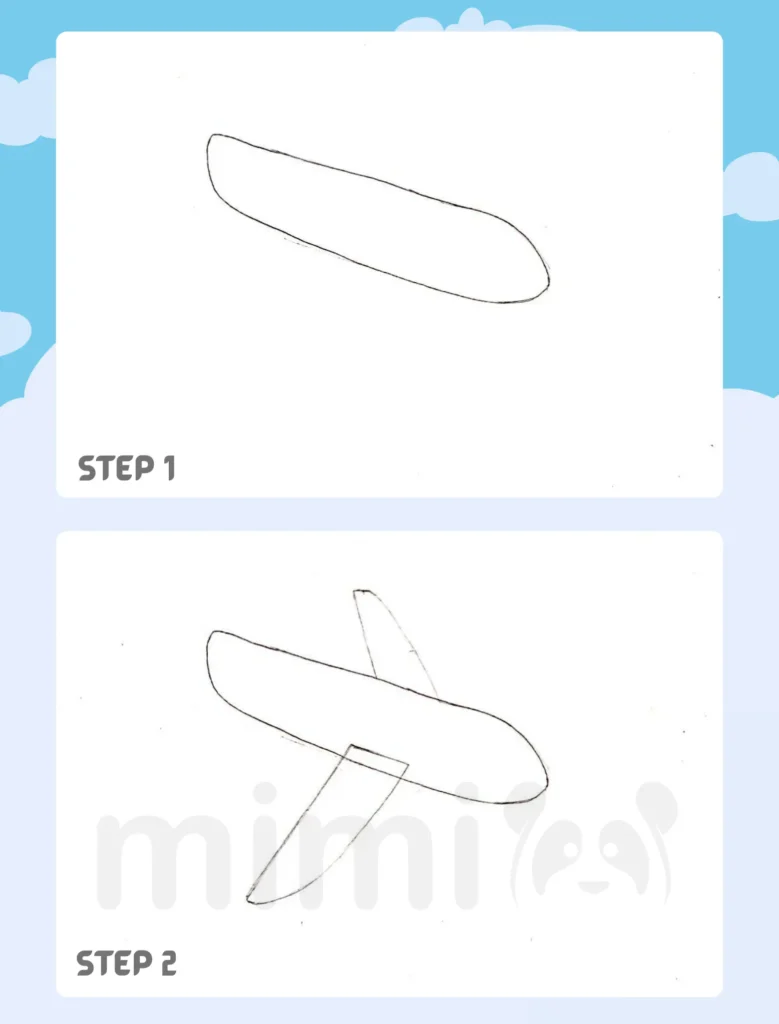
Step 1: Draw the outline of the airplane
First, draw the outline of the main part of the airplane.
Step 2: Draw the wings of the airplane
Now draw the wings of the airplane on both sides.

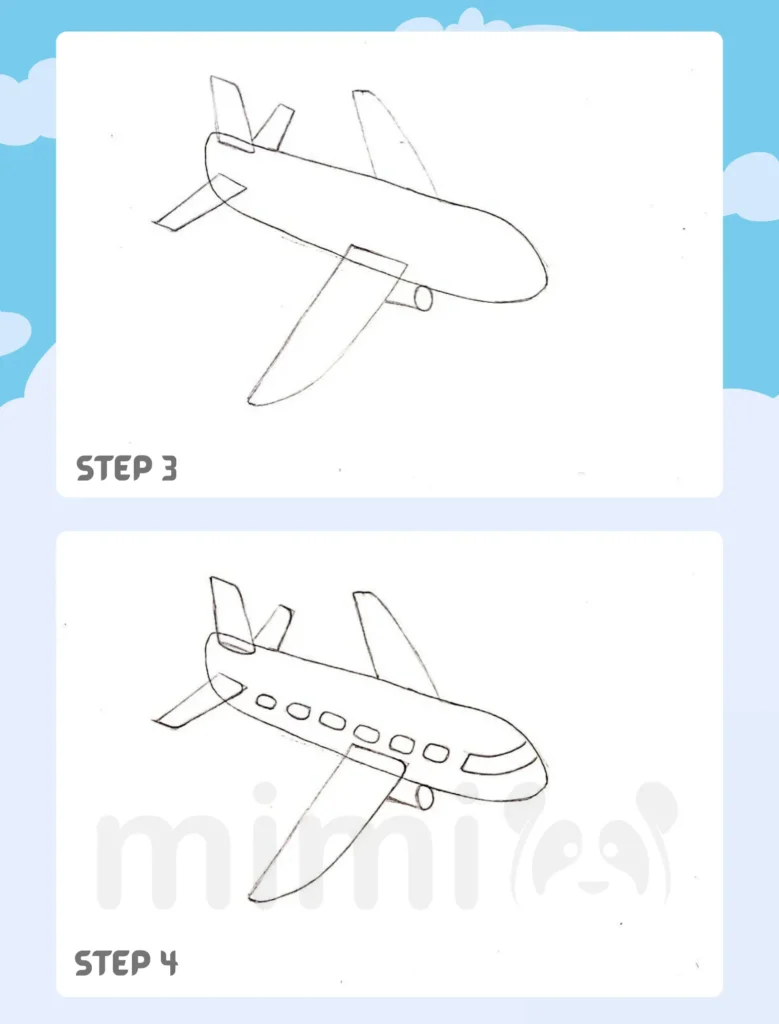
Step 3: Draw the stabilizers
At the back of the airplane, draw 2 horizontal and vertical stabilizers, and add an engine.
Step 4: Draw the windows
Add small passenger windows all along the side of the airplane. Then draw a wide pilot’s viewport at the front of the airplane.

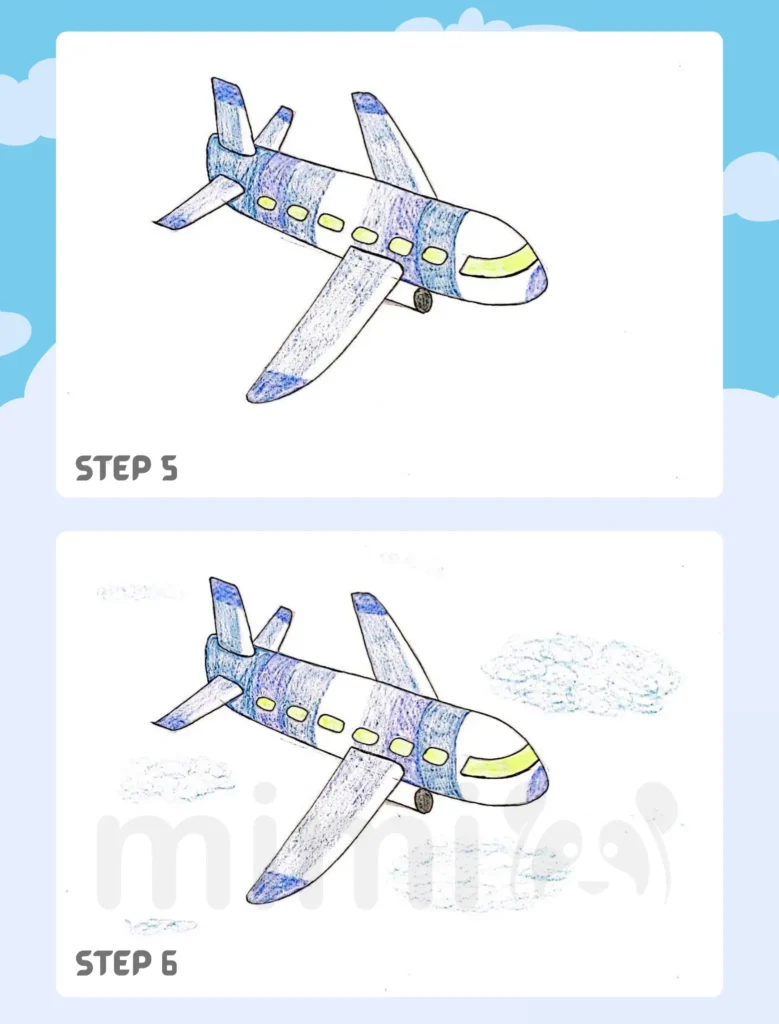
Step 5: Color the airplane
Now let’s move on to coloring. We used colored pencils. You can choose any other materials.
Step 6: Draw the sky
All you have to do is add the sky with clouds and the airplane is ready!

Tips for Learning Airplane Drawing Tutorial for Kids
- Practice Regularly: Like any skill, drawing improves with consistent practice. Set aside time each day to refine your airplane-drawing abilities.
- Explore Different Styles: Experiment with various styles of airplanes, from classic passenger planes to sleek fighter jets. This will broaden your artistic repertoire.
- Watch Video Tutorials: Online tutorials can provide visual guidance, offering additional tips and tricks to enhance your drawing skills.
Benefits of Learning How to Draw the Airplane
- Enhances Creativity: Drawing encourages creativity by allowing kids to express themselves through art.
- Improves Fine Motor Skills: The intricate details involved in drawing airplanes help refine fine motor skills in children.
- Boosts Confidence: Successfully completing a drawing fosters a sense of accomplishment and boosts self-confidence.
FAQ about How to Draw the Airplane
When drawing a big plane with Mimi Panda, enlarge the size of the fuselage and wings while maintaining proportional relationships. Emphasize the proportions to ensure a realistic and visually appealing look. Consider adding more details to fill the larger canvas.
To draw a simple airplane with Mimi Panda, start by creating a basic oval shape for the fuselage. Add wings extending from each side, a tail at the back, and small details such as windows. Keep the design uncomplicated for a charming and easy-to-follow result.
For a simple jet drawing with Mimi Panda, follow the basic airplane steps but streamline the design. Make the fuselage more slender, incorporate pointed wings, and perhaps opt for a single vertical stabilizer to achieve a jet-like appearance. Keep the lines clean and sleek for a modern and aerodynamic look.
Learning how to draw an airplane with Mimi Panda offers numerous benefits. It not only enhances artistic skills but also fosters creativity in aspiring artists. The process improves fine motor skills as individuals practice control over their hand movements. Additionally, the sense of achievement gained from completing a drawing can boost confidence and inspire further artistic exploration.
