

Table of Contents
Materials to Draw a Fish
Embarking on the journey of drawing a magnificent koi fish requires the right tools. Let’s ensure you have everything you need to bring this captivating creature to life.
Quality Paper:
Select a pristine, smooth sheet of paper. Opt for a heavier weight to provide stability and prevent any ink bleeding, ensuring your drawing surface is as impeccable as your koi fish.
Versatile Pencils:
Equip yourself with a diverse range of pencils, from a gentle 2H for initial sketches to a bold 6B for shading. This spectrum allows you to capture the intricacies and dynamics of the koi fish with precision.
Precision Eraser:
A high-quality eraser is a must-have for refining your sketches. Ensure it can delicately remove sketch lines, leaving behind only the refined outlines that define the elegance of your koi fish.
Vibrant Colors:
If your artistic vision includes a burst of color, gather colored pencils, markers, or watercolors. These will breathe life into your drawing, mirroring the vibrant hues of real koi fish.
How to Draw a Koi Fish: Step-by-Step
Step 1: Draw a sketch
Let’s start our creative adventure by drawing an oval and a circle. Then draw a curved line that will go through the center of the shapes.
Step 2: Drawing a head
The next step is to draw the head. Add eyes, lips, and a fin.

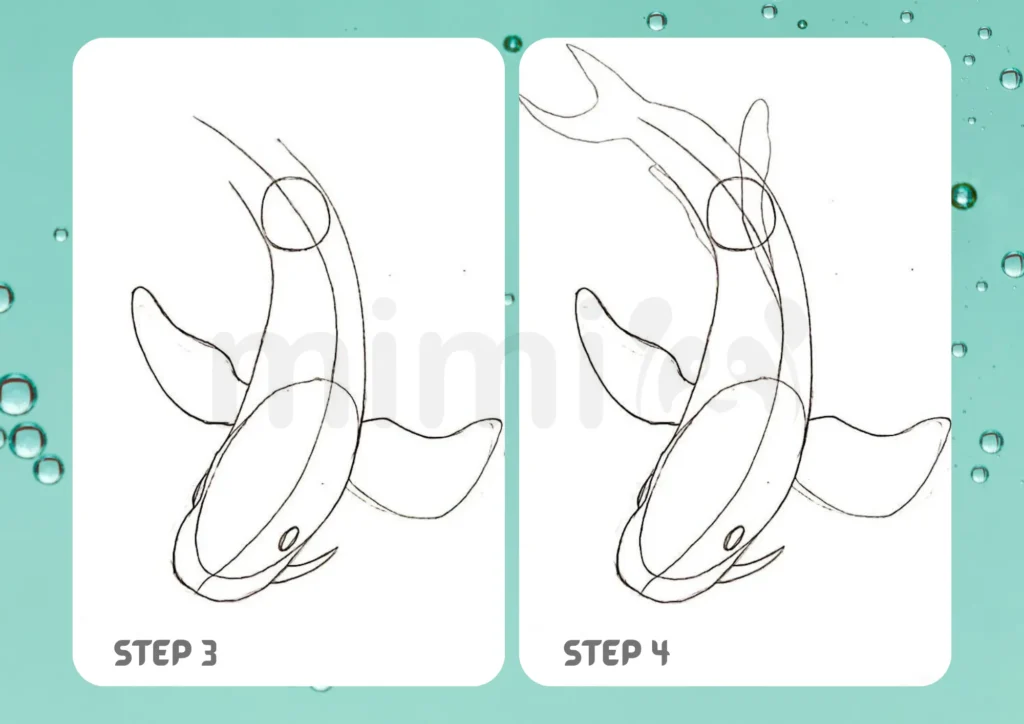
Step 3: Draw a fish body
Now let’s focus on the outline of the fish. Draw from the head to the beginning of the tail. Also add fins on the sides.
Step 4: Drawing the tail
Finish the body of the fish by drawing the tail. And add the tail fin.
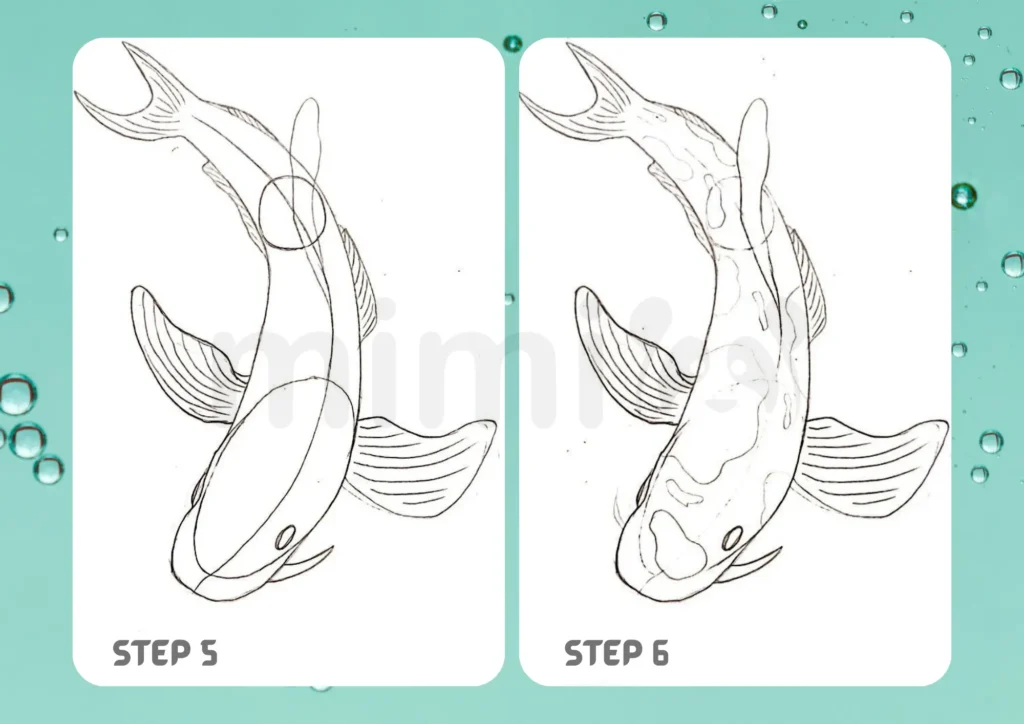
Step 5: Draw details for fins
We add details to all fish fins.
Step 6: Draw spots
We draw chaotic spots of different sizes and shapes all over the fish’s body.
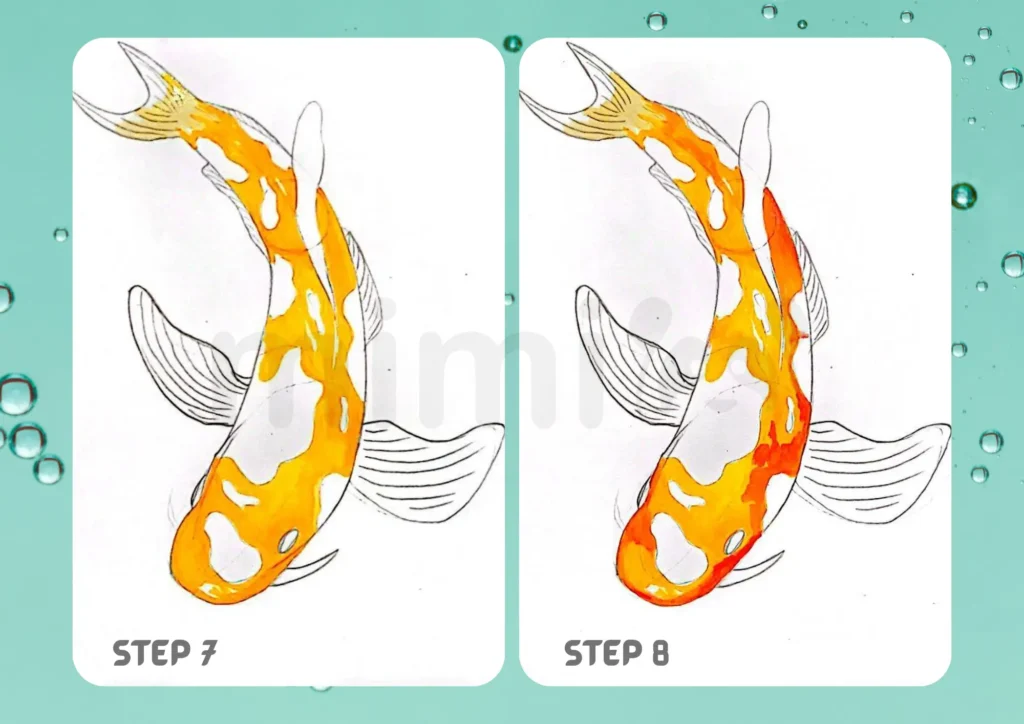
Step 7: Start coloring the koi fish
Start coloring the koi fish. To do this, take the orange color and partially paint over the body of the fish without fins.
Step 8: Continue to color the koi fish
Now take the red color and add it randomly to the body.
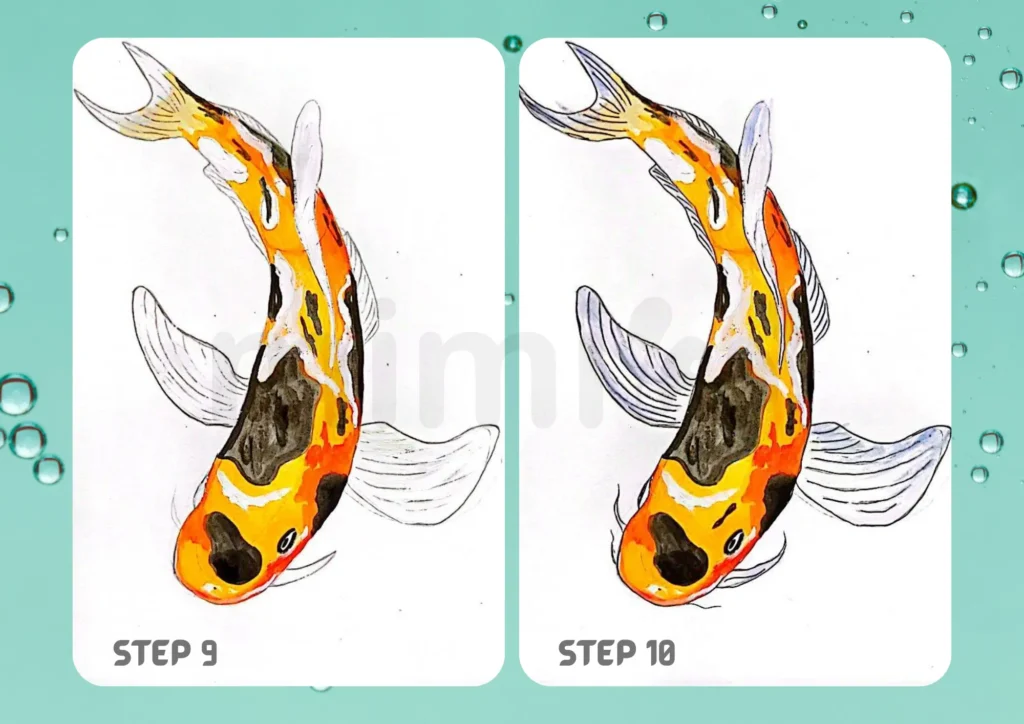
Step 9: Finish coloring the body
Now use black paint to add finishing details to the fish’s body.
Step 10: Completing the coloring of the fish
The last step in coloring the fish is to add spots with black, and when it dries, with white. Also take white and blue and color the tail and fins. Now take the black liner and draw lines on the fins and tail.
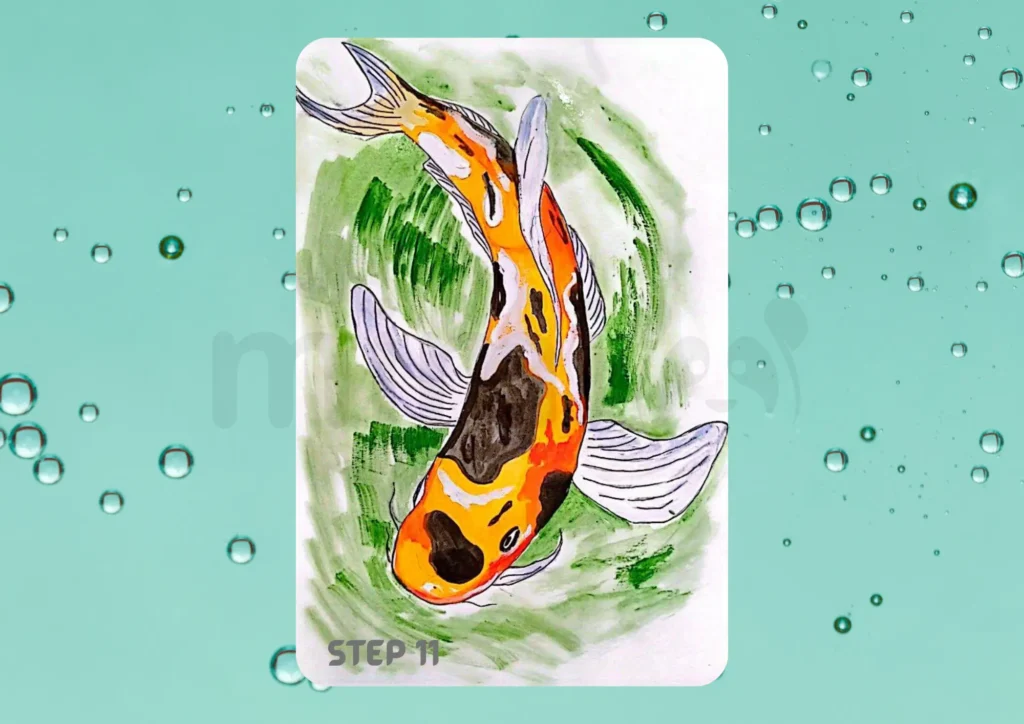
Step 11: Draw water around the fish
Finally, use green in circular strokes to give the impression that the fish is swimming in a lake full of algae.
Culmination: A Masterpiece in Every Stroke
In conclusion, drawing a koi fish is a gratifying artistic pursuit. By adhering to this unique step-by-step guide and utilizing the recommended tools, you’re poised to create a masterpiece that captures the essence of this iconic Japanese symbol.
Embrace experimentation, inject your personality into the colors, and soon you’ll find yourself effortlessly crafting stunning koi fish drawings. Remember, mastery comes with practice. So, seize your pencils, embrace the process, and revel in the joy of bringing a koi fish to life on paper. Happy drawing!