
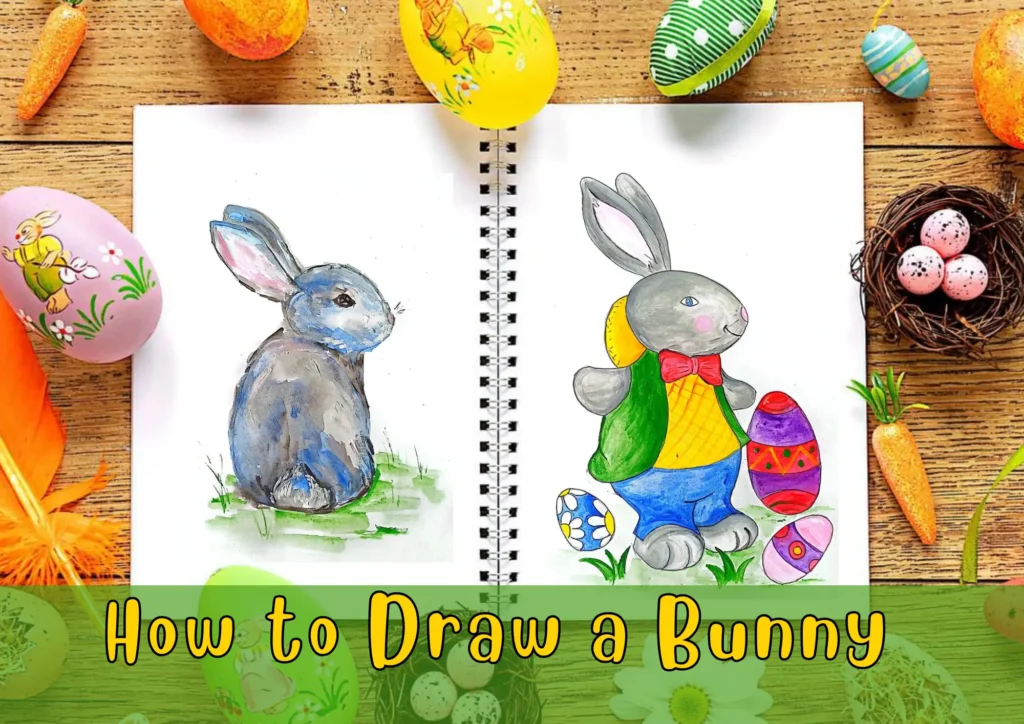
How to Draw a Bunny
Embark on a creative journey as we unravel the secrets of drawing an adorable bunny. From bunny ears to cute expressions, these step-by-step instructions will guide artists of all levels in capturing the charm of these furry companions.
Table of Contents
Materials Needed to Draw a Bunny
Prepare your artistic arsenal with essentials like:
- Pencil
- Eraser
- Quality Paper
- Color pencils or paints
Easy Steps for Drawing a Bunny
Follow these intuitive steps to breathe life into your bunny creation:
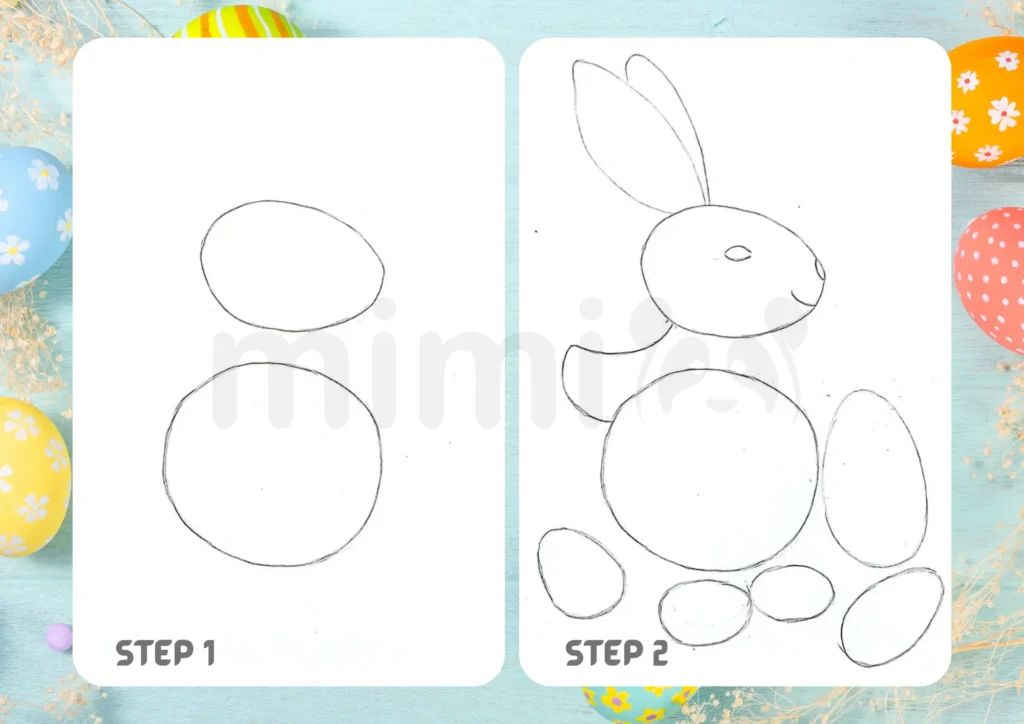
Step 1: Draw the body outline
Let’s start our creative adventure by drawing an Easter bunny. To do this, draw two shapes with a pencil – a circle and an oval.
Step 2: Draw the outline of bunny limbs
Now we draw a lot of ovals – these will be the bunny’s legs and Easter eggs. Next, we draw ears, eyes, nose, and mouth, and connect the head and body with a line.
Step 3: Draw the bunny’s clothes
The next step is to connect the legs to the body. Next, draw a blouse and a butterfly on the neck.
Step 4: Add details
Add details to the lower limbs, ears, and face.

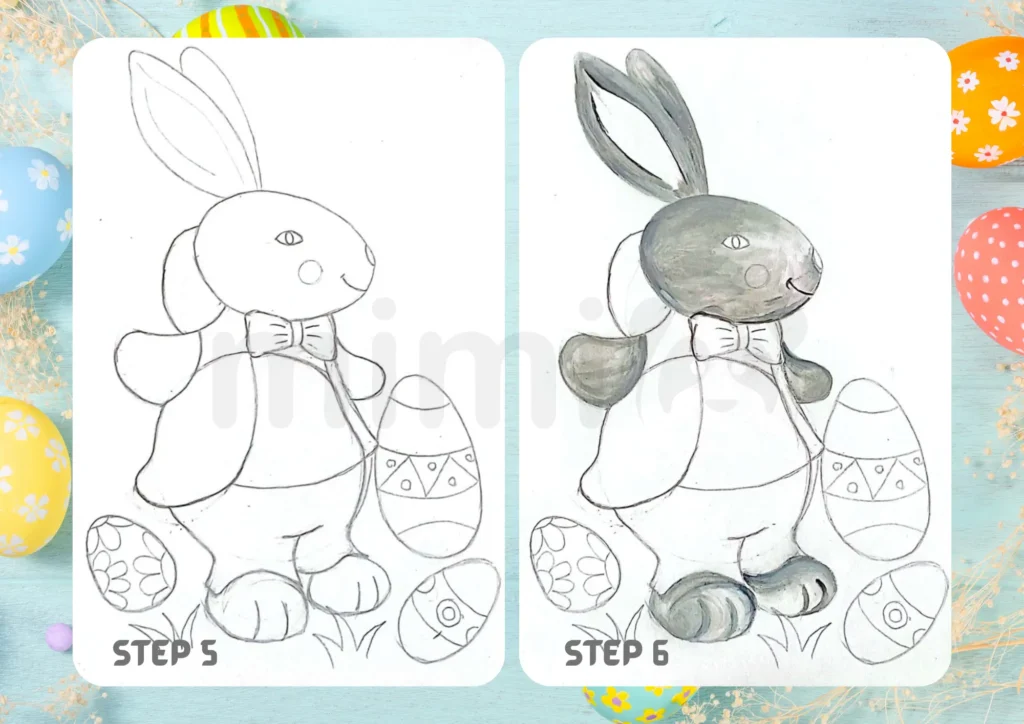
Step 5: Adding patterns to Easter eggs
Add the pattern to the Easter eggs. We detail the butterfly on the neck, and also finish the egg behind it, as if the bunny is holding it in his paws.
Step 6: Color it gray
We begin to color the fur of our bunny gray.
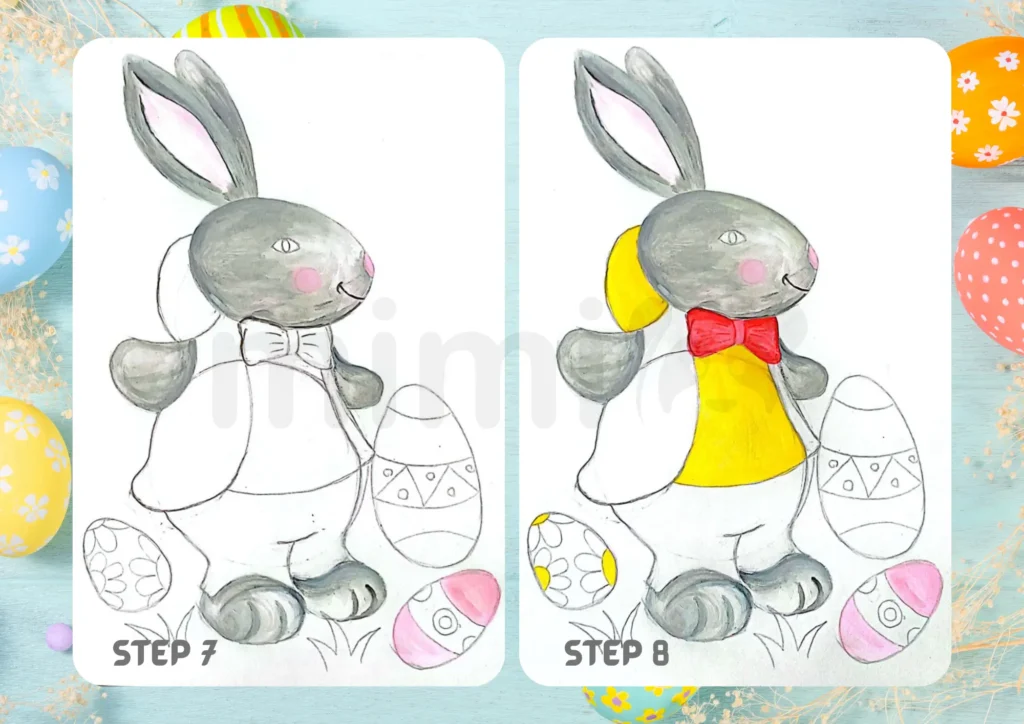
Step 7: Color it pink
Now use pink to draw the middle of the ears, cheeks, and part of the Easter egg.
Step 8: Color with and red
Use yellow to color part of the Easter egg, the T-shirt, and the egg behind the bunny. And use red to paint the butterfly on the neck.
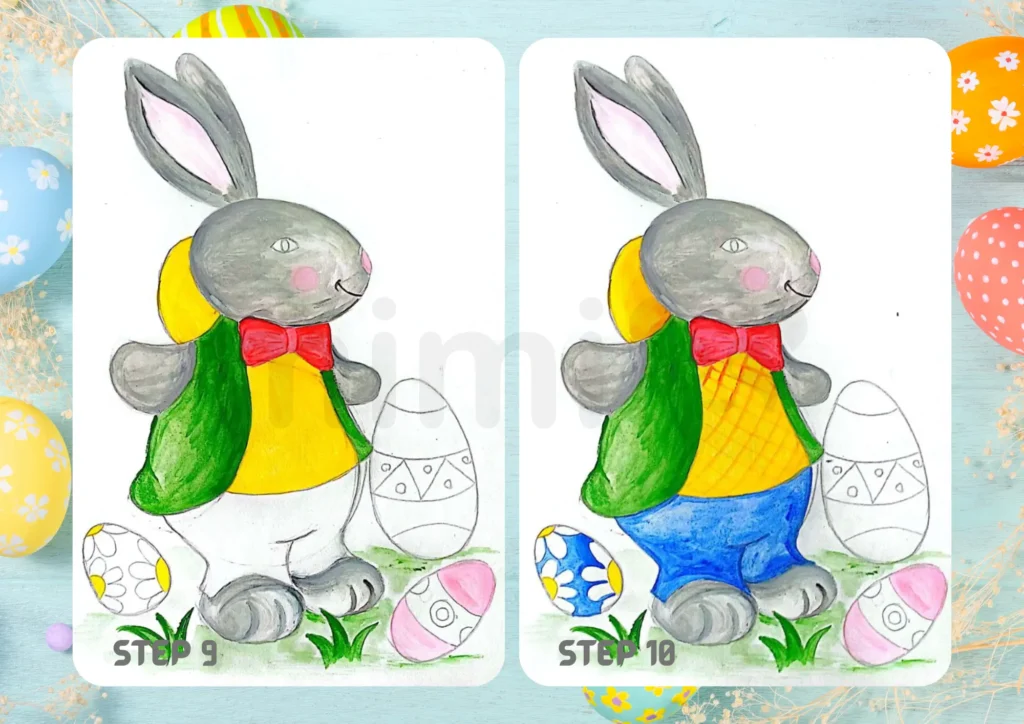
Step 9: Color it green
Color the bunny’s jacket and the grass green.
Step 10: Paint it blue
Add blue to the Easter egg and the bunny’s pants. Add details to the T-shirt.
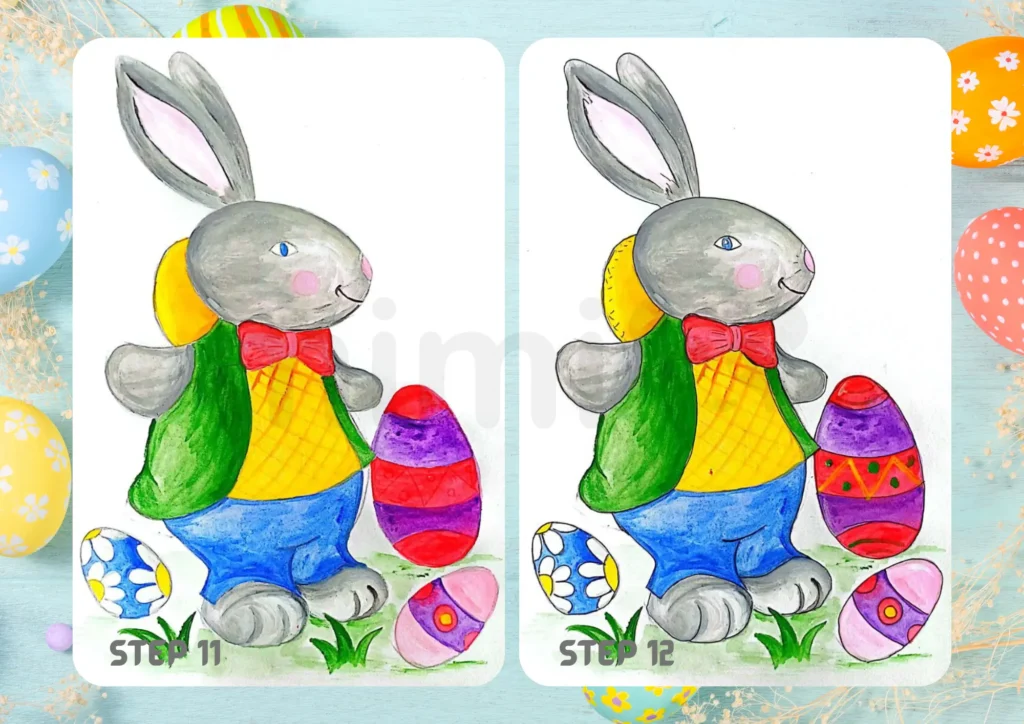
Step 11: Paint with red and purple colors
We paint the largest Easter egg in red and purple. Add color to the eyes.
Step 12: Outline the path in black
Using a black liner, trace the outline of the entire drawing.
Now we offer a quick way to draw a realistic bunny
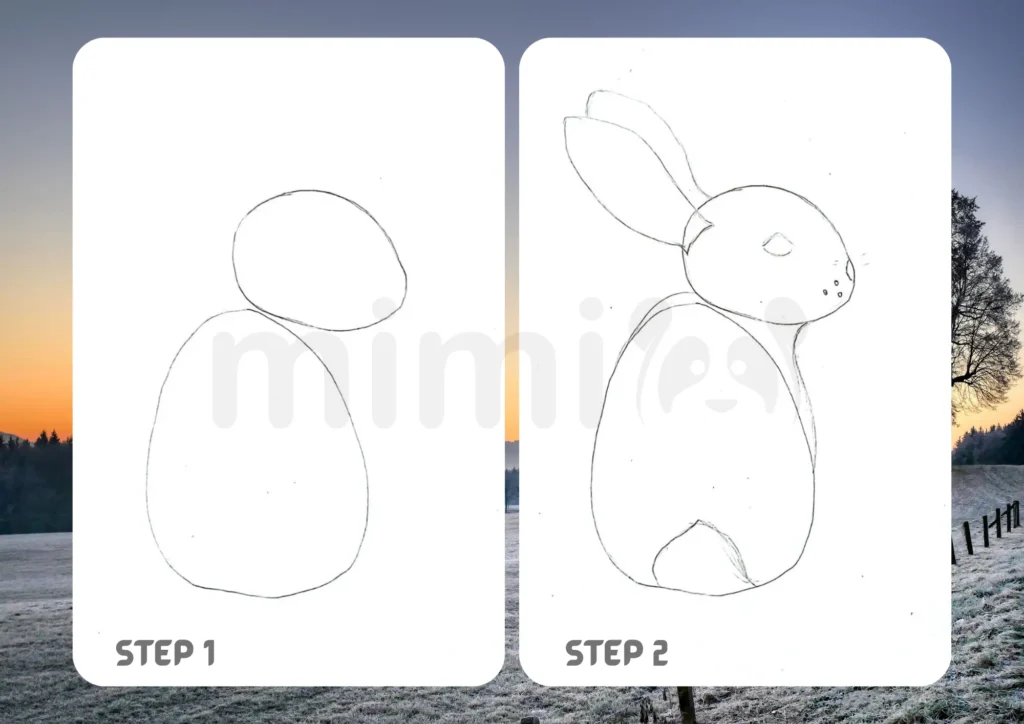
Step 1: Draw the sketch of the head and body
Draw the outline of the head and body. To do this, draw a circle and an oval.
Step 2: Draw ears, nose, eyes, and tail
Draw the ears, nose, eyes and tail of our bunny.
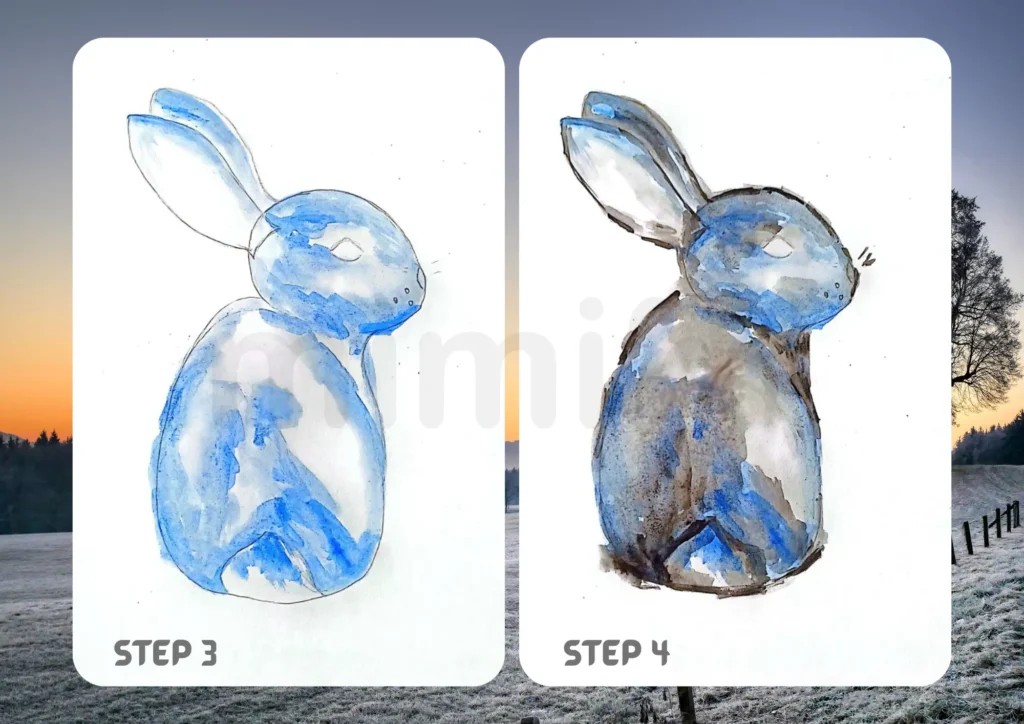
Step 3: Color the fur with blue paint
Use blue paint to partially color the bunny’s fur.
Step 4: Color with gray paint
Use gray paint to color the areas near the outline, adding more color to the area behind the tail.
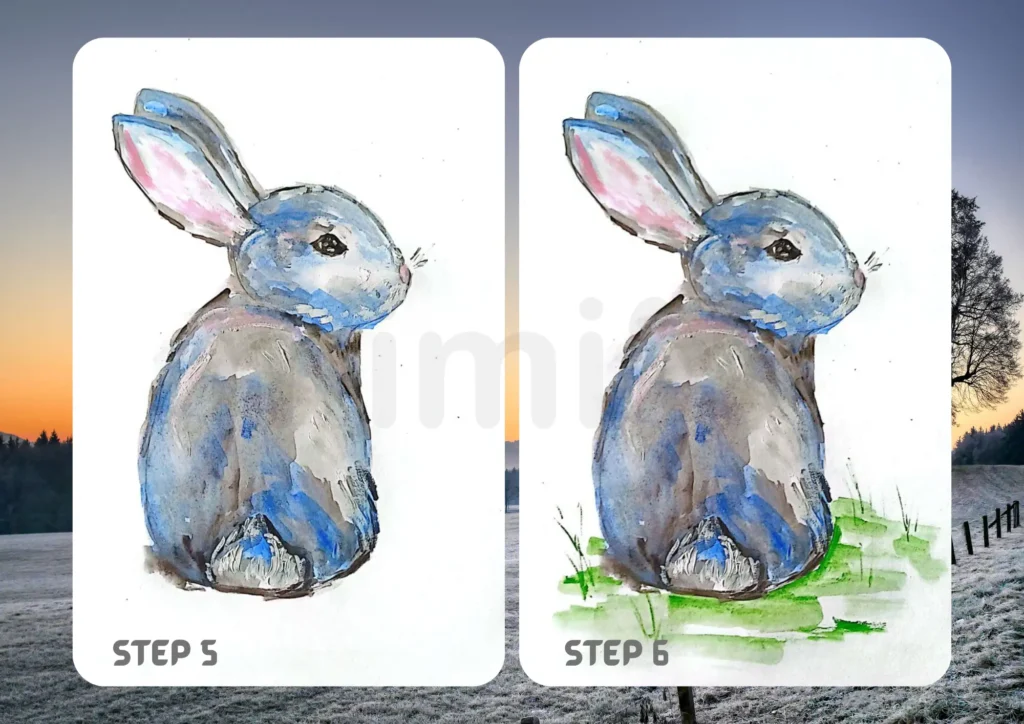
Step 5: Paint it pink
Color the inside of the ears with pink paint. And color the eyes.
Step 6: Color the grass green
Finally, we paint the grass with green paint. That’s it! Your realistic bunny is ready.
Tips and Tricks for Drawing a Bunny with Character
Elevate your bunny-drawing prowess with these insider tips:
- Feature Finesse: Accentuate expressive features like the eyes and nose for a captivating bunny personality.
- Pose Play: Experiment with dynamic poses to infuse energy and charisma into your bunny sketches.
- Proportion Playfulness: Play with proportions, tweaking ear or body sizes to create a diverse range of adorable bunnies.
FAQs
Explore realms beyond drawing, from origami bunnies to plush toys or digital art creations. Let your imagination leap!
Choose high-quality pencils for precise lines, and consider incorporating colored pencils or markers for vibrant accents.
To enhance realism, focus on shading techniques and intricate fur details, capturing the subtleties of light and shadow.
Opt for heavyweight paper to prevent ink bleed-through and provide stability for your artistic endeavors.
Frame it as a charming decor piece, use it for personalized greeting cards, or integrate it into other creative projects.