
Table of Contents
Creating Festive Magic: Easy Christmas Tree Drawing
Unlock the joy of the holiday season with the simplest and most delightful Christmas tree drawing tutorial. Mimi Panda is your creative companion, offering step-by-step guidance for drawing a Christmas tree that’s easy, fun, and perfect for both children and adults.
Drawing a Christmas tree has never been this straightforward
Drawing a Christmas tree is a wonderful way to embrace the holiday spirit.
We present not one, but two drawing options:
- A Simple Christmas Tree Drawing: Perfect for beginners and little artists, this option allows you to create a charming and whimsical Christmas tree effortlessly.
- How to Draw a Christmas Tree Realistically: For those looking to add a touch of realism to their art, this option provides a step-by-step guide to create a more lifelike Christmas tree.
Both of these options are designed to cater to individuals of all ages and varying levels of artistic skills. Whether you’re an experienced artist or just beginning your creative journey, our Christmas tree drawing tutorial has something for everyone.
What You’ll Need:
- A blank sheet of paper
- A sharpened simple pencil
- An eraser
- Pencils or paints
- A marker
- Free time and a desire to draw
A Simple Drawing of a Christmas Tree
Christmas Tree Drawing Easy: Steps
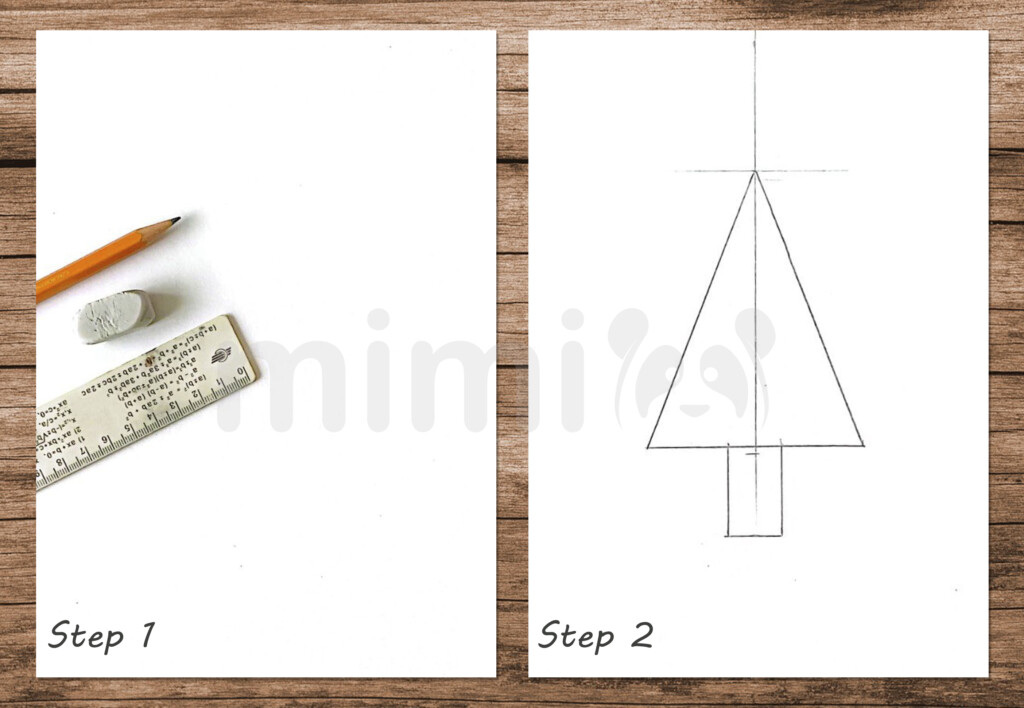
1. Let’s start by gathering the materials you’ll need. Prepare a simple blank sheet of paper, a ruler, a pencil, and an eraser.
2. Draw two basic geometric shapes – a triangle for the Christmas tree and a rectangle for the trunk.
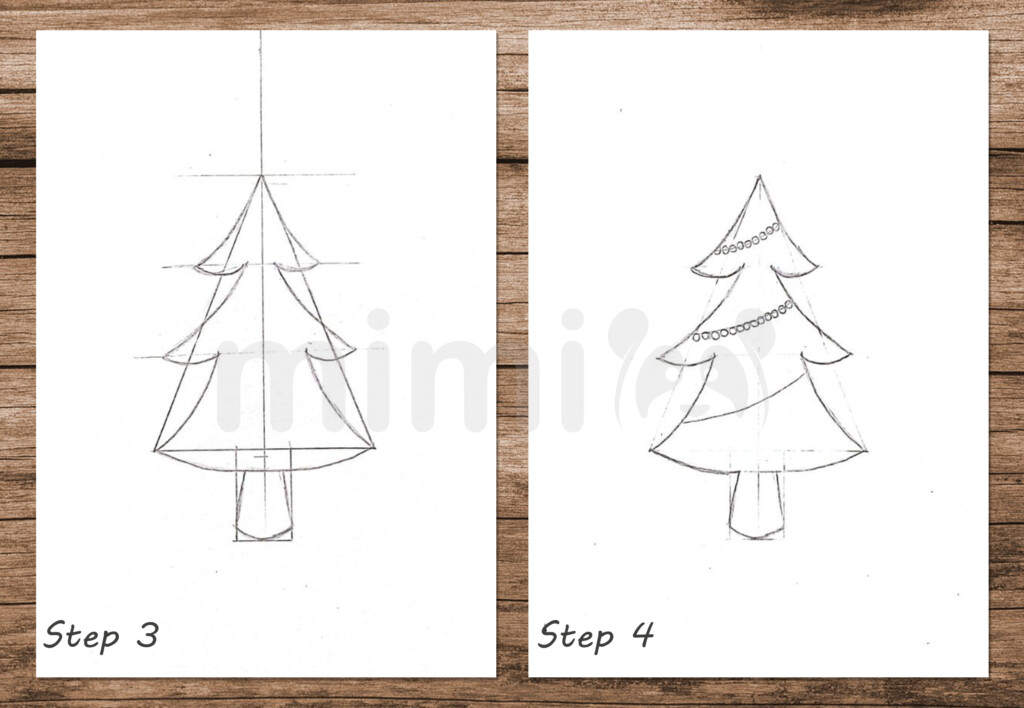
3. Divide the triangle into three parts to create the layers of the tree crown. Use curved lines to give it a more natural look.
4. Erase any unnecessary lines using the eraser. Then, add a touch of holiday magic by drawing Christmas lights.
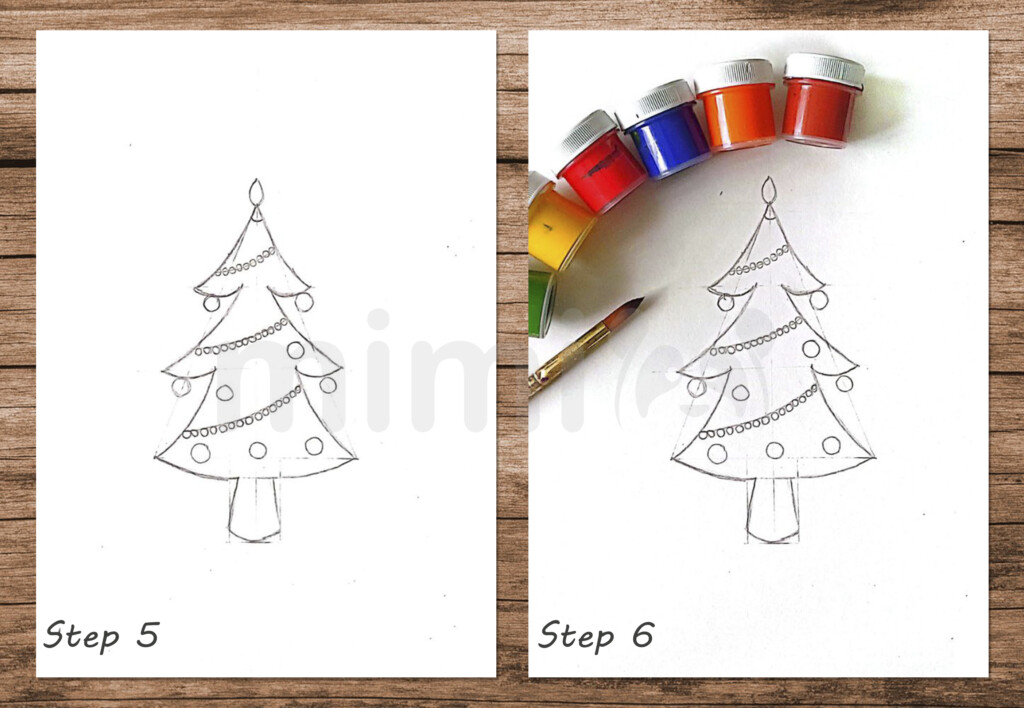
5. Take your drawing a step further by decorating it with New Year’s ornaments, such as balls.
6. It’s time to bring your Christmas tree to life with colors. Grab your paints and a brush.
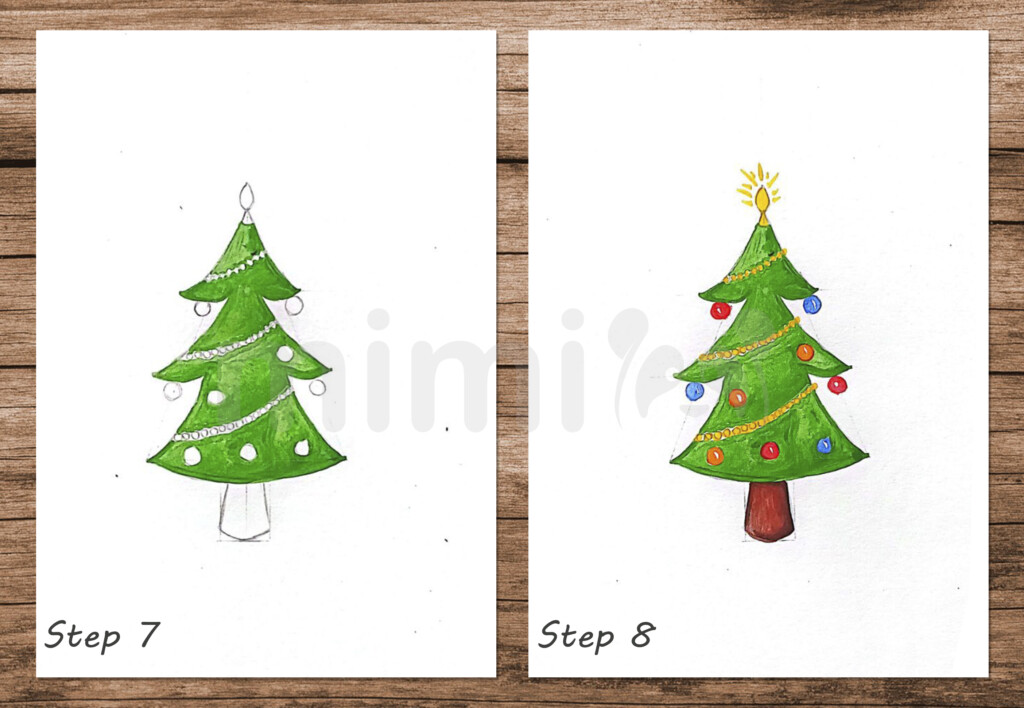
7. Paint the Christmas tree green.
8. Color the trunk brown and the lights and ornaments in various colors. Don’t forget to add a beautiful star or angel on top.
How to Draw a Christmas Tree Realistically: Pine Tree Drawing
How to Draw a Tree. Steps
1. Begin by drawing a triangle in perspective and dividing it in half.
2. Draw the branches of the tree to give it a realistic appearance.
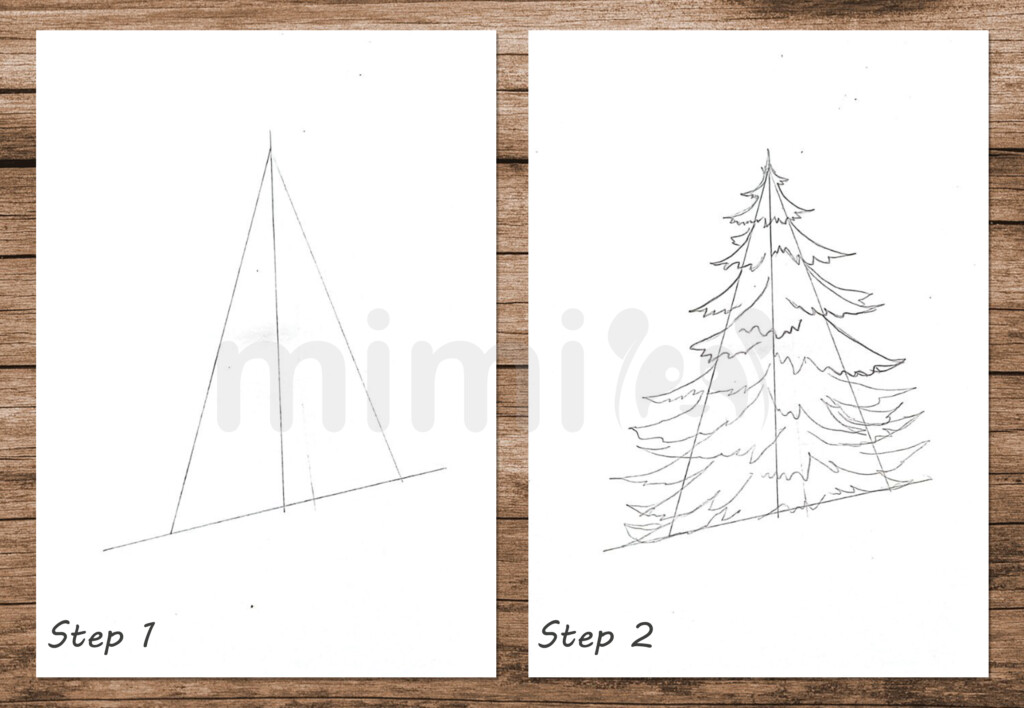
3. Move on to the coloring stage.
4. Fill the tree with light green. Drawing of a tree
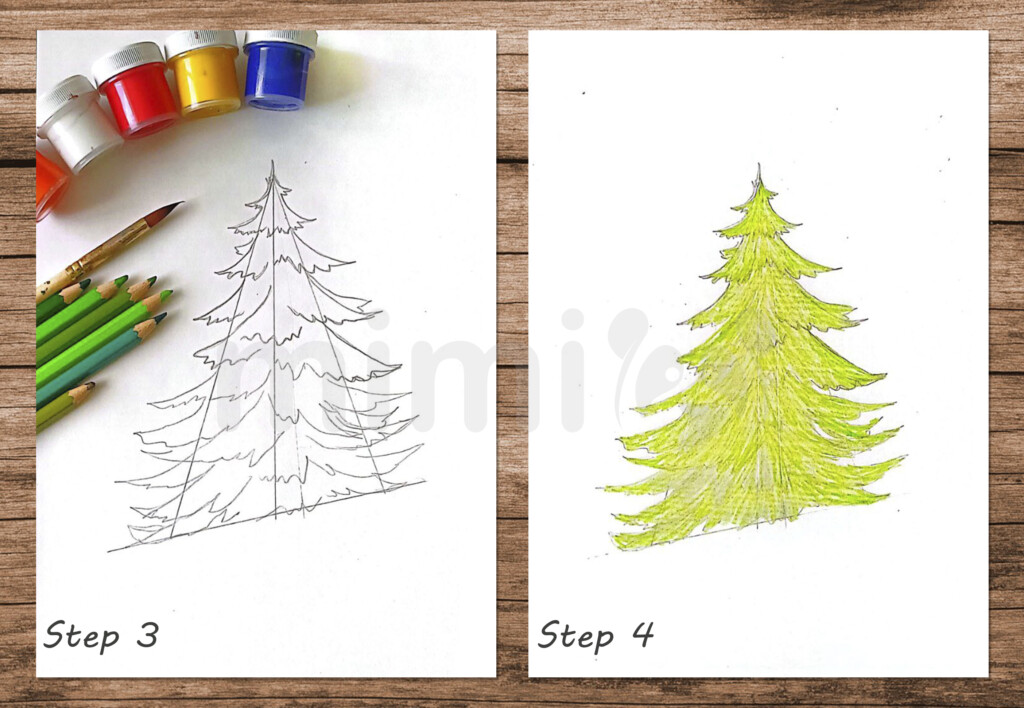
5. Add depth and dimension by incorporating lighter and darker shades of green.
6. Work on drawing individual pine needles and branches.
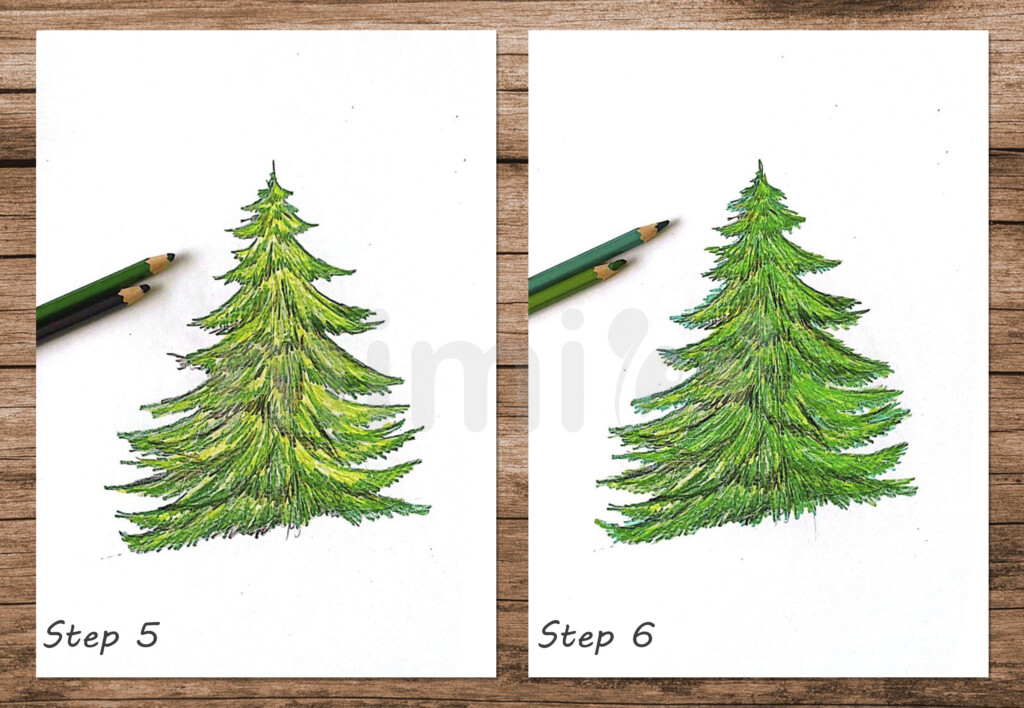
7. Use white paint to create the illusion of snow on your realistic Christmas tree.
8. Add a festive touch to your tree by painting colorful lights and ornaments. Don’t forget to place some beautifully wrapped New Year’s gifts nearby.
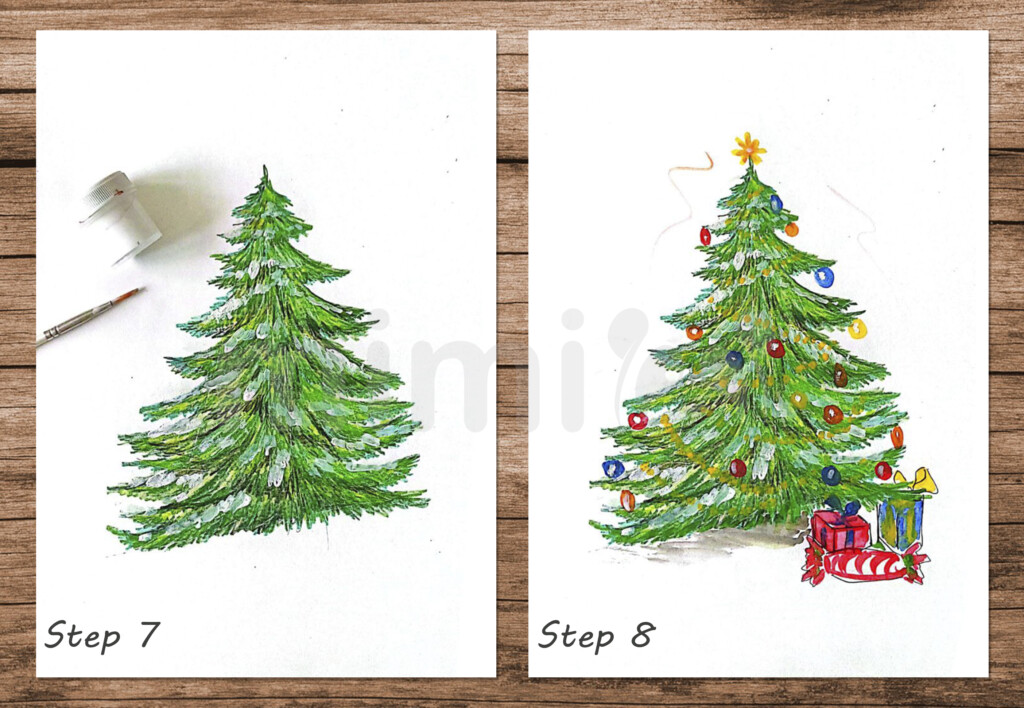
Congratulations!
You’ve successfully created a Christmas tree drawing that’s both simple and realistic. Whether you opt for the easy or realistic approach, the joy of drawing during the holiday season is a magical experience. Enjoy your artistic journey with Mimi Panda!
But why should you venture into the world of drawing? Many find drawing to be a soothing and therapeutic process. It’s a means of expressing your inner thoughts, emotions, and creativity. Drawing it’s not just about creating art; it’s about exploring your inner self and finding solace in the strokes of a pencil or the colors of a palette.
So, this holiday season, immerse yourself in the joy of pine tree drawing. Let your creativity flourish with Mimi Panda’s step-by-step tutorial. Discover the magic of transforming a blank canvas into a festive masterpiece. Whether it’s the joy of creating art, the delight of learning a new skill, or the soothing quality of putting pencil to paper, drawing holds a special place in our hearts. What does drawing mean to you?
Explore the world of art and emotions with Mimi Panda, and let the holiday spirit inspire your inner artist.
