
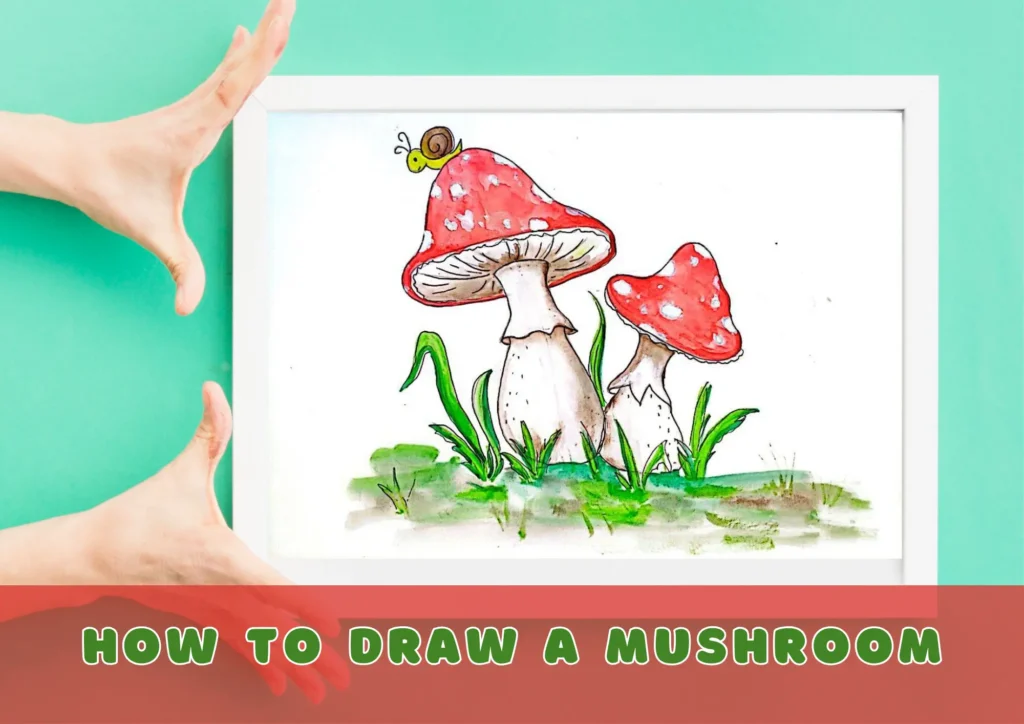
Step-by-Step Guide to Draw a Mushroom
Embark on a creative journey with our step-by-step art tutorial on how to draw a mushroom. Whether you’re a budding artist or seeking a fun and relaxing activity, this guide will walk you through each stage, allowing you to craft a delightful mushroom illustration.
Table of Contents
Step 1: Draw the stem
Start by sketching two slightly curved straight lines to form the basic structure of the mushroom stem.
Step 2: Create the mushroom cap
Create the mushroom cap by adding a rounded shape at the top of the stem, which will start the formation of the cap

Step 3: Define the edges of the hat
Add a curved line above the ovals to define the top edge of the mushroom cap.
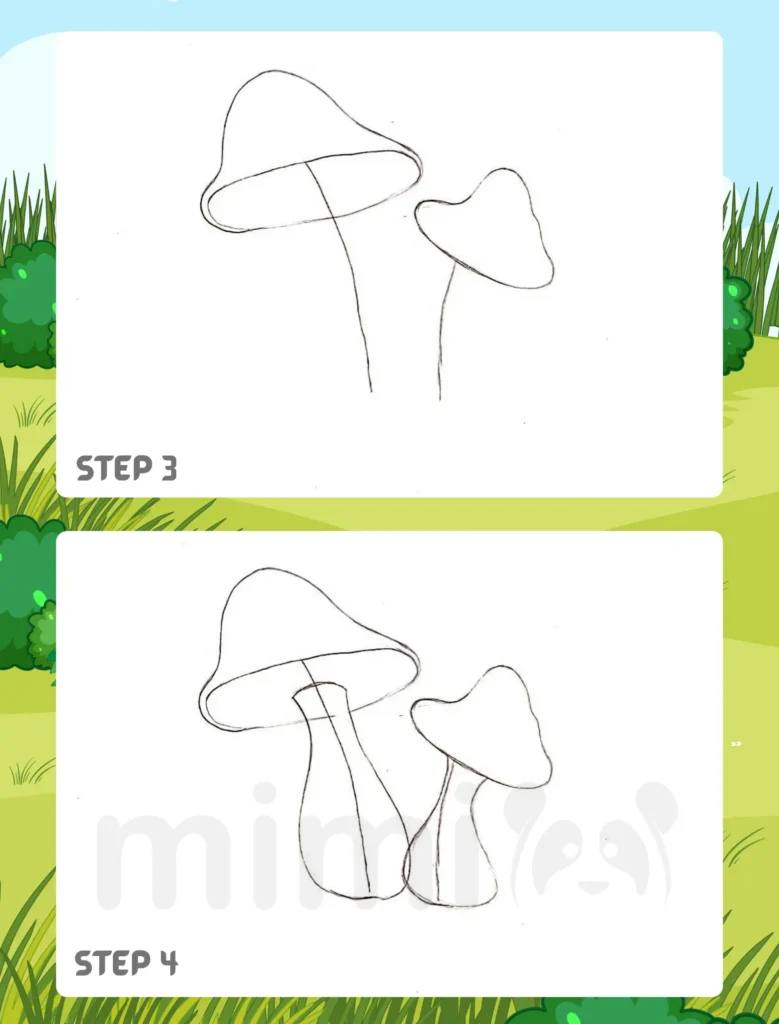
Step 4: Extending the stem
Extend the original straight lines to complete the mushroom stem, making sure it’s in proportion to the hat. Finish drawing the mushroom stem perfectly.
Step 5: Add a ring
Add a thin curved line around the top of the stem to represent the ring or veil of the mushroom.
Step 6: Adding delicate details
Embellish the appearance of the mushroom by adding small details, such as lines and dots, on both the hat and the stem.

Step 7: Grounding with grass
Ground the mushroom in its natural environment by drawing blades of grass around the base, creating a harmonious composition.
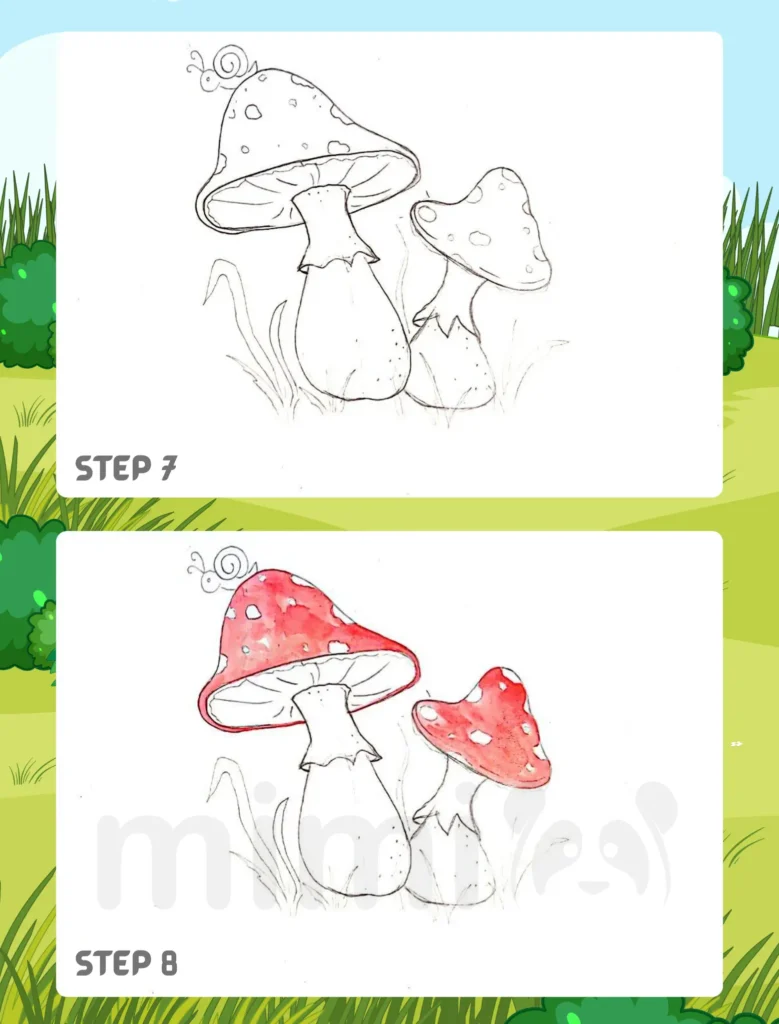
Step 8: Start coloring
Paint the hats with light red paint.
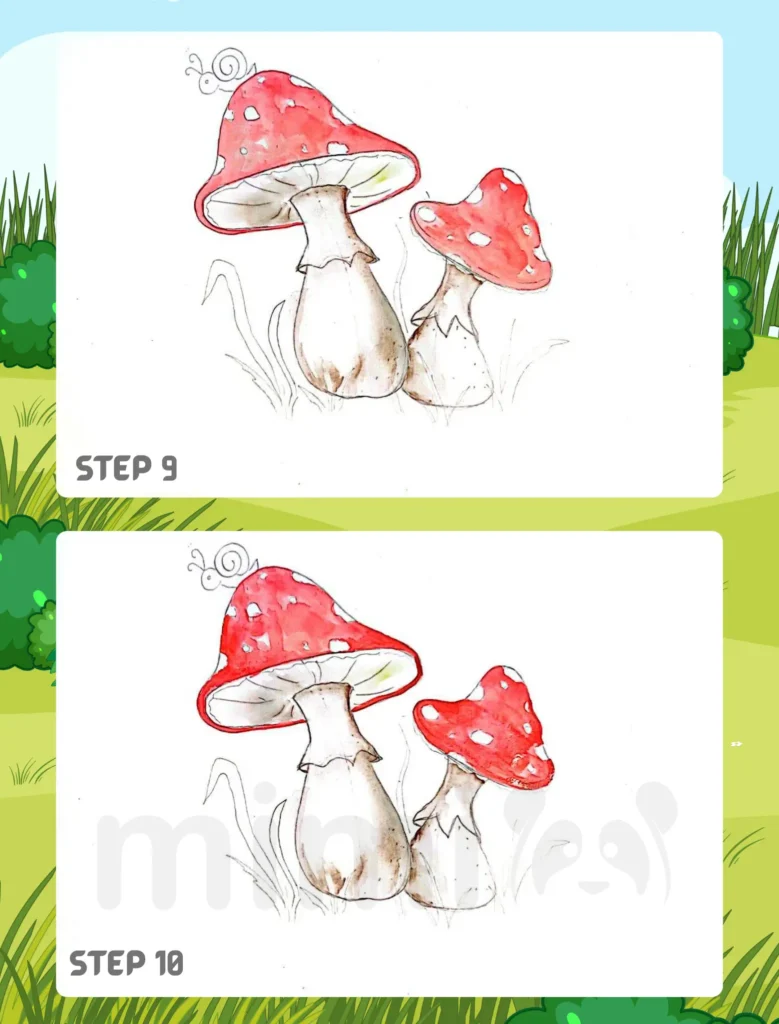
Step 9: Increase the contrast of the stem
Increase contrast by adding darker shades to certain areas of the stem, adding depth and volume.
Step 10: Shading the hat
Add shadows to the hat with dark red paint to create a realistic transition from light to shadow.
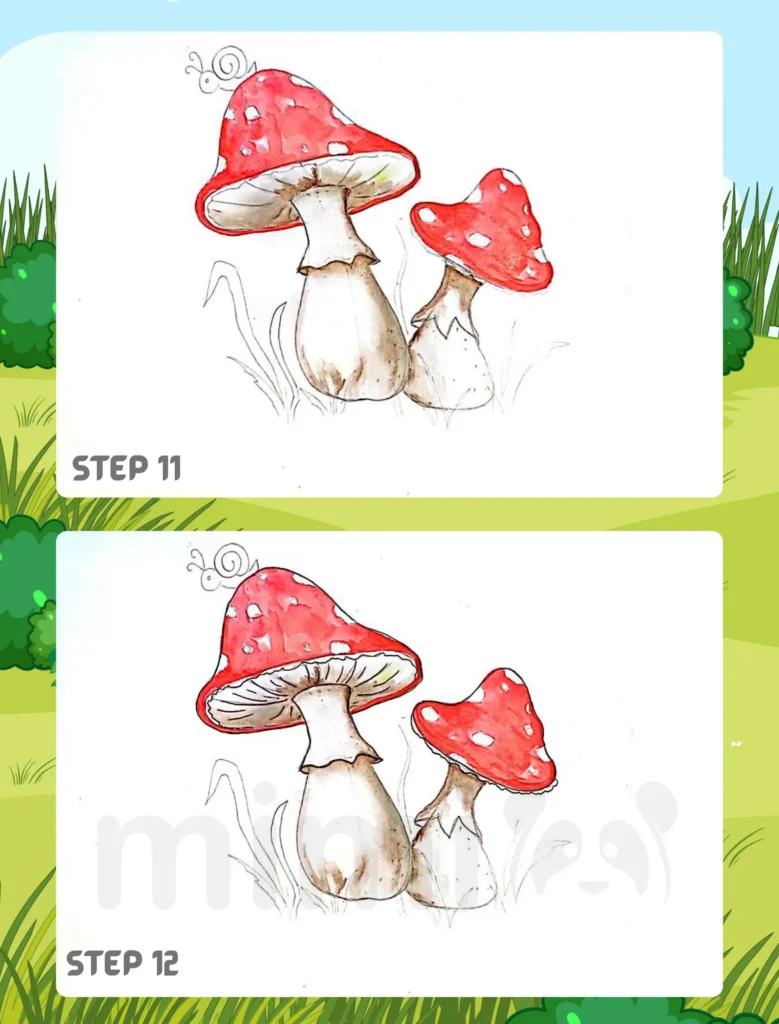
Step 11: Contrast at the base of the hat
Deepen the shadows at the base of the hat to add contrast and make the mushroom more visually appealing.
Step 12: Detailing the gills (if applicable)
If your mushroom has visible gills, add thin lines or curves to represent them, increasing authenticity.
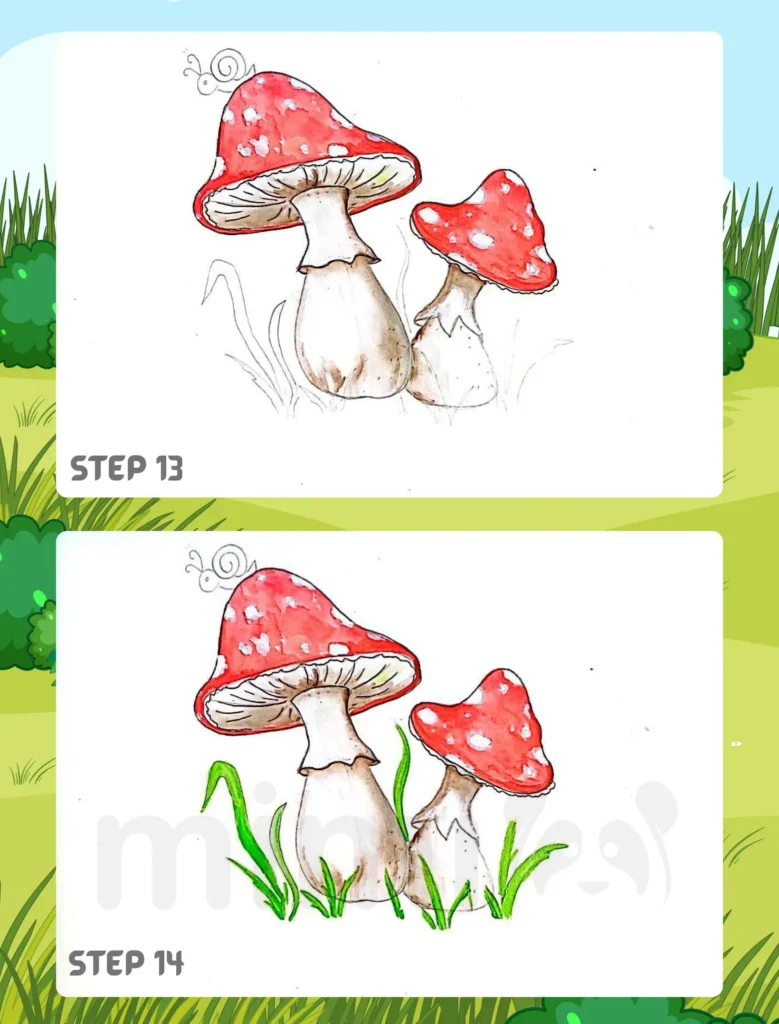
Step 13: Add spots
Apply small spots or textures to the hat to give it a more organic and textured look.
Step 14: Contrasting the grass
Apply different shades to the grass, creating contrast and highlighting certain areas for a dynamic composition.
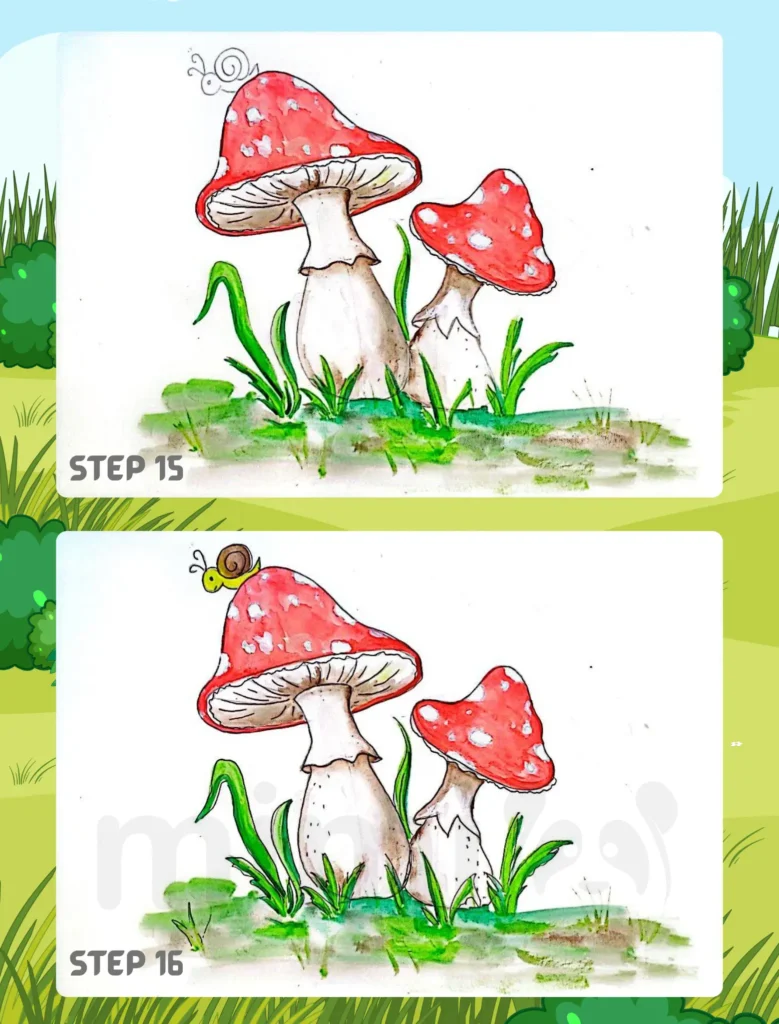
Step 15: Add a black liner outline
If you want, use the liner to complete the mushroom pattern.
Step 16: Add details
You can add a crawling insect or a blue sky with clouds. Now your masterpiece is ready!
Conclusion: A Unique Mushroom Creation
Congratulations on bringing a captivating mushroom to life on paper! Each drawing is a unique expression, so feel free to experiment with colors, shading, and additional details. Let your creativity flourish! Happy drawing!