
Easy Step-by-Step Guide for Drawing a Cat
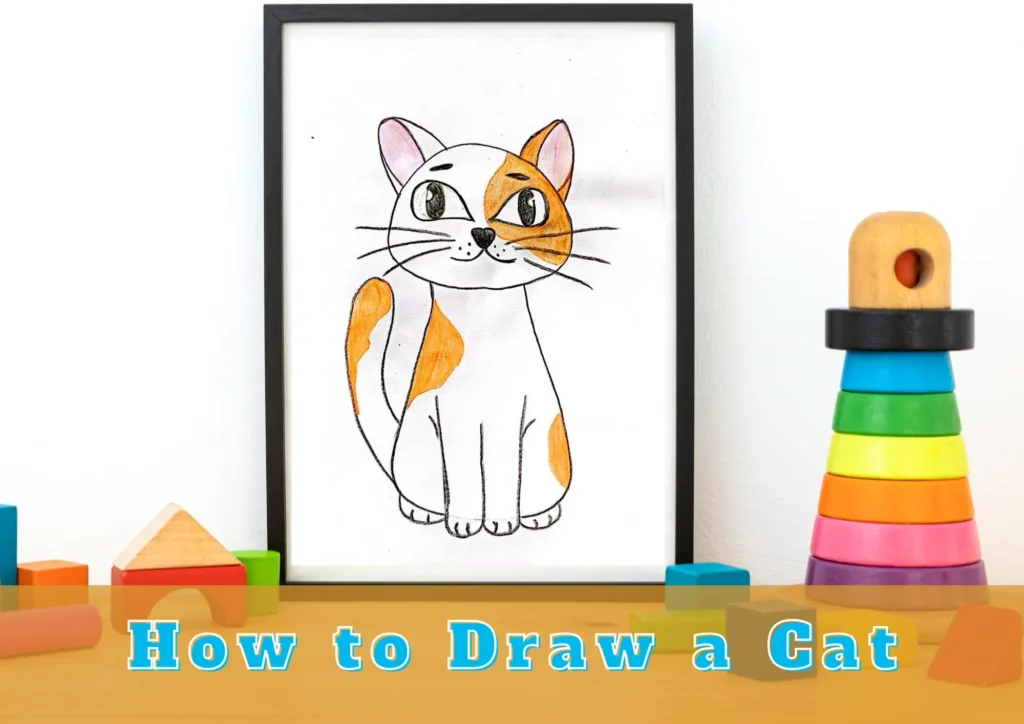
Table of Contents
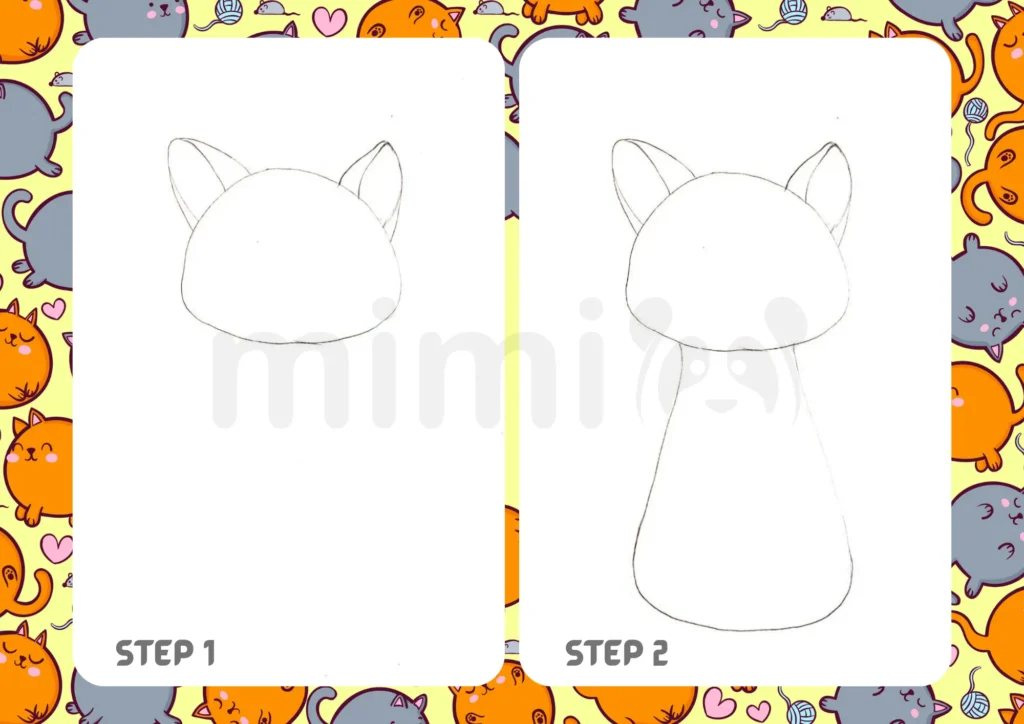
1: Draw the Cat Outline
Commence your cat drawing adventure by sketching the basic outline. Begin with a simple circle for the head and add ears.
2: Add Details
Draw a body base that looks like a vase for flowers.
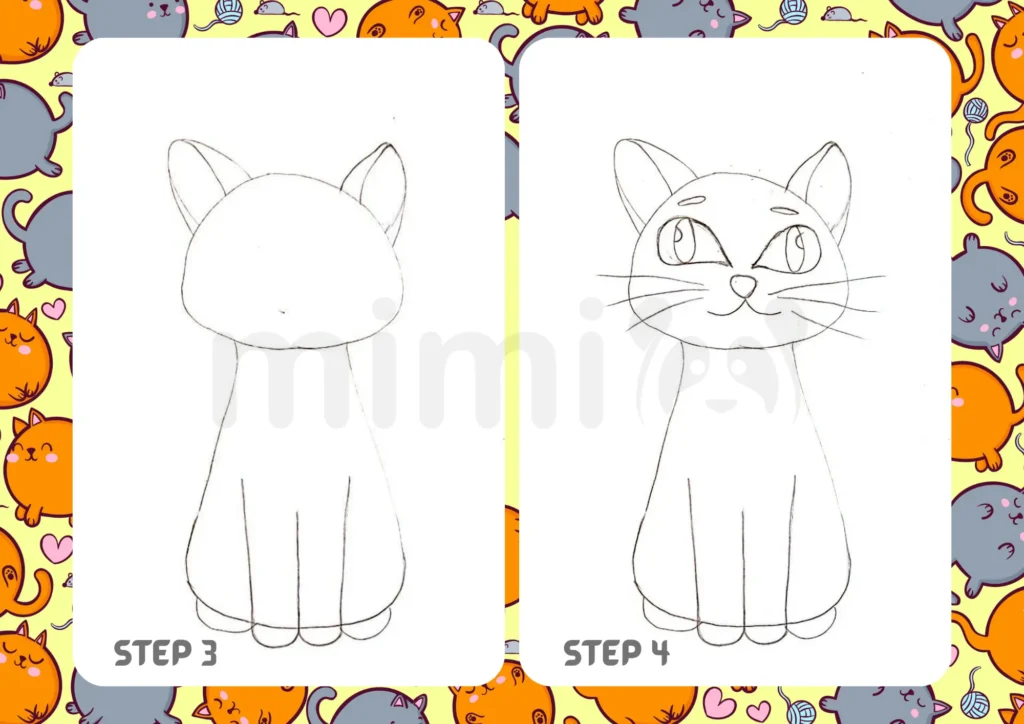
3: Fill in the Cat’s Legs
Extend lines down from the torso to form the legs. Add gentle curves for the paws, keeping the shapes uncomplicated yet expressive.
4: Add the Cat’s Face
Bring the cat to life by defining its face. Introduce two small circles for the eyes, a tiny triangle for the nose, and a curved line to shape the mouth.
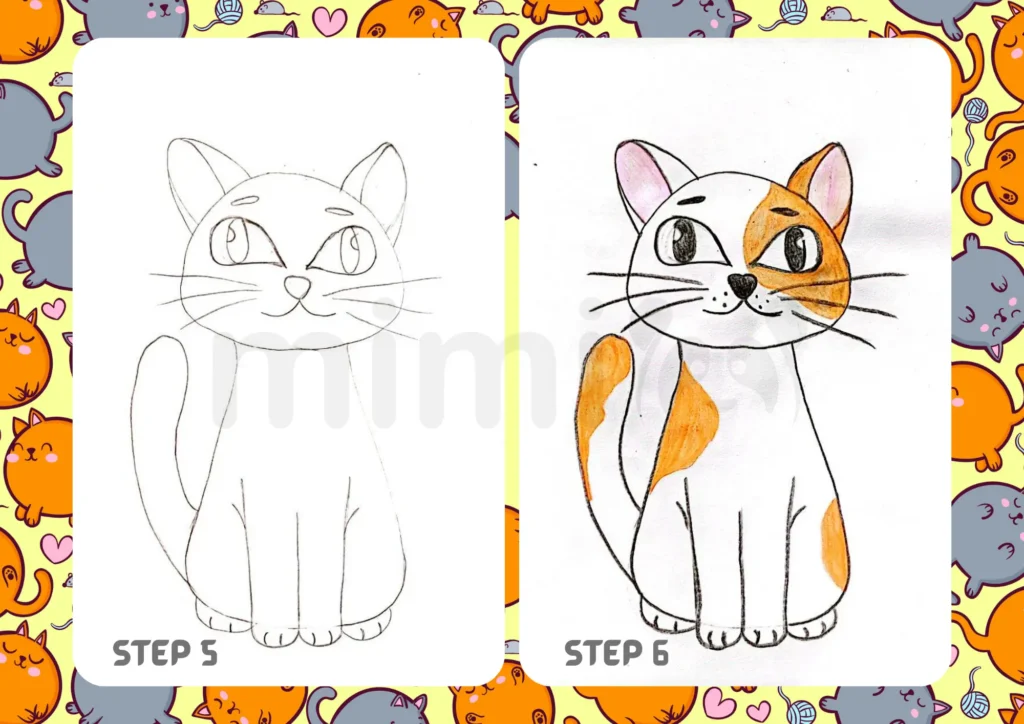
5: Add the Cat Body and Tail
Connect the head to the torso with a graceful line, forming the neck. Extend a fluid line for the cat’s tail, adding a subtle curve for a natural appearance.
6: Make it Colorful
Infuse vibrancy into your cat drawing by adding color. Experiment with various shades to give your feline friend a unique personality. Feel free to get creative with the color palette!
7: Add a Background
You can place your cat in a setting by introducing a simple background. Whether it’s a cozy living room, a garden, or any imagined place, let your cat thrive in its environment.
FAQ When Learning to Draw a Cat
Absolutely! Drawing a cat is an accessible and enjoyable endeavor, especially with step-by-step instructions. Whether you’re a novice or an experienced artist, practice and patience will lead to a charming cat creation.
Start with a combination of pencils, such as 2H for lighter lines, HB for general sketching, and 2B for darker lines and shading.
Opt for smooth, heavyweight paper to ensure an ideal surface for drawing. Consider a sketchbook with acid-free pages to preserve your cat artwork over time.